How to Fix a Crack in an Asphalt Driveway
Step-by-step guide to repairing cracked asphalt driveways using crack filler, cold patch, and sealer. Learn the difference between linear cracks and alligator cracking and which repair method to use.
Asphalt driveway crack repair by type: (1) Linear cracks under 1/2 inch: clean with wire brush, blow out debris, fill with asphalt crack filler ($8-$15/tube). (2) Cracks 1/2 to 2 inches: use cold-patch asphalt repair compound, tamp firmly. (3) Alligator cracking (web of cracks): a sign of base failure — repair with cold patch as temporary fix, but the section will need complete replacement. Seal the entire driveway 24 hours after crack repair for best results. Best time: spring or fall when temps are 50-80°F.
Frequently Asked Questions
What is the best product for sealing asphalt driveway cracks?
For hairline to 1/2 inch cracks: liquid crack filler (Latex-ite Pli-Stix, Quikrete Asphalt Repair) — pour or trowel in and smooth with a putty knife. For larger cracks: cold patch asphalt ($10-$20/bag), tamp firmly with a tamper or drive your car over it. Do not use concrete patching products on asphalt — they bond differently and will pop out.
Should I seal my asphalt driveway before or after crack repair?
Always repair cracks first, then seal. Sealcoating over open cracks traps moisture that accelerates cracking. Fill all cracks, let cure 24-48 hours, then apply sealcoating. Reseal asphalt driveways every 2-3 years; skipping it allows UV degradation and water intrusion that causes new cracking.
What causes asphalt driveways to crack?
The main causes: (1) Freeze-thaw cycles — water in cracks expands when it freezes and widens the crack. (2) Tree roots lifting sections. (3) Heavy vehicles over undermined sections. (4) UV degradation making the asphalt brittle. (5) Age — most asphalt driveways need resurfacing or replacement after 20-30 years regardless of maintenance.
How much does driveway crack repair cost?
DIY supplies: $20-$80 for crack filler and sealcoating for a standard 2-car driveway. Professional crack seal: $0.30-$1.50 per linear foot. Full sealcoating by a pro: $250-$500 for a standard driveway. Complete driveway replacement: $3,000-$10,000 for asphalt; $4,000-$15,000 for concrete.
Asphalt driveway crack repair by type: (1) Linear cracks under 1/2 inch: clean with wire brush, blow out debris, fill with asphalt crack filler ($8-$15/tube). (2) Cracks 1/2 to 2 inches: use cold-patch asphalt repair compound, tamp firmly.
A cracked asphalt driveway is one of those problems that gets more expensive the longer you wait. What starts as a hairline crack from thermal expansion becomes a pothole-sized failure once water gets underneath, freezes, and pries the asphalt apart from below. The good news is that most asphalt cracks — even significant ones — are DIY-repairable with materials available at any home improvement store, and a properly sealed driveway can add another decade of life to the surface.
This guide covers everything from diagnosing the type of crack you have to applying crack filler, cold patch, and sealer for a finished result that looks professional and holds up through freeze-thaw cycles.
Diagnosing Your Driveway Cracks
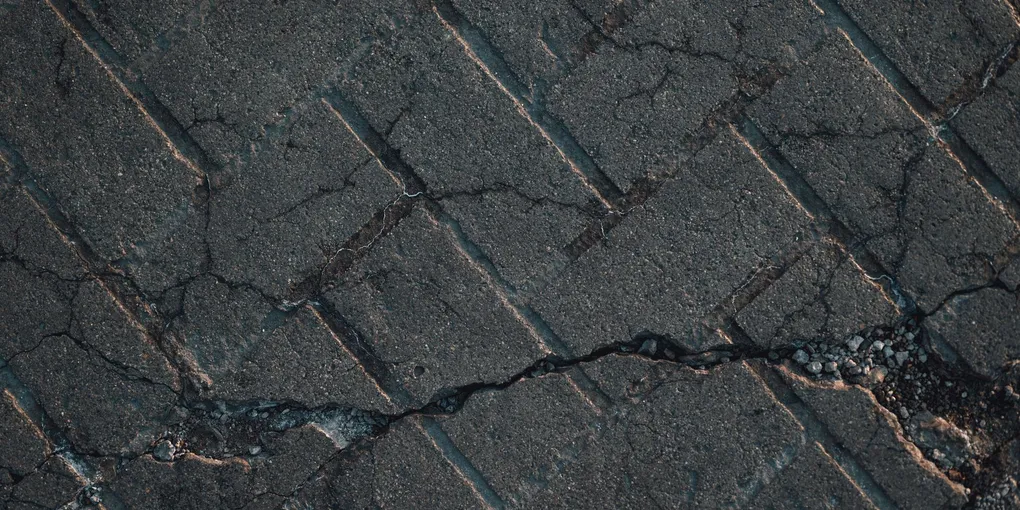
Not all asphalt cracks are created equal. Before buying materials, walk your driveway carefully and identify what you’re dealing with.
Linear cracks (shrinkage or thermal cracks). These are straight or gently curving cracks that run across the driveway’s surface. They’re the most common type and the easiest to repair. Linear cracks form because asphalt expands and contracts with temperature swings, and over time the surface loses flexibility and fractures. Width matters: cracks under 1/2 inch wide respond well to liquid or rope-style crack filler; cracks wider than 1/2 inch need a cold patch product or backer rod plus sealant.
Edge cracking. Cracks that run parallel to the edge of the driveway, typically within 12 to 18 inches of the border. This usually means the edge lacks adequate support — tree roots, soil erosion, or an inadequate base layer underneath. Fix the drainage or root issue first, then repair the surface.
Alligator cracking (fatigue cracking). This is the pattern that looks like reptile skin — a network of interconnecting cracks covering an area rather than running in a single line. Alligator cracking indicates structural failure of the asphalt base. Surface repair is temporary at best; the failed section needs to be cut out, the sub-base rebuilt, and new asphalt installed. You can apply a cold patch as a short-term fix, but plan for a contractor visit if the affected area is larger than a square foot or two.
Potholes. True potholes — holes through the full thickness of the asphalt — require cold patch repair rather than crack filler.
What You Need
Gather these materials before you start. Having everything on hand means you can complete the repair in a single session while the driveway is dry.
- Dalton Enterprises PLI-STIX Asphalt Crack Filler — rope-style filler for cracks 1/4 to 1 inch wide; no mixing, melts into the crack with a propane torch
- Latex-ite Pli-Stix 30 ft. Crack Filler — pour-in liquid filler ideal for hairline to 1/2-inch cracks; dries dark and blends with asphalt
- Sakrete Blacktop Crack Filler — squeeze-bottle applicator for easy crack filling without tools; UV-stable formula
- QPR Asphalt Repair Permanent Pothole Filler Cold Patch — polymer-modified cold mix for potholes, wide cracks, and alligator areas; no heating required
- Latex-ite Airport Grade Driveway Sealer — coal-tar-free, high-solid sealer; apply after crack repairs cure to unify the appearance and protect the surface
- Marshalltown 33 in. Squeegee Sealer Applicator — long-handled squeegee for spreading sealer evenly; essential for a professional-looking finish
Step 1 — Clean the Crack Thoroughly
The single biggest cause of crack repair failure is poor surface prep. Filler won’t bond to a crack filled with dirt, oil, or loose asphalt chunks.
Use a stiff wire brush or a flat-blade screwdriver to remove all loose material from the crack. Work the tool along the full length, pulling out any crumbling asphalt. Follow up with a leaf blower or compressed air to clear dust and debris — a shop vac also works well.
For oil-stained areas near the crack, scrub with a degreaser and rinse thoroughly. Let the surface dry completely before applying any filler; most products fail in wet conditions.
If weeds or grass are growing in the crack, pull them out by the roots and apply a small amount of concentrated weed killer. Give it a day before continuing so you’re not trapping a living plant under the patch.
Step 2 — Choose and Apply Crack Filler
For cracks under 1/4 inch wide: Use a pourable liquid crack filler in a squeeze bottle or jug. Pour slowly, filling the crack from one end to the other. Overfill slightly — the filler will settle as it cures. Smooth the surface with a putty knife or trowel and feather the edges to blend with the surrounding asphalt.
For cracks 1/4 to 1 inch wide: Rope-style filler like PLI-STIX is ideal. Feed the rope into the crack — it should fit snugly. Then run a propane torch slowly over the rope, keeping it moving to avoid scorching. The heat melts the rope into the crack and bonds it to the edges. Finish by pressing a trowel or board over the surface to level it.
For cracks wider than 1 inch: Apply backer rod (a closed-cell foam rope, available by the foot at hardware stores) into the crack first to provide a base. Then apply liquid or rope filler on top. This prevents the filler from sinking too deep and wasting material.
Allow liquid fillers to cure for the time specified on the product — typically 24 to 48 hours before foot traffic, and 72 hours before driving on it.
Step 3 — Cold Patch Repair for Potholes and Alligator Areas
Cold patch asphalt is a ready-to-use mix of aggregate and binding agent. It’s designed to compact into potholes and severely cracked areas without heating.
Step 1: Prep the area. Remove all loose material and standing water. Cut or chisel away any crumbling edges of the pothole so the walls are relatively clean and vertical.
Step 2: Add a thin layer of cold patch. Pour about 2 inches of cold mix into the hole. Don’t fill it to the top in one pour — layered compaction is much stronger.
Step 3: Compact each layer. Tamp firmly with a hand tamper, a 2x4 pressed by hand, or rent a plate compactor for large areas. The material should sit slightly proud of the surrounding surface — it will compress further under traffic.
Step 4: Add another layer and compact again. Continue adding 2-inch layers and compacting until the patch is level with or very slightly above the surrounding asphalt. A slight crown (1/8 inch above grade) is intentional; it settles to flush over the first few weeks of traffic.
Step 5: Drive over it. For small patches, driving your car back and forth over the repair several times provides excellent final compaction.
Step 4 — Let Repairs Cure Before Sealing
Patience is critical here. Applying sealer over uncured crack filler traps solvents and prevents the filler from bonding fully to the asphalt. Follow the cure time on your specific crack filler product — typically 24 to 72 hours for pourable types, and 6 to 12 hours for rope-style.
Cold patch repairs need at least 30 days before sealing. The binders in cold patch need time to cure under traffic before they can accept a sealer coat.
Step 5 — Apply Driveway Sealer
Sealer serves two purposes: it protects repaired areas from water infiltration, and it unifies the appearance of the driveway so patches blend in rather than standing out as dark spots against a faded surface.
Choose a mild, overcast day. Sealer needs 24 hours of dry weather and temperatures above 50°F to cure. Avoid sealing in direct summer sun — the sealer can dry too fast and bubble.
Edge first. Use a brush to cut in along the garage apron, sidewalk edges, and landscaping borders where a squeegee can’t reach cleanly.
Pour and spread. Pour a generous bead of sealer across the width of the driveway at the top. Use a long-handled squeegee applicator to spread it evenly in overlapping strokes, working from the top of the driveway toward the street. Keep a wet edge to avoid lap marks.
Apply two thin coats. One thick coat is tempting but leads to peeling. Two thin coats with 4 to 8 hours between applications provide better durability and a more consistent finish.
Stay off it. Wait at least 24 hours before foot traffic and 48 hours before driving on freshly sealed asphalt. Block the driveway with sawhorses or cones if you have to leave.
How Often Should You Seal an Asphalt Driveway?
Sealing too often is actually harmful — thick build-up of sealer peels and flakes. The general guidance is every 2 to 3 years for a residential driveway in a normal climate, or every 1 to 2 years in climates with severe freeze-thaw cycles. If the sealer still has a slight sheen and repels water beads, it doesn’t need resealing yet.
When to Call a Professional
DIY crack repair is effective for the vast majority of residential driveway damage. Call a paving contractor if:
- Alligator cracking covers more than 25 to 30% of the driveway surface
- The asphalt has sunk or heaved significantly, indicating sub-base failure
- The driveway is more than 20 to 25 years old and has widespread structural deterioration
- You’re seeing water pooling in areas that weren’t previously low spots
In these cases, a full mill-and-overlay (grinding the top inch of asphalt and applying fresh hot mix) or complete replacement is usually more cost-effective than repeated surface patching.
FAQ
-
question: “What is the difference between asphalt crack filler and cold patch?” answer: “Crack filler is a liquid or rope-style sealant designed to fill narrow cracks (typically under 1 inch wide) and prevent water infiltration. Cold patch is a ready-to-use asphalt mix used to fill potholes, wide gaps, or structurally failed areas. Crack filler bonds to existing asphalt surfaces; cold patch replaces missing material.”
-
question: “How long does asphalt crack filler last?” answer: “Quality asphalt crack filler typically lasts 2 to 5 years depending on climate severity, traffic volume, and how well the surface was prepared. Applying driveway sealer over the repair after curing significantly extends the life of the patch.”
-
question: “Can I repair asphalt cracks myself or do I need a contractor?” answer: “Most linear cracks and small potholes are straightforward DIY repairs using products available at home improvement stores. Contractor involvement is warranted for alligator cracking over large areas, significant sub-base failure, or driveways that need full resurfacing.”
-
question: “What causes alligator cracking in asphalt?” answer: “Alligator cracking is caused by structural fatigue — the sub-base beneath the asphalt has failed due to poor drainage, inadequate compaction at installation, heavy vehicle loads, or years of freeze-thaw cycling. Unlike linear thermal cracks, alligator cracking indicates the entire pavement section needs replacement rather than just surface sealing.”
-
question: “Should I fill asphalt cracks before or after sealing the driveway?” answer: “Always fill cracks first and allow them to cure fully before applying sealer. Sealing over uncured filler traps solvents and weakens the bond. Allow pourable crack fillers at least 24 to 48 hours of cure time, and cold patch repairs at least 30 days, before applying sealer.”
-
question: “How do I know when my driveway needs resealing?” answer: “Check by pouring a small amount of water on the surface. If water beads up, the existing sealer is still working. If the water soaks in immediately, it’s time to reseal. Visually, a driveway ready for sealing will look gray and faded rather than dark black, and the texture will feel rough.”
Related Reading
- How to Power Wash a Driveway and Walkway
- Spring Home Maintenance Checklist
- How to Fix a Broken or Leaning Mailbox Post
- Concrete Driveway Cost — comparing concrete vs asphalt replacement costs
- Step 1 — Clean the Crack Thoroughly
The single biggest cause of crack repair failure is poor surface prep. Filler won't bond to a crack filled with dirt, oil, or loose asphalt chunks.
- Step 2 — Choose and Apply Crack Filler
For cracks under 1/4 inch wide: Use a pourable liquid crack filler in a squeeze bottle or jug. Pour slowly, filling the crack from one end to the other. Overfill slightly — the filler will settle as it cures.
- Step 3 — Cold Patch Repair for Potholes and Alligator Areas
Cold patch asphalt is a ready-to-use mix of aggregate and binding agent. It's designed to compact into potholes and severely cracked areas without heating.
- Step 4 — Let Repairs Cure Before Sealing
Patience is critical here. Applying sealer over uncured crack filler traps solvents and prevents the filler from bonding fully to the asphalt.
- Step 5 — Apply Driveway Sealer
Sealer serves two purposes: it protects repaired areas from water infiltration, and it unifies the appearance of the driveway so patches blend in rather than standing out as dark spots against a faded surface.
Free: 10-Point Home Maintenance Checklist
Prevent costly repairs with this seasonal checklist. Save hundreds every year by catching problems early.
Your checklist is ready!
Open Checklist →Something went wrong. View the checklist here.