How to Fix a Cabinet Drawer That Won't Close in 10 Minutes
A cabinet drawer that won't close is usually misaligned slides — adjust the two hex screws in under 10 minutes. Also covers soft-close reset, roller replacement, and full slide swap.
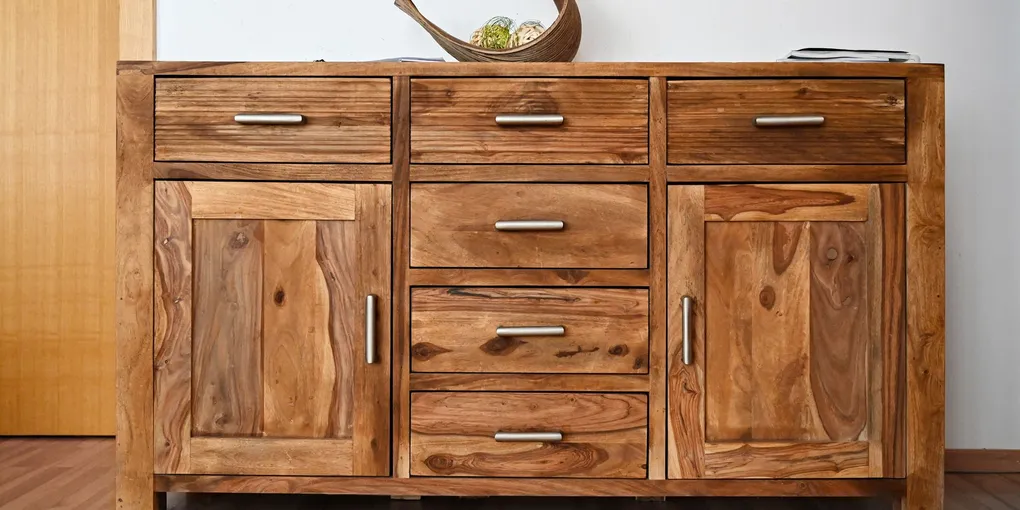
A drawer that won’t close is one of those problems that gets worse every day you ignore it — the slide gets more out of alignment, the drawer box racks from the repeated force, and the face gets scratched from binding.
A drawer that won’t close is one of those problems that gets worse every day you ignore it — the slide gets more out of alignment, the drawer box racks from the repeated force, and the face gets scratched from binding. The good news is that 90 percent of stuck drawers are fixed in under 30 minutes with a screwdriver and knowledge of which screw does what.
What You Need
- Pozidriv screwdriver (PZ2) — most European cabinet hardware (Blum, Grass, Häfele) uses Pozidriv screws, not Phillips ($8–$15 for a quality driver)
- Undermount drawer slides (Blum Tandem or equivalent) — if replacement is needed, measure existing slide length first (21-inch is most common for base cabinets; $25–$60 per pair)
- Side-mount ball-bearing drawer slides — for older-style side-mount repairs or upgrades ($15–$35 per pair)
- Wood shims — for shimming misaligned drawer slide mounting positions ($5–$10 per bundle)
- 1-inch #8 flat head screws (coarse thread) — for remounting loose slide hardware ($6–$10 per box)
- Spray dry lubricant (PTFE-based) — for sticky slide runners ($8–$12 per can)
Total estimated cost: $0–$15 for an adjustment or cleaning repair; $30–$80 for full slide replacement.
Step 1: Diagnose the Problem
Remove the drawer completely before troubleshooting. Understanding the slide type you have determines the repair approach.
Identify your slide type:
- Side-mount slides (older, visible from the side of drawer): Metal rails on both sides of the drawer box. Often have a plastic roller or ball-bearing mechanism. Common in cabinets built before 2010 or in budget installations.
- Undermount slides (modern, hidden under drawer box): Mounted to the cabinet bottom, not visible when the drawer is open. The drawer box clips onto the slide mechanism. Common in all quality cabinets from the 2010s onward — Blum Tandem, Grass, and Häfele are the major brands.
- Center-mount slide (single rail under center of drawer): A single slide centered under the drawer box. Common in older furniture and some bathroom vanities. Simple to adjust but provides less lateral stability.
With the drawer removed, check:
- Look at the slides on both sides. Are they parallel to each other? A side-mount slide that has shifted will be visibly angled when you sight down the cabinet opening from the front.
- Run your finger along each slide. Ball-bearing slides should feel smooth. A grinding or rough-rolling feel indicates dirty or worn bearings.
- Check the drawer box itself. Place it on a flat surface. Does it sit flat and square? Measure diagonally corner to corner — both measurements should be equal. A racked (out of square) drawer box will bind even on properly aligned slides.
- Inspect the drawer box bottom. On undermount slides, the mounting clips attach to the drawer bottom. Check that the clip receivers are intact and not broken.
Step 2: Adjust Side-Mount Slides
Side-mount slides have limited adjustment, but alignment issues are often caused by loose mounting screws rather than the slide itself.
For a sticky or binding side-mount slide:
- Inspect the screws holding the slide to the cabinet side wall and to the drawer box side. Loose screws allow the slide to flex out of alignment. Tighten all screws snugly.
- Check the slide for bent sections by holding it up and looking down its length. A visibly bent slide should be replaced — bends cannot be reliably straightened.
- Spray PTFE dry lubricant along the full length of both slides. Avoid WD-40 — it lubricates temporarily but attracts dust and degrades the plastic rollers. PTFE lubricant is dry, so dust does not stick.
If the slide has shifted laterally (drawer face is off-center left to right):
Side-mount slides have minimal lateral adjustment. Loosen the mounting screws on the cabinet wall, tap the slide slightly in the needed direction, and retighten. The screw slots typically allow 1/8 inch of adjustment.
If the slide is bent or the roller is cracked:
Replace the pair. Side-mount ball-bearing slides are inexpensive ($15–$35 per pair) and an upgrade from roller slides. To replace:
- Mark the mounting screw locations on the cabinet wall with a pencil before removing the old slides — this gives you a reference point for the new ones.
- Remove the old slides (typically 3–4 screws per side per rail member).
- Mount the new cabinet member to the cabinet wall. Use a level to ensure it is horizontal. The back screw hole goes first, then the front, checking level between them.
- Mount the new drawer member to the drawer box side. Match the height to the cabinet member so the drawer will sit level.
- Reinstall the drawer and test. Adjust height by loosening the screws and tapping the slide up or down as needed.
Step 3: Adjust Undermount Slides
Undermount slides are more sophisticated but offer more precise adjustment. The adjustment system uses the mounting clips that attach the drawer box to the slide mechanism.
Blum Tandem Plus (the most common undermount slide in North America):
The mounting clip on the front of the slide has three built-in adjustments. Each is controlled by a small Pozidriv (PZ2) screw:
- Height adjustment (up/down): Turn the screw on the front of the clip. Each quarter turn raises or lowers the front of the drawer approximately 1 mm. Adjust until the gap between the drawer top edge and the cabinet opening top rail is equal left to right.
- Lateral adjustment (left/right): Turn the screw on the side of the clip. Moves the drawer box left or right. Adjust until the drawer face is centered or aligned with adjacent drawers.
- Depth adjustment (front/back): This is set at the rear mounting bracket (the bracket attached to the cabinet bottom at the back of the slide). Loosen the bracket screws and slide it forward or back to change how far the drawer pulls out before stopping, and where it sits when closed.
After adjusting, open and close the drawer 5–6 times to let the mechanism settle, then check alignment again and make any fine-tune corrections.
If the drawer wobbles side-to-side: The stabilizer bar (a horizontal bar connecting the two undermount slides at the back of the drawer box) may be missing or not engaged. Check that the back of the drawer box properly contacts both rear brackets.
Grass Nova Pro (another common European brand):
Similar adjustment system to Blum. The lateral adjustment is typically a cam screw on the front mounting clip. The height adjustment is at the same location. Grass slides often have a slightly different clip release — press both orange levers simultaneously rather than one at a time.
Step 4: Replace Soft-Close Undermount Slides
If the soft-close mechanism has worn out (drawer slams instead of gliding closed, or closes but doesn’t stay closed), you can replace just the dampener on some Blum models, or replace the full slide pair.
Replacing just the Blum soft-close dampener (Blumotion unit):
- Remove the drawer box.
- Look at the front of the undermount slide mechanism — the Blumotion dampener is the small component at the front that the drawer box engages when closing.
- Press the release tab on the Blumotion unit and lift it out of the slide clip.
- Snap in the replacement Blumotion unit (sold separately, approximately $8–$15 per dampener).
- Rehang the drawer and test.
This repair works if the slide mechanism itself is in good condition. If the slide body is worn or bent, replace the full set.
Replacing the full undermount slide pair:
- Remove the drawer box using the release levers.
- Unscrew the slide from the cabinet bottom (typically 3–4 screws per side, accessed from below the slide).
- Unscrew the rear mounting bracket from the cabinet bottom.
- Remove the front mounting clips from the drawer box bottom (2 screws per clip).
- Install new slides: mount the rear bracket first (position it so the slide will end up 3mm from the cabinet side panel — use a spacer block). Attach the slide body to the rear bracket. Secure the front of the slide with 2–3 screws to the cabinet bottom.
- Install new front mounting clips to the drawer box, positioned at the location specified in the new slide instructions.
- Rehang the drawer and run through the full adjustment sequence.
Measuring for replacement slides: Undermount slides are sized by the nominal drawer box depth. A 21-inch slide fits a drawer box 20–21 inches deep. Measure from the back of the drawer box to the front face (do not include the face overlay) to get the nominal size. Common sizes: 12, 15, 18, 21, 24 inches.
Step 5: Realign the Drawer Face
After the slides are corrected, the drawer face may still look slightly off — tilted, too high, or off-center relative to adjacent drawers or the face frame opening.
On frameless (European) cabinets with clip-on drawer faces:
- The drawer face is usually held by two adjustable face attachment screws accessed from inside the drawer box.
- Loosen both screws (do not remove them), adjust the face position, and retighten.
On face-frame cabinets where the face is glued and nailed to the drawer box:
- Minor tilt corrections are made by shimming the slide (see side-mount adjustment above).
- If the face is significantly off, it may need to be removed (score the glue joint with a putty knife), repositioned, and re-glued.
Setting the reveal: The gap (reveal) around a drawer face should be consistent — typically 3/32 to 1/8 inch on all sides. For adjacent drawer banks, all reveals should match so the face frame looks uniform. Stand back and look across the full bank of drawers at eye level to spot any misalignment after adjustment.
Step 6: Check for Drawer Box Problems
If slide adjustment does not solve the problem, the drawer box itself may be the issue.
Check for racking (out of square): Measure diagonally corner to corner. If the measurements differ by more than 1/4 inch, the drawer box has racked. Racking causes the drawer to jam diagonally in the opening.
Fix racking by:
- Reinforcing the drawer box corners with corner brackets (available at hardware stores, $5–$10 for a pack)
- Applying clamps across the diagonal that is too long, pulling the box back toward square, and let any glued joints re-set for 24 hours
- If the drawer box is stapled construction (common in budget cabinets): staple-gun additional staples at each corner to resecure the joints
Check for a swollen bottom panel: A drawer bottom (usually 1/4-inch plywood or hardboard) that has absorbed moisture and swollen may protrude below the drawer box sides, preventing it from seating fully on undermount slide clips. Sand or plane the swollen area to flush, or replace the bottom panel.
Cost Summary
| Repair | DIY Material Cost | Professional Cost |
|---|---|---|
| Lubricate and adjust (no parts) | $8–$12 (lubricant) | $75–$150 |
| Replace soft-close dampener (Blumotion) | $8–$15 per dampener | $100–$200 per drawer |
| Replace undermount slide pair | $25–$60 per pair | $150–$300 per drawer |
| Replace side-mount slide pair | $15–$35 per pair | $100–$200 per drawer |
| Rebuild racked drawer box | $10–$25 in hardware | $100–$200 |
Related Reading
- How to Fix a Kitchen Cabinet Door — hinge adjustment and door alignment for the same cabinets
- How to Fix a Cabinet Hinge — Blum and other European hinge adjustment techniques
- How to Fix a Sticking Drawer — related drawer problems including wood swelling in older drawer guides
- Diagnose the Problem
Remove the drawer completely before troubleshooting. Understanding the slide type you have determines the repair approach.
- Adjust Side-Mount Slides
Side-mount slides have limited adjustment, but alignment issues are often caused by loose mounting screws rather than the slide itself.
- Adjust Undermount Slides
Undermount slides are more sophisticated but offer more precise adjustment. The adjustment system uses the mounting clips that attach the drawer box to the slide mechanism.
- Replace Soft-Close Undermount Slides
If the soft-close mechanism has worn out (drawer slams instead of gliding closed, or closes but doesn't stay closed), you can replace just the dampener on some Blum models, or replace the full slide pair.
- Realign the Drawer Face
After the slides are corrected, the drawer face may still look slightly off — tilted, too high, or off-center relative to adjacent drawers or the face frame opening.
- Check for Drawer Box Problems
If slide adjustment does not solve the problem, the drawer box itself may be the issue.
Free: 10-Point Home Maintenance Checklist
Prevent costly repairs with this seasonal checklist. Save hundreds every year by catching problems early.
Your checklist is ready!
Open Checklist →Something went wrong. View the checklist here.