How to Fix a Broken Outdoor Faucet Handle
Learn how to replace a stripped, cracked, or missing outdoor spigot handle yourself in under an hour with basic plumbing tools and no soldering required.
An outdoor faucet handle takes more abuse than almost any other plumbing fixture in the house — UV exposure, freeze-thaw cycles, garden hose torque, and years of outdoor use all take a toll. When the handle snaps, strips, or simply will not turn, it is a quick and inexpensive DIY fix that takes less than an hour.
An outdoor faucet handle takes more abuse than almost any other plumbing fixture in the house — UV exposure, freeze-thaw cycles, garden hose torque, and years of outdoor use all take a toll. When the handle snaps, strips, or simply will not turn, it is a quick and inexpensive DIY fix that takes less than an hour. You do not need a plumber and you do not need to solder anything.
Understanding Outdoor Faucet (Hose Bib) Construction
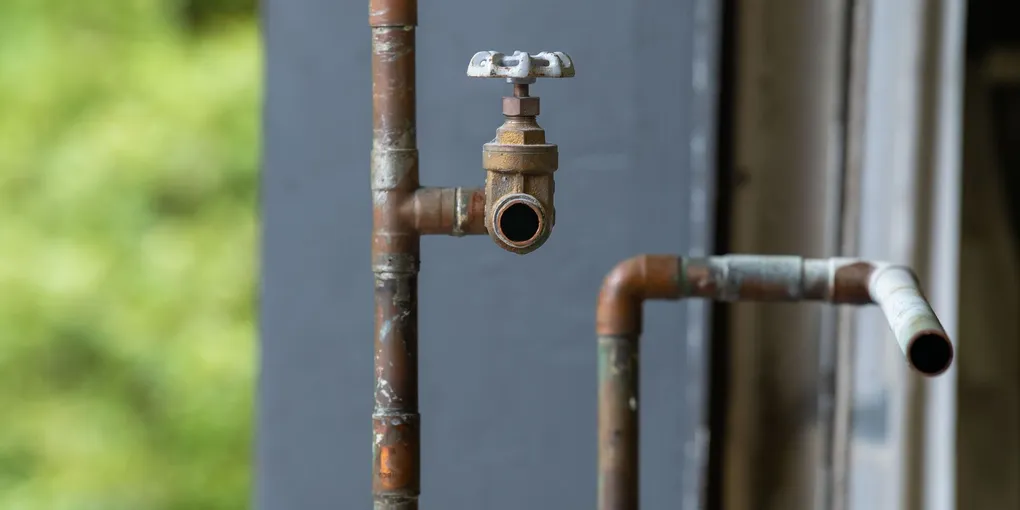
Most residential outdoor faucets are frost-free hose bibs with a simple globe valve inside. The handle connects to a stem via a retaining screw — usually a hex-head set screw accessed through a cap on top of the handle, or a Phillips screw exposed on the handle face. Turning the handle rotates the stem, which drives a rubber washer into or away from the seat inside the faucet body.
Tools and Materials You Will Need
- Adjustable wrench or channel-lock pliers
- Phillips and flathead screwdrivers
- Allen wrench set (3/16 and 1/4 inch are most common)
- Replacement outdoor faucet handle
- Replacement stem washer (optional but recommended)
- Teflon tape
- Towel or bucket
Step 1: Shut Off the Water Supply
Locate the shut-off valve for the outdoor faucet — it is usually inside the home in the basement, crawl space, or utility room on the pipe that runs to the exterior wall. Turn it fully clockwise to close. Open the outdoor faucet to drain the remaining pressure in the line. If you cannot find a dedicated shut-off, turn off the main house supply.
Step 2: Confirm the Handle Type
Look at the center of the handle. Most handles have a plastic cap that pops off with a flathead screwdriver, revealing the retaining screw. Others have a visible screw on the handle face. Some older faucets have a threaded handle that unscrews counterclockwise by hand. Identify your type before reaching for tools.
Step 3: Remove the Broken Handle
For cap-and-screw handles: pry the decorative cap off, then back out the screw with a Phillips driver or the appropriate Allen wrench. Pull the handle straight off the stem. If it is stuck from corrosion, wiggle it gently side to side while pulling — do not pry against the faucet body.
For threaded handles: grip the handle firmly and unscrew counterclockwise. If it is fused with mineral deposits, wrap it with a rag for grip and apply steady turning force.
Step 4: Inspect the Stem
With the handle off, look at the top of the stem. It should be clean and have clearly defined flats or a D-profile that the handle slides onto. If the stem is corroded, clean it with a wire brush. If it is rounded from the handle spinning, the stem may need replacement — but try the new handle first, as a snug new handle screw often compensates for minor wear.
Step 5: Install the Replacement Handle
A Homewerks Worldwide Replacement Hose Bib Handle or BrassCraft Universal Outdoor Faucet Handle fits most standard residential hose bibs. Slide the new handle onto the stem, aligning the key in the handle bore with the flat on the stem. Thread in the retaining screw by hand, then tighten it firmly with the screwdriver or Allen wrench. Do not overtighten — you want it snug, not so tight you crack the new handle.
Replace the decorative cap if your handle uses one.
Step 6: Replace the Stem Washer (While You Are Here)
This optional but worthwhile step prevents drips. With the water still off and the handle removed, use an adjustable wrench to unscrew the packing nut — the large hex nut on the faucet body just behind the handle. Pull the entire stem straight out. At the very bottom is a rubber washer held by a brass screw. Replace the washer with an exact size match from a Danco Faucet Stem Washer Assortment Kit. Reinstall the stem and packing nut, snugging it firmly but not over-torquing.
Step 7: Restore Water and Test
Turn the supply valve back on. With the faucet handle in the off position, look for drips from the packing nut area. A small drip from the packing nut usually means you need to tighten it a quarter turn. Open the handle fully to confirm full flow, then close it and confirm it shuts off with no drip from the spout. If you see a drip from the spout, the stem washer is not seated — shut off the supply and check the washer installation.
Winterizing Reminder
Before the first hard freeze, disconnect all garden hoses from the outdoor faucet. A frost-free faucet only drains properly if the hose is disconnected — a connected hose traps water in the faucet body and can cause a freeze crack that splits the entire faucet. This is the single most common cause of outdoor faucet damage and the most preventable.
A new handle costs under $15 and takes less time to install than most other plumbing repairs. Do not let a stripped or broken handle go unfixed — a faucet you cannot control reliably is a faucet that will eventually cause a bigger problem.
Related guides
- How to Fix a Broken Outdoor Spigot Vacuum Breaker — repair the vacuum breaker cap if dripping continues after handle replacement
- How to Fix a Dripping Outdoor Faucet — stop a persistent drip at the spout or packing nut
- How to Fix a Broken Outdoor Spigot — full sillcock replacement when handle repair isn’t enough
- Shut Off the Water Supply
Locate the shut-off valve for the outdoor faucet — it is usually inside the home in the basement, crawl space, or utility room on the pipe that runs to the exterior wall. Turn it fully clockwise to close.
- Confirm the Handle Type
Look at the center of the handle. Most handles have a plastic cap that pops off with a flathead screwdriver, revealing the retaining screw. Others have a visible screw on the handle face.
- Remove the Broken Handle
For cap-and-screw handles: pry the decorative cap off, then back out the screw with a Phillips driver or the appropriate Allen wrench. Pull the handle straight off the stem.
- Inspect the Stem
With the handle off, look at the top of the stem. It should be clean and have clearly defined flats or a D-profile that the handle slides onto. If the stem is corroded, clean it with a wire brush.
- Install the Replacement Handle
A Homewerks Worldwide Replacement Hose Bib Handle or BrassCraft Universal Outdoor Faucet Handle fits most standard residential hose bibs. Slide the new handle onto the stem, aligning the key in the handle bore with the flat on the stem.
- Replace the Stem Washer (While You Are Here)
This optional but worthwhile step prevents drips. With the water still off and the handle removed, use an adjustable wrench to unscrew the packing nut — the large hex nut on the faucet body just behind the handle. Pull the entire stem straight out.
Free: 10-Point Home Maintenance Checklist
Prevent costly repairs with this seasonal checklist. Save hundreds every year by catching problems early.
Your checklist is ready!
Open Checklist →Something went wrong. View the checklist here.