How to Fix a Broken Dimmer Switch
A dimmer switch that flickers, buzzes, or stops responding can usually be replaced in under 30 minutes — this guide covers diagnosis, wiring, and choosing a compatible replacement.
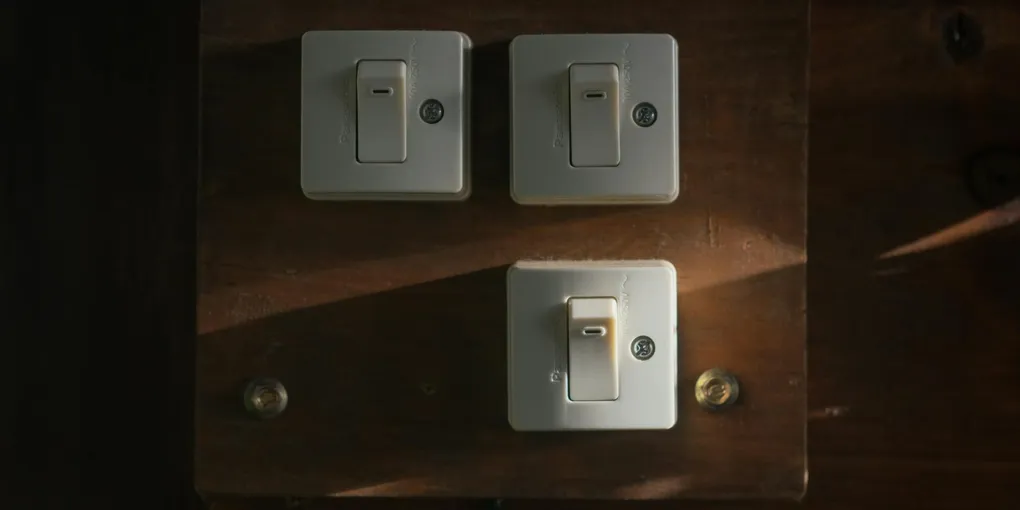
Fixing a broken dimmer switch: (1) Common failures: buzzing/humming (incompatible dimmer with LED bulbs — replace with a LED-compatible dimmer), flickering (LED bulbs not rated for dimming — buy dimmable LEDs), unresponsive controls (the dimmer is failed). (2) Check the load: many dimmers have a minimum wattage — if total wattage is too low (typical with LED bulbs), install a minimum load adapter or replace with an LED-specific dimmer. (3) For replacement: turn off the breaker. Verify dead with a tester. Remove the old dimmer — note the wiring. (4) Most dimmers have: two black wires (hot in and switched hot out) plus a ground. Match the wiring on the new dimmer. (5) If your circuit has a neutral wire (white), use a smart dimmer — they require neutral for their electronics. (6) Restore power and test. A replacement LED-compatible dimmer costs $15 to $40.
Frequently Asked Questions
Why is my dimmer switch buzzing or humming?
Buzzing from the switch itself usually means the dimmer is not compatible with the bulb type installed. Traditional incandescent dimmers often buzz when paired with LED or CFL bulbs. The solution is to replace the dimmer with a model specifically rated for LED/CFL loads. A separate buzzing or hum from the light fixture is typically caused by the same incompatibility but is resolved by choosing a dimmer with a trim adjustment dial — a small screwdriver slot on the front of the switch that lets you tune out buzz. If the dimmer is LED-compatible and the buzz persists, the bulb itself may not be dimmable — check the bulb packaging.
Why does my dimmer switch flicker?
Flickering is almost always a compatibility issue between the dimmer and the bulb. LED bulbs require a minimum load to operate smoothly, and many older dimmer switches cannot modulate down to the low wattage that LED bulbs draw. Replace the dimmer with a current LED-compatible model and confirm your bulbs are labeled as dimmable. Also check that the total wattage on the circuit does not exceed the dimmer's rated maximum — overloaded dimmers flicker and overheat.
Do I need an electrician to replace a dimmer switch?
Replacing a dimmer switch is one of the most accessible DIY electrical tasks. It involves turning off the breaker, removing the old switch, connecting the same wires to the same terminals on the new switch, and reinstalling the cover. No new wiring is required. If you are comfortable identifying hot, neutral, and ground wires and are careful to keep the power off throughout the job, this is a straightforward replacement. Hire an electrician if the box has unusual wiring (more than three wires not counting a ground), if the wiring is aluminum, or if there is no ground wire and you are installing a grounded switch.
How do I know if my dimmer switch needs a neutral wire?
Most modern smart dimmers and many LED-compatible dimmers require a neutral wire (white wire in the box) to function correctly. Older dimmer switches typically work on a two-wire system (no neutral required). When buying a replacement dimmer, check the specifications — the package will state whether a neutral wire is required. If your electrical box has only two wires (plus ground), choose a no-neutral dimmer. If the box has a white neutral wire bundled or connected, you have the option of either type.
Can I replace a single-pole dimmer with a 3-way dimmer?
Only if both switches controlling the light are being converted. A 3-way dimmer circuit requires a 3-way dimmer at one location and a compatible 3-way accessory switch (or a second 3-way dimmer, depending on the brand) at the other location. You cannot mix a 3-way dimmer with a standard 3-way toggle switch — it will not dim correctly and may not work at all. If you only want dimming at one of two switch locations, one solution is a smart dimmer that communicates wirelessly, eliminating the need to run new wire.
What wattage dimmer do I need for LED lights?
LED bulbs draw far less wattage than the bulbs they replace, but dimmers have both a minimum and maximum load rating. Most LED-compatible dimmers are rated for 150 to 600 watts maximum and have a minimum load of 25 to 40 watts. If your LED fixture draws less than the dimmer's minimum load (easy to do with a single LED bulb), the dimmer will flicker, buzz, or not turn off fully. Add up the wattage of all bulbs on the circuit and confirm it falls between the dimmer's minimum and maximum ratings. When in doubt, a multi-location smart dimmer with a wide load range solves most compatibility problems.
What is the best dimmer switch for LED lights in 2026?
The Lutron Caseta Wireless (PD-6WCL, $60) is the top recommendation for most homeowners — it's compatible with over 2,000 LED and CFL bulbs, works without a neutral wire, integrates with Alexa, Google Home, and Apple HomeKit, and rarely flickers or buzzes. For a no-smart-features option, the Lutron Diva (DVCL-153P, $25–$30) is widely regarded as the most reliable LED dimmer without app connectivity. Leviton's Universal Dimmer (DSL06-1LZ, $20–$25) is a solid budget option compatible with most LEDs. When comparing dimmers, look for: a wide load range (as low as 0W or close to it for small LED fixtures), a trim adjustment dial to eliminate buzz, and compatibility with your specific bulb brand if possible — Lutron maintains a certified bulb list on their website.
My dimmer switch only works at full brightness and won't dim. How do I fix it?
A dimmer that operates as an on/off switch but won't actually dim the lights has one of these causes: (1) Incompatible bulbs — the bulbs are not rated as dimmable. LED bulbs must specifically state 'dimmable' on the package; standard LED bulbs will not dim and may flicker or stay at full brightness. (2) Minimum load not met — the total wattage of the bulbs is below the dimmer's minimum load (the point at which the dimmer's electronics engage). Add more bulbs or install a minimum load adapter ($5–$10). (3) The dimmer itself is failing — if it worked before and stopped, the internal electronics may have failed. Replace the dimmer ($15–$40 for LED-compatible). (4) 3-way circuit wiring error — if a 3-way circuit was rewired, an error can cause the dimmer to act as a switch. Verify the traveler wire connections match the dimmer's wiring diagram.
Fixing a broken dimmer switch: (1) Common failures: buzzing/humming (incompatible dimmer with LED bulbs — replace with a LED-compatible dimmer), flickering (LED bulbs not rated for dimming — buy dimmable LEDs), unresponsive controls (the dimmer is failed).
A dimmer switch that flickers, buzzes, gets hot to the touch, stops responding at the low end of the range, or simply fails to turn the lights on at all is telling you it needs to be replaced. The good news: dimmer switch replacement is one of the most beginner-friendly electrical jobs in the home. The power comes from one breaker, there are only two to four wires to deal with, and the whole job takes 20 to 40 minutes. The most important part of the job is choosing the right replacement — the wrong dimmer for your bulb type is the root cause of most dimmer problems.
This guide walks through diagnosing what went wrong, choosing a compatible replacement, and completing the swap safely.
What You Need
- LED-compatible dimmer switch (single-pole) — choose one rated for your bulb type and wattage load; $15–$35
- Screwdrivers (flathead and Phillips) — for removing the cover plate and switch mounting screws; $10–$20 for a basic set
- Non-contact voltage tester — essential for confirming power is off before touching any wires; $15–$25
- Needle-nose pliers — for forming wire hooks if needed
- Wire stripper — if wire ends need to be freshened
- Masking tape and marker — for labeling wires before disconnecting
- Electrical tape
Estimated cost: $15–$40 depending on the dimmer model chosen.
Step 1: Diagnose the Problem
Before buying a replacement, confirm the dimmer is actually the problem and understand why it failed.
Common dimmer failure modes:
- Buzzing or humming from the switch body: Incompatible dimmer-to-bulb pairing. The fix is a new LED-compatible dimmer.
- Flickering at low dim levels: Same incompatibility, or the circuit load is below the dimmer’s minimum rated load. New LED dimmer with a lower minimum load threshold.
- Switch feels hot: The dimmer is overloaded (total wattage on circuit exceeds the dimmer’s maximum rating), or it has failed internally. Replace the switch and verify the load is within the new switch’s rating.
- Lights do not respond to the slider or dial: The dimmer mechanism has failed. Replace the switch.
- Lights turn on at full brightness only (no dimming): The dimmer’s phase-cut circuit has failed. Replace the switch.
- Lights will not turn off fully: Classic LED minimum-load issue with an incompatible older dimmer. New LED dimmer resolves this.
If all the lights on a circuit stopped working simultaneously, check the breaker first — this is a tripped breaker, not a failed dimmer.
Step 2: Turn Off the Power
Go to your electrical panel and turn off the breaker for the circuit that controls the dimmer you are replacing. Do not rely on turning the switch off — you need the breaker off to safely work in the box.
After turning off the breaker, go back to the switch and use a non-contact voltage tester to verify the power is actually off. Hold the tester near the switch — if it beeps or lights up, the power is still on. Check that you turned off the correct breaker. Some homes have mislabeled panels; test before you touch any wires.
If you do not own a non-contact voltage tester, purchase one before doing any electrical work. They cost $15 to $25 and are the most important safety tool for DIY electrical jobs.
Step 3: Remove the Old Dimmer
Unscrew the cover plate (one or two screws in the center). Set it aside. You will see the dimmer mounted to a metal or plastic electrical box in the wall. Remove the two mounting screws holding the dimmer to the box tabs.
Gently pull the dimmer out of the box by gripping the switch body — do not yank by the wires. Pull it out 3 to 4 inches so you have room to work on the wire connections.
Before disconnecting anything: Take a clear photo of the wiring with your phone. This is your reference if you get confused during reinstallation. Label each wire with a small piece of masking tape and a marker — write “line” on the hot wire coming from the breaker, “load” on the wire going to the fixture, and “ground” on the bare copper or green wire.
Disconnect the wires from the old dimmer. Most dimmers use either screw terminals (loosen the screw and pull the wire free) or push-in wire connectors (insert a small flathead screwdriver into the release slot next to the wire to free it). If the wire ends are nicked or frayed, strip 3/4 inch of fresh insulation before connecting to the new switch.
Step 4: Choose the Right Replacement Dimmer
This step happens before the purchase, but confirm it before connecting the new switch:
Single-pole vs. 3-way: Count the wires in the box (excluding ground). Two wires = single-pole circuit. Three wires = 3-way circuit (the light is controlled from two locations). The replacement must match.
Load type: Verify your bulbs are LED, CFL, incandescent, or halogen. The dimmer package will list compatible load types. Most new dimmers handle LED and incandescent. CFL dimming is less common — confirm CFL compatibility if needed.
Wattage capacity: Add up the wattage of all bulbs on the circuit. The dimmer’s maximum watt rating must exceed the total load. Standard LED dimmer max ratings are 150 to 600 watts — more than enough for typical residential circuits.
Neutral wire requirement: Check whether the new dimmer requires a neutral wire (white wire) and whether your box has one. If not, choose a no-neutral dimmer.
Step 5: Connect the New Dimmer
Most standard dimmers have two main terminals (for the two hot wires on a single-pole circuit) and a ground terminal. The two hot terminals are interchangeable on a single-pole switch — it does not matter which hot wire goes to which terminal.
Connect the ground wire first: The bare copper or green insulated wire connects to the green screw on the dimmer or to the green pigtail wire. This is an important safety connection — do not skip it or leave it unconnected.
Connect the hot wires: Attach the black wires (or black and red on a 3-way) to the designated terminals. On screw terminals, form the wire into a clockwise hook around the screw so tightening the screw pulls the wire in rather than pushing it off. Tighten the screws firmly — loose terminal connections cause arcing and overheating.
Connect the neutral if required: White wire to the white wire or neutral terminal, secured with a wire nut or terminal.
Fold the wires carefully back into the box — do not crimp or bend them sharply. Push the dimmer into the box and drive the two mounting screws to seat it flush. Attach the cover plate.
Step 6: Restore Power and Test
Turn the breaker back on. Test the dimmer through its full range: lights should turn on at low brightness, increase smoothly to full, and dim back down to off without flickering, buzzing, or sticking at any point.
Most LED-compatible dimmers have a small trim adjustment dial — a narrow slot on the front face of the switch body accessible with a small flathead screwdriver. If the lights flicker at the low end of the dim range, adjust the trim dial slightly upward. If the lights do not turn off fully at the lowest setting, adjust the trim dial downward. This trim adjustment compensates for the specific LED bulbs on your circuit and eliminates most residual flickering or incomplete shutoff.
What to Expect Long-Term
A quality LED-compatible dimmer switch from a name brand (Lutron, Leviton, GE) should last 10 to 15 years under normal use. The most common reason for early failure is using a dimmer with bulbs that exceed its rated load — running a 300-watt dimmer at 280 watts continuously shortens its lifespan significantly. Size the dimmer for no more than 75 percent of its maximum rated load to extend service life.
Related Reading
- How to Replace a Light Switch — the same basic process for non-dimming switches
- How to Install a Ceiling Fan — another accessible DIY electrical project using the same breaker-off safety protocol
- How to Fix an Electrical Outlet — diagnose and replace outlets using the same tools and process
- How to Install a Ceiling Fan With No Existing Wiring — add a fan where no box exists
- Diagnose the Problem
Before buying a replacement, confirm the dimmer is actually the problem and understand why it failed.
- Turn Off the Power
Go to your electrical panel and turn off the breaker for the circuit that controls the dimmer you are replacing. Do not rely on turning the switch off — you need the breaker off to safely work in the box.
- Remove the Old Dimmer
Unscrew the cover plate (one or two screws in the center). Set it aside. You will see the dimmer mounted to a metal or plastic electrical box in the wall. Remove the two mounting screws holding the dimmer to the box tabs.
- Choose the Right Replacement Dimmer
This step happens before the purchase, but confirm it before connecting the new switch:
- Connect the New Dimmer
Most standard dimmers have two main terminals (for the two hot wires on a single-pole circuit) and a ground terminal. The two hot terminals are interchangeable on a single-pole switch — it does not matter which hot wire goes to which terminal.
- Restore Power and Test
Turn the breaker back on. Test the dimmer through its full range: lights should turn on at low brightness, increase smoothly to full, and dim back down to off without flickering, buzzing, or sticking at any point.
Free: 10-Point Home Maintenance Checklist
Prevent costly repairs with this seasonal checklist. Save hundreds every year by catching problems early.
Your checklist is ready!
Open Checklist →Something went wrong. View the checklist here.