How to Fix a Broken Ceiling Medallion
Learn how to repair a cracked or loose ceiling medallion, or install a new one around a light fixture, using adhesive and simple painting techniques.
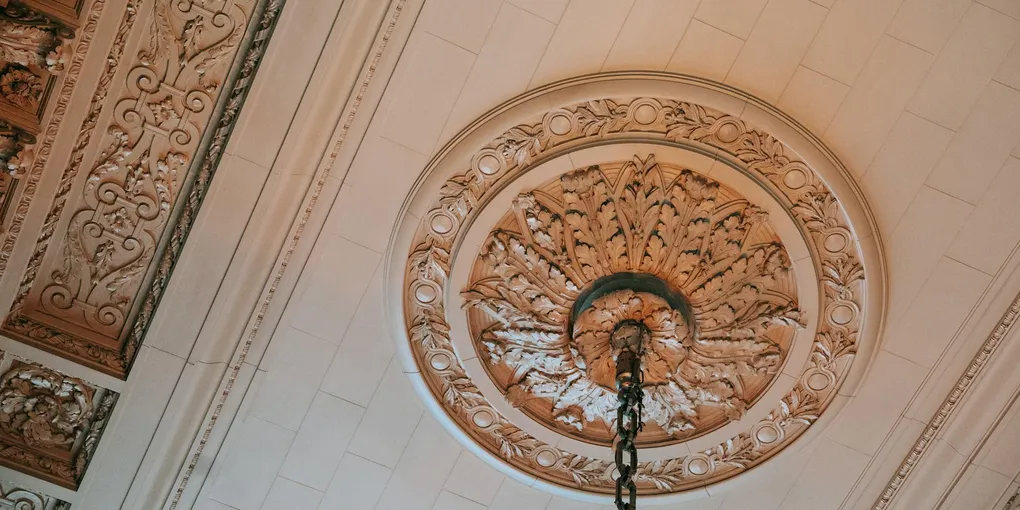
Fixing a loose or cracked ceiling medallion: (1) Cracked plaster medallion: fill cracks with spackling compound or paintable caulk, sand smooth, prime, and paint. For a broken section: use epoxy wood filler to rebuild the missing area, shape to match while still pliable. (2) Loose medallion that's pulling away from the ceiling: inject construction adhesive (Loctite Power Grab) behind the medallion with a thin nozzle, press the medallion against the ceiling, and support with painter's tape for 24 hours. (3) Full replacement: remove the old medallion (pry gently), clean the ceiling. Most polyurethane medallions ($15 to $60 at home centers) come with pre-drilled center holes. Apply construction adhesive to the back, press into place, caulk the outer edge with paintable caulk, prime and paint. Medallions cover the ceiling box and hide any patched drywall around a light fixture.
Frequently Asked Questions
Can I install a ceiling medallion without removing the light fixture?
Yes. Most modern foam and polyurethane medallions are split into two halves so you can slip them around the existing canopy without touching the wiring. One-piece medallions require temporarily removing the fixture canopy, but the wiring stays connected — you just loosen the canopy, slide the medallion over the stem, and re-secure the canopy on top.
What is the best adhesive for a ceiling medallion?
Construction adhesive such as Loctite PL Premium or Liquid Nails Heavy Duty works well for most medallions. For lightweight foam and polyurethane pieces, paintable caulk adhesive or foam construction adhesive also works. Avoid solvent-based adhesives on foam medallions — they will dissolve the foam.
My ceiling medallion is cracked. Can I repair it instead of replacing it?
Yes, if the crack is clean and the pieces align. Apply wood glue or two-part epoxy to the crack, press the pieces together, and secure with painter's tape until fully cured. Once dry, fill the seam with lightweight spackle or paintable caulk, sand smooth, prime, and repaint. The repair is invisible once painted.
How do I match the paint on a ceiling medallion?
Take a paint chip or a photo with natural light to a paint store and ask for a spectrophotometer color match. For white ceilings, note that ceiling white is often slightly flatter (lower sheen) than wall white — request flat or matte finish. Apply the ceiling paint to the entire medallion rather than just spot-painting the repair so the sheen and color blend seamlessly.
How do I secure a heavy plaster medallion that keeps falling?
Heavy plaster medallions need mechanical support in addition to adhesive. Drive drywall screws into the ceiling joists through the medallion face, countersinking them slightly. Fill the screw holes with joint compound or spackle, sand flush, and paint over. If you cannot hit a joist, use toggle bolt anchors rated for the weight of the medallion.
What size ceiling medallion should I use?
A general rule: the medallion diameter should be roughly one inch per foot of ceiling height. An 8-foot ceiling works well with an 8-inch to 12-inch medallion. For a larger visual statement, match the medallion diameter to the fixture's widest point plus 4 to 6 inches on each side. Avoid medallions larger than one-third of the room's shortest ceiling dimension.
Can I install a ceiling medallion on a textured or popcorn ceiling?
Yes, but the medallion will rest on top of the texture rather than flush against the ceiling, leaving a visible gap at the perimeter. To address this: (1) Scrape the texture from the medallion's footprint and skim coat the area smooth before installing — this gives the cleanest result. (2) Apply a generous bead of paintable caulk around the medallion perimeter after installation to fill the gap and blend into the surrounding texture. (3) Use a flexible foam or polyurethane medallion that conforms slightly to irregular surfaces. Rigid plaster medallions show the gap most prominently and benefit most from the scrape-and-skim-coat approach.
What is the difference between foam, polyurethane, and plaster ceiling medallions?
The three materials differ in weight, durability, and installation requirements: (1) Foam medallions are the lightest and least expensive ($10 to $25). They paint well but dent easily and are not suitable for high-traffic areas where they might be bumped. (2) Polyurethane (urethane) medallions are rigid, lightweight, dent-resistant, and paint to a crisp finish with fine detail — the best choice for most DIY installations ($20 to $80). They adhere well with construction adhesive alone. (3) Plaster (gypsum) medallions are the heaviest and most authentic, found in historic homes. They require mechanical fasteners (screws into ceiling joists) in addition to adhesive and are significantly harder to install. All three types accept latex ceiling paint equally well.
Fixing a loose or cracked ceiling medallion: (1) Cracked plaster medallion: fill cracks with spackling compound or paintable caulk, sand smooth, prime, and paint. For a broken section: use epoxy wood filler to rebuild the missing area, shape to match while still pliable.
A ceiling medallion frames your light fixture and adds architectural detail to an otherwise flat ceiling. When a medallion cracks, sags, or falls — or when you want to add one where none existed — the repair or installation is a straightforward afternoon project. No special tools or ceiling experience are required.
What You Need
- Ekena Millwork Polyurethane Ceiling Medallion — Lightweight polyurethane medallions are easier to handle than plaster and accept paint perfectly. The split (two-piece) version installs without touching the fixture wiring.
- Loctite PL Premium Construction Adhesive — Strong, paintable, and compatible with foam and polyurethane substrates. One tube covers most medallion installations.
- DAP DryDex Spackling Compound — For filling gaps, cracks, and screw holes before painting. Goes on pink, dries white — no guesswork on dry time.
- Painter’s tape, sandpaper (120 and 220 grit), a putty knife, and ceiling paint to match.
Step 1: Assess the Damage
Before anything else, understand what you are dealing with.
Cracked but intact medallion: If the medallion is still attached to the ceiling and the crack is cosmetic — a hairline or a clean break with both pieces still in place — you can repair it in place without removing it. Skip to Step 4.
Medallion falling or already down: If the medallion is hanging loose, sagging significantly, or already on the floor, you will need to re-adhere it or install a replacement. Continue with Step 2.
Replacement needed: If the medallion is shattered, heavily chipped, or simply dated, a new polyurethane medallion is inexpensive ($15 to $60) and installs in under an hour.
Step 2: Remove the Old Medallion (If Replacing)
Turn off the power to the light fixture at the breaker as a precaution. You will not be touching any wiring, but having the power off is good practice when working directly above a fixture.
If the medallion is a one-piece unit, loosen the fixture canopy (the cover plate against the ceiling) by unscrewing the decorative nut or ring holding it in place. Slide the canopy down the chain or stem a few inches — the wiring remains connected. Now you have access to the medallion itself.
Pry the old medallion away from the ceiling gently using a wide putty knife. Work around the perimeter, breaking the adhesive bond gradually rather than forcing it. Old plaster medallions may have been nailed or screwed as well — look for fastener holes as you pry.
Scrape any remaining adhesive and dried caulk off the ceiling surface. Sand the area smooth and wipe with a damp cloth to remove dust.
Step 3: Prepare the New Medallion
For a split (two-piece) medallion, dry-fit both halves around the fixture canopy before applying any adhesive. The halves should close tightly with a clean seam and sit flat against the ceiling without gaps.
If the ceiling has a texture, lightly sand the contact area on the back of the medallion to improve the adhesive bond. Wipe both the back of the medallion and the ceiling surface with a tack cloth to remove any dust.
Mark the ceiling lightly with a pencil to indicate the center of the fixture box — this helps you center the medallion accurately when you cannot see through it during installation.
Step 4: Apply Adhesive and Set the Medallion
Apply a continuous bead of construction adhesive to the back edge of the medallion, about one inch from the outer perimeter. For larger medallions (over 16 inches), also add a bead in a ring roughly halfway between the center hole and the outer edge.
For a split medallion: apply adhesive to each half separately. Press the first half firmly to the ceiling, aligning it with your center mark. Then press the second half into position, closing the seam tightly.
Press the medallion firmly against the ceiling with both palms for 30 to 60 seconds, then use painter’s tape to support it while the adhesive cures. Run several strips of tape from the medallion face down to the ceiling on all sides — this holds it flat and prevents sagging before the adhesive sets.
Leave the tape in place for the adhesive manufacturer’s recommended open time, typically 24 hours for full cure.
Step 5: Fill and Finish the Seams
Once the adhesive has cured, remove the painter’s tape. Examine the perimeter of the medallion and the center seam (on split units) for gaps.
Apply paintable caulk or spackling compound to any gaps between the medallion and the ceiling, and along the split seam. Smooth the compound with a wet fingertip or a damp putty knife. Work it into the gap completely, then wipe away the excess cleanly.
Let the filler dry completely — DryDex turns fully white when dry. Sand lightly with 220-grit sandpaper to smooth any ridges, then wipe with a tack cloth.
Step 6: Prime and Paint
Spot-prime the filled areas with a water-based primer. If you are painting the entire medallion (recommended for the most uniform result), apply primer to the whole surface. Let the primer dry for one hour.
Apply ceiling paint with a small brush, working the paint into all the decorative details of the medallion. Two thin coats produce a cleaner result than one heavy coat. Let the first coat dry fully before applying the second.
Re-attach the light fixture canopy and restore power at the breaker.
Tips for Long-Term Success
- Avoid oil-based paint on foam or polyurethane medallions. It takes much longer to dry and can cause adhesion issues. Stick to water-based (latex or acrylic) ceiling paint.
- In humid environments, consider adding two or three drywall screws through the medallion into the ceiling joists as supplemental mechanical support, then spackle over the screw heads. Adhesive alone can release in high-humidity conditions over time.
- If the medallion sits over a junction box, make sure the new medallion’s center hole is large enough to clear the canopy of your fixture. Measure the canopy diameter before ordering.
Related Reading
- How to Fix a Popcorn Ceiling — Remove or repair popcorn texture around the medallion area before installation.
- How to Install a Ceiling Fan — Replace a standard fixture with a ceiling fan using the same medallion approach.
- How to Paint a Room — Complete interior painting guide including ceiling technique.
- How to Install Crown Molding — add crown molding around the ceiling after the medallion is installed for a complete finished look
- Assess the Damage
Before anything else, understand what you are dealing with.
- Remove the Old Medallion (If Replacing)
Turn off the power to the light fixture at the breaker as a precaution. You will not be touching any wiring, but having the power off is good practice when working directly above a fixture.
- Prepare the New Medallion
For a split (two-piece) medallion, dry-fit both halves around the fixture canopy before applying any adhesive. The halves should close tightly with a clean seam and sit flat against the ceiling without gaps.
- Apply Adhesive and Set the Medallion
Apply a continuous bead of construction adhesive to the back edge of the medallion, about one inch from the outer perimeter. For larger medallions (over 16 inches), also add a bead in a ring roughly halfway between the center hole and the outer edge.
- Fill and Finish the Seams
Once the adhesive has cured, remove the painter's tape. Examine the perimeter of the medallion and the center seam (on split units) for gaps.
- Prime and Paint
Spot-prime the filled areas with a water-based primer. If you are painting the entire medallion (recommended for the most uniform result), apply primer to the whole surface. Let the primer dry for one hour.
Free: 10-Point Home Maintenance Checklist
Prevent costly repairs with this seasonal checklist. Save hundreds every year by catching problems early.
Your checklist is ready!
Open Checklist →Something went wrong. View the checklist here.