How to Fix a Broken Bathroom Mirror: Reframe or Replace in 30 Minutes ($0–$50)
Secure a loose mirror with the right clips or adhesive, reframe a cracked one, or do a full replacement in 30 minutes. Clips and adhesive cost $0–$15; replacement mirrors run $20–$50.
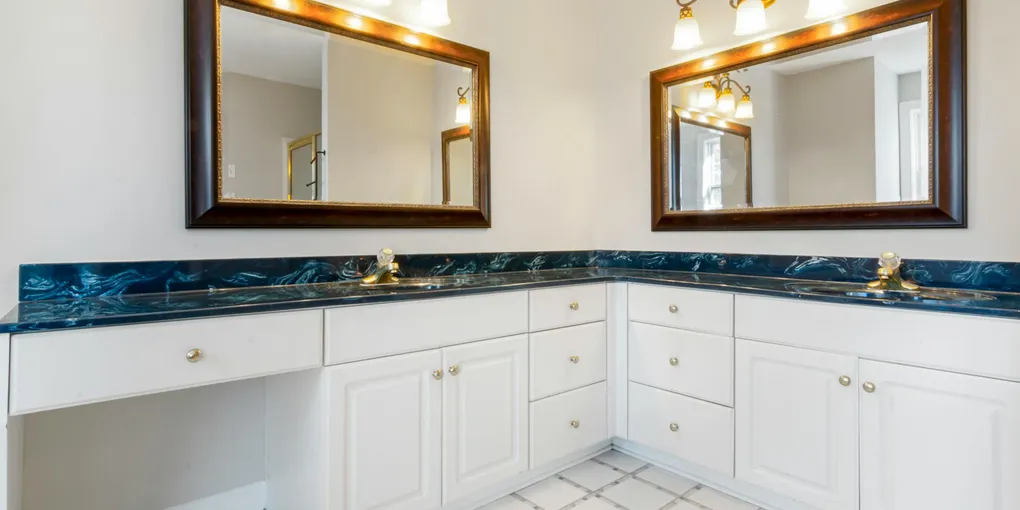
Fixing a bathroom mirror: (1) Cracked mirror with clips: if the mirror is secured by metal clips and the crack is minor, leave it in place and cover with mirror repair tape or use a glass repair kit for small chips. (2) Full replacement: measure the existing mirror precisely (height x width x thickness — usually 1/4 inch). Order a cut-to-size mirror from a glass shop or home center. (3) Removing the old mirror: mirrors adhered with mastic adhesive may require cutting the adhesive with a thin wire or oscillating tool — work slowly to avoid shattering. (4) Installing the new mirror: use mirror mastic (not regular construction adhesive — it contains solvents that eat mirror backing), apply in vertical strips, press and brace for 24 hours. (5) Edge treatment: add J-channel or chrome mirror clips to protect the edges and prevent moisture behind the glass.
Frequently Asked Questions
Can a cracked bathroom mirror be repaired without replacing it?
Minor surface cracks can be filled with clear epoxy resin to stop spreading and reduce visibility, but the repair will still be noticeable. A cracked mirror is typically best replaced for appearance and safety reasons.
How do I remove a mirror that is glued directly to the wall?
Slide thin piano wire or a mirror removal tool behind the mirror in a sawing motion to cut through the adhesive. Work slowly from one edge to avoid shattering the glass. Wear gloves and eye protection.
What adhesive is safe for hanging a bathroom mirror?
Use a mirror-safe mastic adhesive or construction adhesive specifically labeled as mirror-safe. Standard construction adhesives can contain solvents that eat the silver backing of mirrors and cause black edge spots.
How much weight can mirror clips hold?
Standard J-channel and side clips can support mirrors up to about 50 lbs. For heavier mirrors, use a combination of clips and mirror-safe adhesive, or hang the mirror from a French cleat mounted into wall studs.
Why are the edges of my bathroom mirror turning black?
Black or dark spots at the mirror edges are called desilvering, caused by moisture and cleaning chemicals attacking the silver backing. This is a cosmetic defect; reframing the mirror can hide edge desilvering.
Is it safe to DIY mirror installation in the bathroom?
Yes, for mirrors under 16 inches by 20 inches and under 30 lbs. Larger or heavier mirrors should be anchored into studs. Always wear cut-resistant gloves when handling glass.
How do I safely dispose of a broken bathroom mirror?
Wrap the broken mirror in several layers of newspaper or cardboard, tape the bundle securely, and label it BROKEN GLASS on the outside. In most municipalities, wrapped broken glass goes in regular trash, not recycling — loose glass in a recycling bin is a safety hazard for workers and cannot be processed. For very large mirror panels, call your local solid waste hauler to ask about special disposal options. Some areas have glass drop-off locations at recycling centers. Never place unwrapped mirror glass in any bin.
How do I add a decorative frame to an existing frameless bathroom mirror?
Use a mirror frame molding kit designed to adhere directly to the mirror face — brands like MirrorMate and similar kits come in custom-cut or field-cut lengths with corner connectors. Installation requires no drilling or tools: clean the mirror surface with alcohol, peel the backing from the foam mounting tape on the molding strips, and press them firmly around the perimeter. The frame covers edge desilvering, adds visual depth, and transforms a builder-grade mirror in about 30 minutes. Measure the exact mirror width and height before ordering — kits are available in standard and custom sizes to fit any mirror.
Fixing a bathroom mirror: (1) Cracked mirror with clips: if the mirror is secured by metal clips and the crack is minor, leave it in place and cover with mirror repair tape or use a glass repair kit for small chips. (2) Full replacement: measure the existing mirror precisely (height x width x thickness — usually 1/4 inch).
A broken or damaged bathroom mirror can range from a loose clip to a cracked panel to a fully desilverized surface. Each problem has a specific fix. This guide covers the three most common scenarios: reattaching a mirror that has lost its clips or backing, repairing minor cracks with epoxy, and replacing a mirror that is beyond saving.
Safety First
Before any mirror work, put on cut-resistant gloves and safety glasses. Mirror glass is thin and sharp — even a mirror that looks intact can fracture unexpectedly during handling. If a mirror is already cracked, treat it as fragile glass at all times.
Scenario 1: Loose or Missing Mirror Clips
Most frameless bathroom mirrors hang on a J-channel bracket along the bottom and metal side clips at the top corners. If the mirror is drooping or wobbling, the clips have likely come loose or the J-channel has pulled away from the wall.
Tools and Materials
- Power drill and bits
- Wall anchors appropriate for your wall type
- Replacement mirror mounting clips
- Level
Steps
- Carefully lift the mirror off the existing J-channel and lean it securely against a wall or lay it flat on a protected surface.
- Remove the old J-channel and clips. Fill old screw holes with spackle if they are in poor condition.
- Use a level to mark the new J-channel position along the bottom of the mirror location.
- Drill pilot holes and drive screws into wall studs or use appropriate drywall anchors.
- Mount the J-channel, set the mirror in place, and install the top and side clips snugly — finger-tight, then a quarter-turn more. Clips that are overtightened can crack the glass.
- Check that the mirror is level before fully tightening all fasteners.
Scenario 2: Re-adhering a Mirror with Mirror Mastic
If the mirror was glued directly to the wall and has begun to sag or pull away, you can re-adhere it using mirror-safe mastic.
Tools and Materials
- Mirror-safe mastic or mirror adhesive
- Painter’s tape
- Caulk gun
- Putty knife
Steps
- If the mirror is partially detached, support it with temporary props or tape it to the wall while you work.
- Working from one corner, carefully press the mirror away from the wall slightly and inject fresh mirror mastic behind it using a caulk gun with a long nozzle.
- Press the mirror firmly back against the wall and tape it in place with painter’s tape run across the face and secured to the wall on both sides.
- Allow the adhesive to cure for 24-48 hours before removing the tape support.
If the mirror has fully detached, clean the old adhesive residue from the wall, apply fresh mastic in vertical ribbons or dabs (not full coverage — some air circulation prevents moisture buildup behind the glass), press the mirror into place, and support it until cured.
Scenario 3: Repairing a Cracked Mirror with Epoxy
A hairline crack that has not compromised the structural integrity of the mirror can be stabilized with clear epoxy resin.
- Clean the crack thoroughly with rubbing alcohol and allow it to dry completely.
- Mix a small amount of clear two-part epoxy resin.
- Use a razor blade to carefully work the epoxy into the crack.
- Wipe off any excess with a clean cloth before it sets.
- Allow to cure per the manufacturer’s instructions.
This repair stops the crack from spreading and reduces light refraction at the fracture line, but it will still be visible up close. If the mirror is heavily cracked, a full replacement is the better choice.
Scenario 4: Full Mirror Replacement
When a mirror is shattered, deeply cracked, or heavily desilverized, replacement is the most practical solution. Measure the opening precisely — height, width, and depth of any recess — before ordering.
For a standard over-vanity mirror, bring your measurements to a local glass shop for a custom-cut replacement, or order a pre-sized frameless mirror online. Mount using the clip or adhesive method described above.
To add a frame to a frameless mirror, use mirror frame molding kits that adhere directly to the mirror face — no tools required, and they can also hide minor edge desilvering.
Maintenance Tips
- Use only vinegar-and-water or ammonia-free glass cleaner on bathroom mirrors. Ammonia-based cleaners accelerate desilvering at the edges.
- Never spray cleaner directly onto the mirror — spray onto a cloth first to prevent solution from wicking behind the glass and attacking the backing.
- Inspect mounting clips annually and tighten any that have loosened.
Related Reading
- How to Fix a Broken Medicine Cabinet Door — repair or replace a sagging or detached medicine cabinet door
- Scenario 1: Loose or Missing Mirror Clips
Most frameless bathroom mirrors hang on a J-channel bracket along the bottom and metal side clips at the top corners. If the mirror is drooping or wobbling, the clips have likely come loose or the J-channel has pulled away from the wall.
- Scenario 2: Re-adhering a Mirror with Mirror Mastic
If the mirror was glued directly to the wall and has begun to sag or pull away, you can re-adhere it using mirror-safe mastic.
- Scenario 3: Repairing a Cracked Mirror with Epoxy
A hairline crack that has not compromised the structural integrity of the mirror can be stabilized with clear epoxy resin.
- Scenario 4: Full Mirror Replacement
When a mirror is shattered, deeply cracked, or heavily desilverized, replacement is the most practical solution. Measure the opening precisely — height, width, and depth of any recess — before ordering.
Free: 10-Point Home Maintenance Checklist
Prevent costly repairs with this seasonal checklist. Save hundreds every year by catching problems early.
Your checklist is ready!
Open Checklist →Something went wrong. View the checklist here.