How to Fix a Bathtub Drain Stopper: $0–$5 Fix for Pop-Up, Push-Pull, and Trip-Lever Types
Bathtub drain won't hold water or won't open? Identify your stopper type: push-pull (no linkage), pop-up (lift-and-turn), or trip-lever (lever on overflow plate). Adjust the clevis strap or replace the rubber seal — most repairs cost $0–$5 and take 20 minutes.
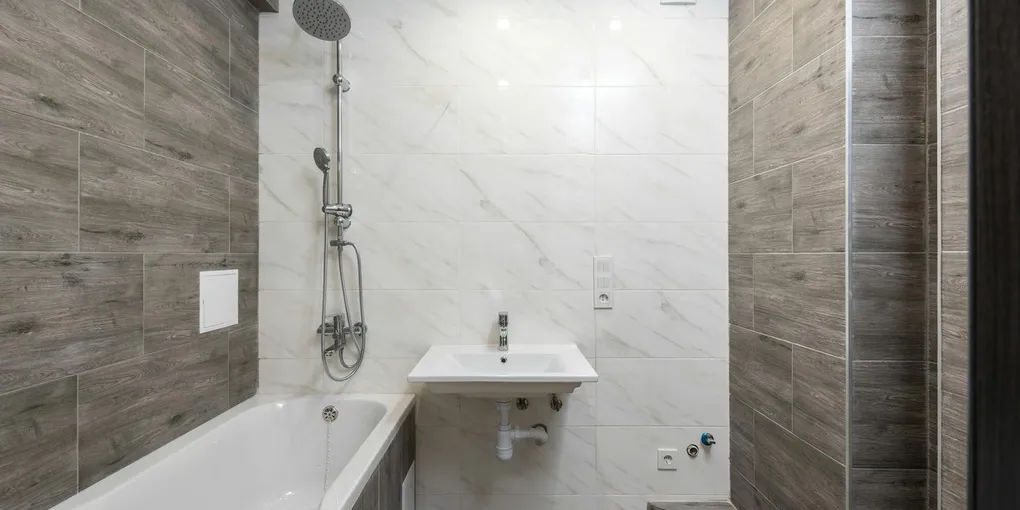
Fix a bathtub drain stopper: (1) Pop-up stopper (the rocker-style that lifts when you pull the toe-tap or overflow lever): remove the stopper by lifting straight up and turning counterclockwise. Clean debris from the rocker arm linkage. Adjust the lift rod in the overflow plate — loosening the adjustment nut and shortening the rod length lifts the stopper higher for a better seal. (2) Trip-lever (lever on overflow plate controls an internal plunger): the plunger is at the bottom of the overflow tube — remove it and clean off the assembly. Adjust the linkage rod length to move the plunger lower for a better seal. (3) Push-pull or toe-tap stopper: unscrew the stopper counterclockwise directly.
Frequently Asked Questions
What type of bathtub drain stopper do I have?
Bathtub stopper types: (1) Pop-up stopper — a visible stopper cap sits in the drain opening. It lifts and lowers via a rocker arm mechanism connected to a trip lever on the overflow plate (the chrome plate on the tub face about 8 inches above the drain). When you flip the lever up, the rocker arm lifts the stopper out of the drain. When you flip it down, it pushes the stopper into the drain. (2) Trip-lever / plunger-style — the overflow plate has a lever but there is NO visible stopper in the drain opening. Instead, an internal plunger (a brass or zinc cylinder) rides up and down inside the overflow tube. When lowered, it blocks water from entering the overflow drain, allowing the tub to fill. The drain opening itself is open — water drains freely but cannot reach the overflow. (3) Push-pull or toe-tap stopper — a simple threaded cylinder that screws into the drain cross-bar. You push it down to seal, push again to release (or in the case of a toe-tap, push with your toe). There is no lever on the overflow plate — the overflow plate is just a cover with no mechanism. (4) Lift-and-turn — similar to push-pull but you lift and rotate to open, push down and rotate to lock closed.
How do I fix a pop-up drain stopper that won't seal?
Pop-up stopper not sealing — repair: (1) Remove the stopper: lift the stopper straight up out of the drain, then rotate counterclockwise. Some pop-up stoppers have a set screw on the side — loosen it before removing. The stopper should pull out with some resistance. (2) Clean the stopper and the drain seat: hair, soap scum, and debris on the stopper base or the drain seat prevents a good seal. Clean both the rubber or plastic seal on the stopper base and the drain seat it contacts. (3) Access the linkage: remove the overflow plate (two screws on the tub face above the drain). The lift rod and linkage assembly hang down inside the overflow tube — pull it out carefully. (4) Adjust the linkage: the lift rod connects to the stopper rocker arm via threaded adjustment nuts. To make the stopper seat more firmly (better seal): shorten the lift rod by threading the lower nut upward, reducing the rod's effective length. This causes the rocker arm to push the stopper into the drain with more force when the lever is in the closed position. (5) Reinstall: feed the linkage back down the overflow tube, replace the overflow plate, reinstall the stopper, and test.
How do I fix a trip-lever drain that won't hold water?
Trip-lever plunger drain repair: (1) Remove the overflow plate: unscrew the two screws holding the chrome overflow cover plate to the tub face. Pull the plate forward — the linkage rod and plunger assembly come out with it. This may require wiggling gently. (2) Inspect the plunger: the plunger is a bullet-shaped or cylindrical metal piece at the bottom of the linkage assembly. It should have a rubber seal or be shaped to make a watertight contact with a seat inside the overflow tube. Inspect for: missing or cracked rubber gasket, mineral deposits preventing contact, or corrosion distorting the seal surface. (3) Clean the plunger: remove mineral deposits with white vinegar and a wire brush. Replace the gasket if damaged. (4) Adjust the linkage: if the plunger is not descending far enough to seal, lengthen the linkage rod. The rod connects to the plunger via a threaded coupler with locking nuts — loosen the locking nut and thread the rod to increase its effective length, pushing the plunger deeper. Increase length in small increments (1/4 turn). (5) Test: reassemble partially, turn the lever to closed, and fill the tub. If water still drains at the overflow: lengthen the rod further. If the drain won't open completely: the plunger is too deep — shorten the rod.
How do I remove and replace a push-pull or toe-tap stopper?
Push-pull / toe-tap stopper removal and replacement: (1) These stoppers are threaded directly onto a post in the drain opening. Removal is straightforward: flip the stopper to its open (up) position, then turn counterclockwise. Most will unscrew by hand. If it resists, grip the edge of the stopper body with pliers (wrap with a cloth to protect the finish) and turn counterclockwise. (2) Take the old stopper to the hardware store to match: the thread size (most are 3/8 inch x 16 TPI or 1/4 inch x 20 TPI) and the overall diameter. (3) Some toe-tap stoppers require removing the decorative cap first: use a small flat screwdriver to pop off the cap on top, which exposes the set screw underneath. Loosen the set screw, then unscrew the stopper body. (4) Install the new stopper: thread on clockwise by hand until snug. Test the push/tap action. (5) If the drain crossbar post is stripped: the post is a separate piece threaded into the drain body. A universal replacement drain kit (Watco, Danco) replaces the entire drain assembly including the stopper post and drain body.
What if my bathtub drains slowly even with the stopper open?
Slow drain with stopper open: (1) If the tub drains slowly when the stopper is in the open position, the problem is a clog in the drain, not the stopper. (2) The most common clog location is the P-trap below the tub or hair accumulated around the drain crossbar. (3) Remove the stopper and clean the drain opening: hair and soap scum collect on the stopper body and crossbar. A zip-it tool or bent wire hook can pull hair out of the drain opening. (4) For a trip-lever style with no visible stopper: hair collects on the plunger inside the overflow tube. Pull the linkage assembly out (as described above) and clean the plunger thoroughly. (5) Chemical drain cleaner: use enzyme-based drain cleaner (not lye/sulfuric acid) for hair clogs — safer for tub finishes and more effective on organic material. (6) If the slow drain persists: the P-trap or the main drain line has a blockage. Try a drain snake (25 feet covers most tub-to-main-drain runs). Insert through the overflow opening (which gives a straighter path to the drain line) rather than the main drain opening.
Can I replace a trip-lever drain with a simpler push-pull stopper?
Yes — universal drain conversion kits (Watco, Danco) replace the entire drain body, overflow plate, and stopper mechanism with a simpler system. A push-pull conversion eliminates the internal linkage assembly entirely, replacing it with a push-button stopper in the drain opening. The conversion requires removing the old drain body using a drain wrench (a crossbar tool that fits the drain opening cross) — the drain body unscrews counterclockwise from the tub shoe. This takes about 30-60 minutes. Kits include a new drain body, overflow cover plate, and stopper that fit standard 1.5-inch or 1.625-inch drain openings. If you are frustrated by a repeatedly maladjusted trip-lever mechanism, conversion to push-pull is a worthwhile upgrade.
How do I remove a corroded bathtub drain body?
A seized drain body requires penetrating oil and a drain wrench. Apply PB Blaster or Kroil around the drain flange where it meets the tub, and let it soak for 30-60 minutes. Insert the drain wrench into the drain crossbar slots and turn counterclockwise — use a long screwdriver through the wrench handle for leverage if needed. For extreme corrosion, carefully use a rotary tool to cut through the old drain flange in two places without damaging the tub surface, then collapse and remove the sections with pliers. Replace with a new drain body, threading it clockwise into the tub shoe and sealing with plumber's putty under the flange.
Fix a bathtub drain stopper: (1) Pop-up stopper (the rocker-style that lifts when you pull the toe-tap or overflow lever): remove the stopper by lifting straight up and turning counterclockwise. Clean debris from the rocker arm linkage.
Adjust the linkage rod length before buying parts — most stopper problems are a misadjusted lift rod, not a broken stopper.
What you need
- Flathead screwdriver (for overflow plate and adjustment nuts)
- Replacement stopper if needed ($5–$15, match type and drain diameter)
- Zip-it or drain hair removal tool
Step 1: Identify your stopper type
Pop-up (lever on overflow plate + visible stopper), trip-lever (lever on plate, no stopper in drain), or push-pull/toe-tap (no lever, stopper twists or pushes).
Step 2: Remove and clean
Pull out the stopper or remove the overflow plate to access the linkage assembly. Clean all debris, soap scum, and mineral deposits.
Step 3: Adjust the linkage
For pop-up: shorten the lift rod to seal more firmly. For trip-lever: lengthen the rod to push the plunger deeper. Make 1/4-turn adjustments and test.
Step 4: Reassemble and test
Fill the tub to verify the seal holds. Test the release. Adjust further if needed.
Related guides
- How to Unclog a Shower Drain — clearing hair clogs when the stopper is open
- How to Caulk a Bathtub — re-seal the tub perimeter after any plumbing access
- How to Fix a Chipped Bathtub — porcelain and fiberglass tub surface repair
- How to Fix a Broken Bathroom Sink Stopper — repair the pop-up stopper on a bathroom sink using the same techniques
- Identify your stopper type
Pop-up stopper: visible stopper cap with a trip lever on the overflow plate (the chrome plate on the tub face above the drain). Trip-lever: lever on overflow plate but NO visible stopper in the drain — an internal plunger inside the overflow tube does the sealing. Push-pull or toe-tap: stopper in the drain opening with no lever on the overflow plate.
- Remove and clean the assembly
Pop-up: lift the stopper straight up, rotate counterclockwise to remove. Remove overflow plate screws and pull out the linkage assembly. Clean all hair, soap scum, and mineral deposits from the stopper, rocker arm, and linkage. Trip-lever: unscrew the overflow plate and pull the linkage with plunger out of the tube. Clean the plunger and inspect its rubber seal. Push-pull: unscrew the stopper counterclockwise from the drain crossbar.
- Adjust the linkage rod length
Pop-up stopper won't seal: shorten the lift rod by threading the lower adjustment nut upward — this pushes the stopper into the drain with more force. Pop-up won't open: lengthen the rod. Trip-lever won't seal: lengthen the linkage rod to push the plunger deeper into the tube. Adjust in small increments (1/4 turn at a time) and test after each change.
- Reassemble and test
Feed the linkage back down the overflow tube and reinstall the overflow plate. Reinstall the stopper. Fill the tub to verify the seal holds — the water level should not drop. Test that the stopper releases fully when opened. If the drain still won't seal after adjustment: replace the stopper gasket or the full stopper ($5–$15).
Free: 10-Point Home Maintenance Checklist
Prevent costly repairs with this seasonal checklist. Save hundreds every year by catching problems early.
Your checklist is ready!
Open Checklist →Something went wrong. View the checklist here.