How to Fix a Bathroom Floor Tile
Repair a loose, cracked, or stained bathroom floor tile by safely removing it, applying fresh thinset, setting a replacement tile, grouting, and sealing the finished repair.
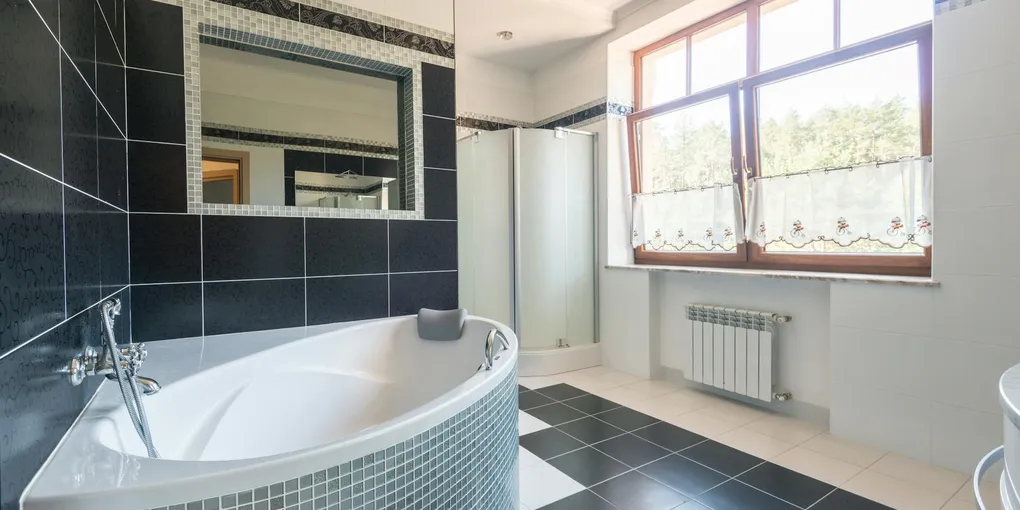
Fixing a loose or cracked bathroom floor tile: (1) Score around the tile with a grout saw or oscillating tool to remove the grout. (2) For a cracked tile: break it up with a chisel and hammer to remove in pieces. For a loose tile: pop it up with a floor scraper. (3) Scrape all old thinset off the subfloor until flat. (4) Apply fresh thinset with a notched trowel. (5) Set the replacement tile, press firmly, and use spacers to match existing grout lines. (6) Let cure 24 hours, then grout with color-matched grout. (7) Let cure 72 hours, then apply grout sealer. Getting an exact tile match is the hardest part — bring the old tile to a tile store if you don't have extras.
Frequently Asked Questions
How do I remove a single bathroom floor tile without cracking the surrounding tiles?
Grind out the grout around the damaged tile first using an oscillating tool with a grout removal blade. This removes the mechanical connection between tiles before you apply any prying force. Then work a wide chisel into the joint and tap it gently toward the center of the tile — never toward the adjacent tile. Taking 15 extra minutes on grout removal prevents cracking a $4 tile from turning into a $200 repair.
Why does my bathroom floor tile feel hollow when I tap it?
A hollow sound when you tap a tile means the bond between the tile and the thinset or mortar bed has failed, leaving a void. This happens when original thinset coverage was insufficient, when moisture worked under the tile, or when subfloor movement cracked the adhesive bond. A tile that sounds hollow will eventually crack or loosen completely — it is worth re-bonding now before it becomes a trip hazard.
Can I re-bond a loose tile without removing it?
Sometimes, using a specialized tile injection adhesive. Drill one or two small holes through the grout joint (not the tile), inject low-viscosity epoxy tile adhesive, then press the tile down firmly and weight it for 24 hours. This works best when the tile itself is undamaged and the void is small. If the tile has already cracked, or if there is any water damage under it, full removal is the right approach.
How do I find a matching replacement tile?
Check if leftover tiles were stored in the home — many builders leave extras in the attic, garage, or under a sink. If not, bring a full tile or a high-quality photo to tile specialty stores, not big-box stores, as they have access to a wider range of patterns and can sometimes identify discontinued lines. As a last resort, an unmatched tile in a less visible corner of the floor can be swapped to the damaged spot.
What grout should I use for a bathroom floor repair?
For joints under 1/8 inch wide, use unsanded grout. For joints 1/8 inch and wider (common in floor tile), use sanded grout. Match the grout color to the existing grout as closely as possible — bring a chip of the old grout or a photo to the hardware store. For high-moisture bathrooms, consider epoxy grout, which resists staining and mold far better than standard cement grout.
Do I need to seal grout after repairing bathroom floor tile?
Yes, always seal new grout on bathroom floors. Unsealed cement grout absorbs moisture and stains within weeks in a bathroom environment. Apply a penetrating grout sealer after the grout has cured for at least 72 hours. Wipe off any excess sealer from the tile surface within 5 minutes to avoid a hazy residue. Reapply sealer annually or whenever water stops beading on the grout surface.
What causes bathroom floor tiles to crack, and how do I prevent it?
The most common causes: (1) Subfloor flex — if the subfloor deflects under foot traffic, tile joints crack over time. The fix is securing loose subfloor screws or adding a layer of cement backer board. (2) Inadequate thinset coverage — air pockets under tile leave hollow spots that crack when loaded. Proper thinset coverage should be 80–95% of the tile back surface. (3) Grout joints that are too narrow — less than 1/16 inch gives no room for minor movement, causing cracked tiles and cracked grout. (4) Point load impacts — dropping a heavy object on one spot. (5) Settling or heaving — foundation movement that works its way into the floor. To prevent future cracking: use a crack isolation membrane (like Schluter Ditra) between the subfloor and the tile layer — it absorbs minor subfloor movement before it reaches the tile.
Can I fix a cracked tile without replacing it?
For cosmetic cracks that don't affect the structural integrity (thin hairline cracks with no missing pieces): use a tile crack repair kit — an epoxy-based filler tinted to match the tile color ($10–$20 at hardware stores). Clean the crack, apply the epoxy with a putty knife, and wipe the excess immediately. Results are visible but reduce the eyesore. This is a cosmetic fix, not a structural one — it does not restore the tile's load capacity. For functional cracks (missing pieces, cracked through, hollow sound, or moisture intrusion risk): replacement is the right answer. A cracked tile in a shower or wet area must be replaced — water infiltrates through even hairline cracks and causes moisture damage to the substrate and subfloor.
Fixing a loose or cracked bathroom floor tile: (1) Score around the tile with a grout saw or oscillating tool to remove the grout. (2) For a cracked tile: break it up with a chisel and hammer to remove in pieces.
A cracked, loose, or badly stained bathroom floor tile is more than an eyesore — it can allow water to seep under the floor, eventually rotting the subfloor and creating an expensive structural problem. The encouraging fact is that replacing a single tile is a straightforward DIY repair. You do not need experience with large-scale tile work to pull off a clean, invisible patch. The key is patient preparation: proper grout removal before prying, thorough thinset coverage on installation, and full cure time before traffic.
This guide walks through the complete repair sequence — diagnosing the problem, safely removing the damaged tile, preparing the substrate, setting the replacement, grouting, and sealing. A careful first-time DIYer can complete this repair in one weekend with the tools and materials listed below.
What You Need
- Oscillating multi-tool with grout blade — fastest and safest way to cut grout before tile removal
- Modified thinset mortar — polymer-modified type is more forgiving and bonds better than unmodified
- Margin trowel and notched trowel — 1/4-inch V-notch for floor tiles up to 12 inches, larger notch for bigger tiles
- Unsanded and sanded grout — match color and joint size to existing grout
- Penetrating grout sealer — protects finished joints from moisture and staining
- Tile spacers — maintain consistent joint width while the thinset cures
Safety and Preparation
Wear eye protection throughout grout grinding and tile removal. Tile and grout fragments are sharp, and an oscillating tool throws debris.
Test for asbestos if your home was built before 1980. Floor tile adhesives from that era sometimes contained asbestos. Purchase an inexpensive asbestos test kit at the hardware store, collect a small sample of the old adhesive, and mail it in before disturbing any material. If the result is positive, hire a licensed abatement contractor.
Protect adjacent tile. Before any prying, apply painter’s tape to the edges of all four surrounding tiles. This will not prevent mechanical damage from hard prying, but it reduces scratches from chisel edges.
Step 1 — Remove the Grout
The grout joints are what hold adjacent tiles together. If you skip this step and go straight to prying, you will almost certainly crack one or more surrounding tiles.
Fit the oscillating tool with a grout removal blade and set the depth to match your grout joint thickness — typically 1/4 inch for floor tile. Run the blade along all four sides of the damaged tile, staying in the center of each joint. Work slowly; the goal is to remove the full depth of grout without touching the tile faces on either side.
For narrow joints or tight corners, a manual grout saw (a carbide-tipped hand tool) gives you more control than the oscillating tool. It is slower, but it eliminates the risk of blade wander into the adjacent tile face.
Once the grout is cleared from all four joints, you should be able to insert a thin putty knife into the joint and feel open space down to the substrate — no grout bridging between tiles.
Step 2 — Remove the Damaged Tile
With the grout fully removed, tile removal is controlled and relatively low-risk.
- Place a wide cold chisel or floor chisel against the center of one joint, angled slightly toward the center of the damaged tile.
- Tap the chisel with a hammer using moderate force — you are trying to break the thinset bond, not smash through the tile.
- Work around all four sides before the tile releases. Attempting to pry from one side only increases the chance of the chisel skipping sideways onto an adjacent tile.
- Once the tile pops loose, remove it and the underlying thinset from the substrate.
Cleaning the substrate: Use the oscillating tool with a scraper blade, or a manual floor scraper, to remove all old thinset down to the substrate surface. The goal is a flat surface with no ridges of old adhesive that would cause the new tile to sit high or rock.
Vacuum and wipe the area clean. If the substrate is cement board or concrete, lightly mist it with water before applying new thinset — dry surfaces pull moisture out of thinset too quickly and weaken the bond.
Step 3 — Inspect the Substrate
Before setting the replacement tile, spend a few minutes examining the subfloor.
Check for water damage. Press a finger firmly onto the substrate. Soft, spongy, or discolored material indicates water infiltration. If the cement board or plywood feels soft, probe it with a screwdriver. Material that crumbles or easily dents needs to be replaced before you tile over it — otherwise the new tile will fail in the same way.
Check for level. Set a small level or a straight edge across the repair area and the surrounding tiles. The substrate should be flat within 1/8 inch over any 10-foot span (the industry standard). If there is a low spot, fill it with floor leveling compound and allow it to cure before proceeding.
Check for movement. Step on the subfloor in the repair area. Any flex or bounce indicates subfloor or joist issues that should be addressed before retiling. A tile repair over a springy floor will crack again quickly.
Step 4 — Set the Replacement Tile
With a clean, flat, structurally sound substrate, you are ready to set tile.
Back-butter and comb the substrate:
- Mix modified thinset to a peanut butter consistency — it should hold a ridge without slumping.
- Apply thinset to the substrate with the flat side of the notched trowel, then comb ridges with the notched side. Use a 1/4-inch V-notch trowel for tiles up to 12 inches; use a 3/8-inch square-notch for 12-inch and larger tiles.
- Back-butter the replacement tile itself with a thin coat of thinset spread flat — this eliminates any air pockets on the tile back and improves bond coverage.
Setting the tile:
- Press the tile firmly down into the thinset, twisting it slightly (about 15 degrees) as you press to collapse the ridges and achieve full contact.
- Check that the tile is level with the surrounding tiles using a small level. Adjust height by pressing harder or adding a bit more thinset.
- Insert tile spacers in all four joints to match the existing joint width. Most bathroom floor tile uses 1/16-inch to 1/8-inch spacers.
- Do not walk on the repaired area for at least 24 hours. Wait 48 hours before grouting on concrete or cement board substrates.
Verify coverage: After the thinset has cured enough to lift the tile without disturbing the set (about 2 hours), carefully pry up one corner with a putty knife, look at the tile back, then press it back down. You should see at least 80 percent thinset contact with no bare spots under the center of the tile. If coverage is low, re-set with more thinset.
Step 5 — Apply Grout
Remove the tile spacers once the thinset has cured (typically 24 hours minimum).
- Dampen the joints slightly with a wet brush.
- Mix sanded grout per the package instructions — the consistency should be like thick peanut butter.
- Apply grout with a rubber float held at 45 degrees, pressing firmly to pack the joints completely with no voids.
- Work the float diagonally across the joints to avoid dragging grout back out of the seams.
- Let the grout firm up for 10–20 minutes (it will lose its sheen and feel slightly stiff when pressed).
- Wipe the surface with a damp sponge in a circular motion, rinsing the sponge frequently. You are removing the grout haze from the tile surface while leaving grout packed in the joints.
- Wipe again with a clean damp sponge diagonally across the joints, removing any remaining haze.
- Allow to cure 24–72 hours before heavy traffic and before sealing.
Color matching tip: Mix the entire batch of grout and let it dry on a scrap tile or piece of cardboard before committing. Grout darkens significantly when wet and dries to a lighter, final color. Compare the dried swatch to the existing grout in good lighting before applying.
Step 6 — Seal the Grout
Unsealed grout in a bathroom will absorb water, soap, and mold within weeks. Sealing is a five-minute step that protects the repair for years.
- Allow the grout to cure at least 72 hours before sealing (some products require longer — check the label).
- Apply penetrating grout sealer with a small brush or applicator bottle directly into the joints.
- Allow it to soak in for the time specified on the label (usually 3–5 minutes).
- Wipe any excess sealer off the tile surface before it dries — dried sealer leaves a white haze.
- Apply a second coat after the first has penetrated.
Test the seal after curing: drop a few drops of water on the grout. If the water beads and does not soak in, the seal is effective. If it absorbs, apply another coat.
Addressing Stained Tiles
If your tile is stained but structurally sound (not cracked or loose), you may be able to restore it without removal.
- Soap scum and mineral deposits: Spray with a white vinegar and water solution, let it sit 10 minutes, then scrub with a stiff-bristled nylon brush. For heavy buildup, use a commercial lime and rust remover rated for tile.
- Mold and mildew: Spray with a bleach-and-water solution (1:10 ratio), let sit 15 minutes, scrub, and rinse. Use in a ventilated space.
- Deep staining in grout: If cleaning does not restore the grout color, apply grout colorant or grout paint specifically designed for in-place application. Clean the joints thoroughly first and allow to dry before applying colorant.
Related Reading
- How to Fix a Bathtub Caulk Line
- How to Repair Drywall in a Bathroom
- How to Install a New Bathroom Vanity
- How to Fix a Floor Tile That Is Loose — reattach tiles that shift or clunk underfoot
- Step 1 — Remove the Grout
The grout joints are what hold adjacent tiles together. If you skip this step and go straight to prying, you will almost certainly crack one or more surrounding tiles.
- Step 2 — Remove the Damaged Tile
With the grout fully removed, tile removal is controlled and relatively low-risk.
- Step 3 — Inspect the Substrate
Before setting the replacement tile, spend a few minutes examining the subfloor.
- Step 4 — Set the Replacement Tile
With a clean, flat, structurally sound substrate, you are ready to set tile.
- Step 5 — Apply Grout
Remove the tile spacers once the thinset has cured (typically 24 hours minimum).
- Step 6 — Seal the Grout
Unsealed grout in a bathroom will absorb water, soap, and mold within weeks. Sealing is a five-minute step that protects the repair for years.
Free: 10-Point Home Maintenance Checklist
Prevent costly repairs with this seasonal checklist. Save hundreds every year by catching problems early.
Your checklist is ready!
Open Checklist →Something went wrong. View the checklist here.