How to Add Drip Irrigation to a Raised Garden Bed
Step-by-step guide to setting up drip irrigation in a raised garden bed — components, layout, timer connection, and emitter placement for vegetables and herbs.
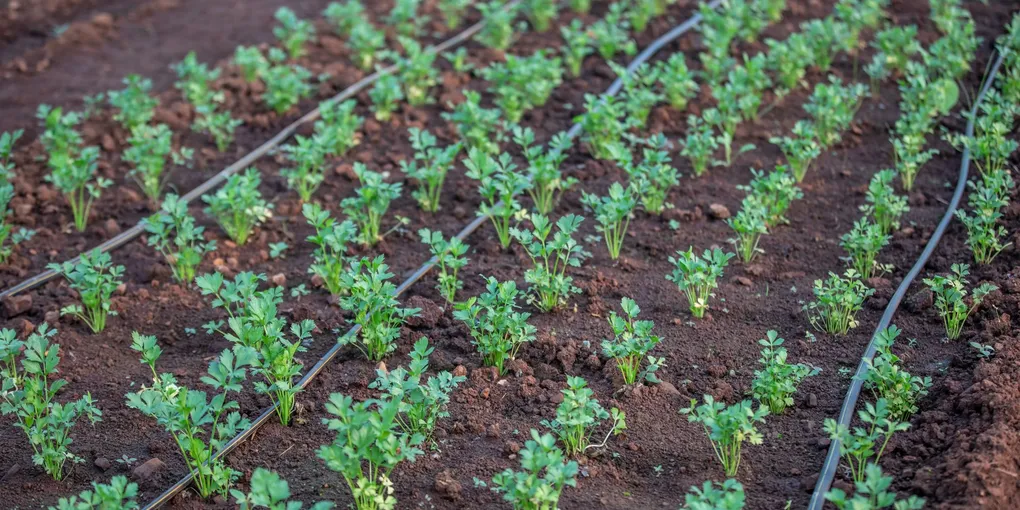
Drip irrigation delivers water directly to plant roots at a slow, steady rate — using 30–50% less water than overhead sprinklers and reducing disease by keeping foliage dry. For a raised bed, you need six components: a hose-thread timer, a backflow preventer, a filter, a pressure regulator, 1/2-inch supply tubing, and 1/4-inch distribution tubing with emitters. Run the supply line along one edge of the bed and branch off 1/4-inch tubing to each plant with a 1 GPH emitter. Program the timer for 20–45 minutes per day depending on plant type and weather.
Frequently Asked Questions
What is drip irrigation and why is it better for garden beds?
Drip irrigation delivers water slowly and directly to the root zone of each plant through small emitters, rather than spraying water over the entire garden from above. Benefits over overhead watering: uses 30–50% less water because water goes exactly where plants need it with minimal evaporation or runoff; reduces fungal disease because foliage stays dry; encourages deeper root growth because water soaks down rather than staying at the surface; can be automated with a timer so you don't forget to water during hot spells. For raised beds in particular, drip systems are efficient because the contained soil dries out faster than in-ground beds and benefits from consistent, targeted moisture.
What components do I need for a drip irrigation system?
A complete drip system for a raised bed has six parts: (1) Timer — connects to your outdoor faucet and automates watering on a schedule. (2) Backflow preventer — a small valve that stops irrigation water from being siphoned back into your household water supply; required by code in most areas. (3) Filter — a fine mesh screen that catches debris before it clogs emitters; most quality systems include one. (4) Pressure regulator — reduces house water pressure (40–80 PSI) to the 15–25 PSI that drip systems require; without it, emitters blow off tubing. (5) 1/2-inch supply tubing — the main line that runs from the faucet assembly to the bed and along its perimeter. (6) 1/4-inch distribution tubing and emitters — the small tubing that branches off the main line to individual plants.
How do I connect drip irrigation to my outdoor faucet?
Assembly order from the faucet outward: hose bib timer (screws onto faucet threads), then backflow preventer, then filter, then pressure regulator, then the 1/2-inch supply line. Many starter kits package the backflow preventer, filter, and pressure regulator as a single assembly unit that threads between the timer and the supply line. Hand-tighten all connections — these are designed to seal without tools. The supply line runs from this assembly along the ground to your raised bed. Use a hose barb fitting to connect the supply line to the timer assembly, and secure it with a hose clamp if the kit doesn't include locking connectors.
How many emitters do I need per plant?
One emitter per plant for most vegetables and herbs. For large plants — tomatoes, zucchini, peppers, eggplant — use two emitters per plant spaced a few inches apart to spread water across the root zone. Emitter flow rate matters more than quantity: 1 GPH (one gallon per hour) emitters are standard for most vegetables. Use 0.5 GPH for herbs and small starts. Use 2 GPH for large, thirsty plants like tomatoes and cucumbers. Place emitters 2–4 inches from the base of the plant, not directly against the stem. For seedlings or seeds, a soaker dripline (perforated 1/4-inch tubing) laid in rows works better than individual emitters.
How long should I run drip irrigation for vegetables?
Run time depends on emitter flow rate, plant water needs, soil type, and weather. A general starting point: 20–30 minutes per day for herbs and light feeders; 30–45 minutes per day for tomatoes, peppers, squash, and cucumbers during peak summer. Run once per day in the morning so plants have moisture during the heat of the day but foliage dries before evening. In raised beds — which drain faster than in-ground beds — you may need to run twice per day during heat waves. Check soil moisture an inch below the surface: it should be consistently damp, not wet and waterlogged, not dry and crumbling. Adjust timer run time in 5-minute increments until you find the right balance for your climate and bed.
How do I winterize a drip irrigation system?
Before the first freeze: (1) Turn off the water supply at the faucet. (2) Disconnect the timer from the faucet and store indoors — timers have electronics and batteries that fail in freezing temperatures. (3) Open the system's low-point drain or disconnect the supply line from the faucet assembly to drain the water. (4) Walk the bed and remove any water-filled emitters or fittings prone to cracking. (5) In mild climates, leaving the tubing in place is fine — just drain it. In climates with sustained hard freezes, detach the supply and distribution tubing and store it in a garage or shed. Coil tubing loosely to avoid kinking. Inspect emitters in spring before reinstalling — freeze damage often shows as cracked emitter bodies.
How do I prevent drip emitters from clogging?
Emitter clogs are the most common drip system failure. Prevention: (1) Keep the inline filter screen clean — rinse it at the start and middle of each growing season; a clogged filter starves the whole system. (2) Flush the supply line seasonally by removing end caps and running water through for 30 seconds to clear sediment before it reaches emitters. (3) Don't inject organic fertilizers through a drip system unless you add a dedicated fertilizer injector with an extra fine filter — organic particles clog emitters within days. (4) Check each emitter monthly by holding your hand under it during a run cycle and confirming a steady drip. (5) Clear a clogged emitter by removing it and soaking in white vinegar for 30 minutes, or simply replace it — emitters cost $0.10–$0.30 each.
What garden plants should not use drip emitters?
Drip emitters work poorly for: (1) Seeded rows (carrots, beets, radishes, lettuce, beans) — seeds need uniform surface moisture to germinate; use a soaker dripline (perforated 1/4-inch tubing) laid in rows instead of spot emitters. (2) Drought-tolerant herbs like rosemary, lavender, and thyme that prefer drying out between waterings — daily drip runs overwater these plants and cause root rot. Give them a separate zone on a less frequent schedule, or hand-water. (3) Lawn areas — drip coverage gaps make irrigation uneven; use sprinkler heads for turf. For mixed beds with both thirsty and drought-tolerant plants, group by water needs and run separate zones or use adjustable emitters (0.5 GPH for drought-tolerant, 1-2 GPH for heavy feeders).
Drip irrigation delivers water directly to plant roots at a slow, steady rate — using 30–50% less water than overhead sprinklers and reducing disease by keeping foliage dry. For a raised bed, you need six components: a hose-thread timer, a backflow preventer, a filter, a pressure regulator, 1/2-inch supply tubing, and 1/4-inch distribution tubing with emitters.
A drip system in a raised bed is one of the highest-return garden upgrades you can make. Plants are healthier, water bills go down, and you stop losing crops to forgotten watering during summer travel.
Why drip works better than overhead watering
Overhead watering — hose, sprinkler, or watering can — puts water everywhere and loses a significant portion to evaporation before it ever reaches roots. Drip delivers water at the root zone at a rate the soil can absorb without runoff. For raised beds specifically, which drain freely and dry out faster than in-ground soil, this targeted delivery means consistent moisture with 30–50% less water than overhead methods.
Dry foliage also means dramatically less fungal disease. Tomato blight, powdery mildew, and most common vegetable diseases spread through moisture on leaves.
System components and why each matters
A complete raised-bed drip system has six components. Each one has a specific job and leaving any out causes problems.
1. Timer The timer connects directly to your outdoor faucet and controls when and how long the system runs. Even a basic single-zone battery-powered timer ($25–$45) eliminates the need to remember to water. Look for a model with daily and multiple-per-day scheduling. The timer mounts last (closest to the faucet) so it can shut off the entire system.
2. Backflow preventer A backflow preventer is a one-way valve that prevents irrigation water — which may contact soil, fertilizer, and plant material — from being sucked back into your household supply if pressure drops. Most local codes require one any time you connect irrigation to a potable water supply. It costs $5–$10 and fits between the timer and the filter.
3. Filter Drip emitters have very small openings — a tiny piece of grit can clog an emitter and leave a plant unwatered without you noticing. A filter (usually a 155-mesh screen) catches sediment and particles before they reach emitters. Most kits include one. Clean the screen at the start and middle of each season.
4. Pressure regulator House water pressure typically runs 40–80 PSI. Drip systems are designed for 15–25 PSI. Too much pressure pops emitters off tubing and causes uneven flow. A pressure regulator — a small inline valve that steps down pressure — protects the system. It installs between the filter and the supply line.
5. 1/2-inch supply tubing The main supply line carries water from the faucet assembly to the bed and runs along the perimeter. This is the backbone of the system — 1/4-inch distribution lines branch off it.
6. 1/4-inch distribution tubing and emitters Short runs of 1/4-inch tubing connect from the supply line to individual plants, terminating in a drip emitter. The emitter controls the flow rate (typically 0.5, 1, or 2 GPH).
Shop drip irrigation kits for raised beds | Shop garden timers | Shop pressure regulators | Shop backflow preventers
Layout planning
Before buying components, sketch your bed and plant layout.
Mark the position of each plant. For most raised beds, a single 1/2-inch supply line runs along one long edge of the bed, with 1/4-inch lines branching off perpendicular to reach each plant. In a 4x8 bed, you typically need 8–10 feet of 1/2-inch supply tubing (with some slack for the run from the faucet) and 2–3 feet of 1/4-inch tubing per plant.
Emitter placement:
- One 1 GPH emitter per plant for most vegetables and herbs
- Two 1 GPH emitters per plant for large plants (tomatoes, zucchini, peppers)
- 0.5 GPH emitters for herbs and small plants
- For transplants and seeds, 1/4-inch soaker drip lines laid in rows cover more area than individual emitters
Shop 1 GPH drip emitters | Shop 1/4-inch drip tubing
Step-by-step setup
-
Assemble the faucet connection: Thread the backflow preventer onto the outdoor faucet (hand-tight). Attach the filter to the backflow preventer. Attach the pressure regulator to the filter. Thread the hose-barb supply line fitting onto the pressure regulator. Attach the timer last — or put it first (closest to the faucet), with the rest of the assembly hanging below it.
-
Run the supply line: Connect 1/2-inch tubing to the faucet assembly and run it to the raised bed. Use stakes or clips to keep it on the ground or along the bed frame edge. Run it along one long edge of the bed inside the bed.
-
Cap the end of the supply line: Install an end cap or fold-over clamp at the far end of the supply line. This seals the system.
-
Install 1/4-inch distribution lines: Use a hole punch to punch holes in the supply line at each plant position. Insert barbed tee fittings or straight emitter fittings. Run 1/4-inch tubing from each fitting to the plant, cutting to length with scissors.
-
Install emitters: Push the emitter into the open end of each 1/4-inch line at the plant. Press the emitter stake into the soil 2–4 inches from the plant stem.
-
Program the timer: Set frequency (once daily in most cases) and duration (start with 25–30 minutes and adjust based on soil moisture checks).
-
Test the system: Turn the faucet on and run a manual cycle. Check that all emitters drip, that no connections are leaking, and that the end cap is holding. Look for any 1/4-inch lines that popped off their barb fittings — push them back on firmly.
Timer programming by plant type
| Plant type | Starting run time | Frequency |
|---|---|---|
| Herbs (basil, parsley, thyme) | 15–20 min | Daily |
| Lettuce, greens, radishes | 20–25 min | Daily |
| Tomatoes, peppers, eggplant | 35–45 min | Daily |
| Cucumbers, squash, zucchini | 30–40 min | Daily |
| Beans, peas | 20–30 min | Daily |
Check soil moisture 2 inches below the surface after the first week. Moist but not saturated is the target. Adjust run time up if the soil is dry, down if water is pooling on the surface.
During heat waves (sustained temperatures above 95°F), add a second short cycle in the afternoon or extend morning run time by 10–15 minutes.
Winterization
When the growing season ends:
- Turn off the faucet supply valve.
- Disconnect and store the timer indoors to protect its electronics and battery from freezing.
- Disconnect the supply line from the faucet assembly to allow the system to drain.
- In mild climates (temperatures staying above 25°F), tubing can remain in the bed through winter if fully drained.
- In hard-freeze climates, roll up and store the supply and distribution tubing in a garage or shed. Inspect emitters before reinstalling in spring — freeze damage cracks emitter bodies and affects flow rate.
Related guides
- How to Build a Raised Garden Bed
- How to Winterize a Sprinkler System
- How to Lay Sod
- How to Fix a Broken Outdoor Spigot Vacuum Breaker — repair the vacuum breaker on the spigot feeding your irrigation line
- Assemble the faucet connection
Thread the components onto the outdoor faucet in order: timer first (closest to faucet), then backflow preventer, then filter, then pressure regulator. Hand-tighten all connections — these are designed to seal without tools. Connect the 1/2-inch supply tubing to the pressure regulator with a hose barb fitting.
- Run the supply tubing along the bed
Route the 1/2-inch main supply line from the faucet assembly along one edge of the raised bed. Secure the tubing with stake anchors every 2–3 feet. Add an end cap at the far end of the supply line.
- Branch 1/4-inch distribution tubing to each plant
Use a hole punch to make holes in the 1/2-inch supply line at each plant location. Insert barbed T-fittings or goof plugs and run 1/4-inch tubing to each plant. Secure distribution tubing with ground stakes to keep emitters positioned at the root zone.
- Install emitters and test the system
Insert a 1 GPH emitter at the end of each 1/4-inch tube, positioned 2–4 inches from the plant base. Use 2 GPH emitters for tomatoes and large plants. Turn on the water and check every emitter for flow — cap off any unused holes in the supply line with goof plugs.
- Program the timer
Set the timer to run 20–30 minutes per day for herbs, 30–45 minutes for tomatoes and cucumbers. Run in the morning so foliage dries before evening. After the first week, check soil moisture an inch below the surface and adjust run time in 5-minute increments until soil stays consistently damp but not waterlogged.
Free: 10-Point Home Maintenance Checklist
Prevent costly repairs with this seasonal checklist. Save hundreds every year by catching problems early.
Your checklist is ready!
Open Checklist →Something went wrong. View the checklist here.