How to Remove a Wall: Load-Bearing vs Non-Load-Bearing (2026)
Removing a wall opens up living space but requires identifying whether the wall is load-bearing. This guide covers how to determine if a wall carries load, when to add a beam, the permit process, and demolition sequence.
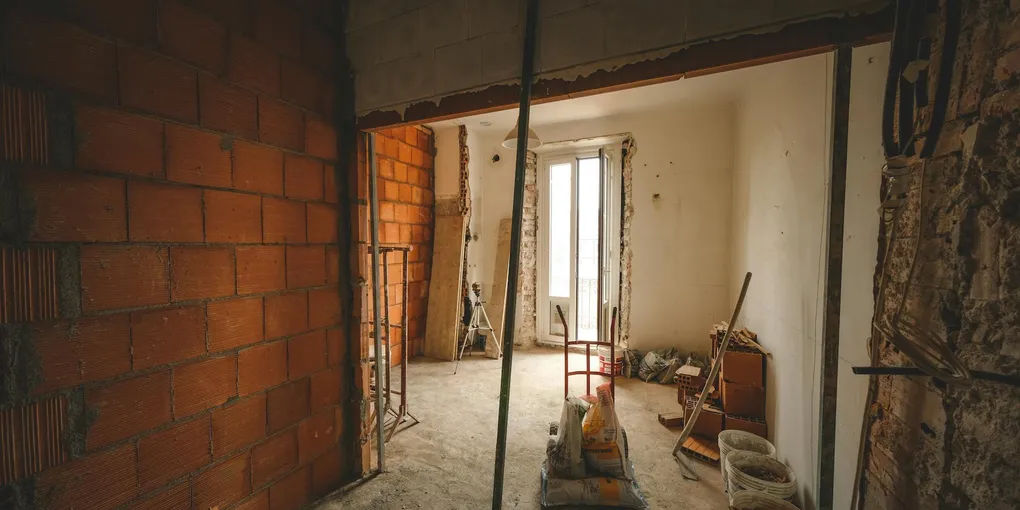
Before removing any wall: determine if it is load-bearing. Signs a wall may be load-bearing: it runs perpendicular to the floor joists, it sits above a beam or wall in the basement/crawl space, it is near the center of the house. Signs it is likely not load-bearing: it runs parallel to floor joists, it is an obvious partition wall added to divide a room, there is nothing above or below it in the same line. When in doubt, hire a structural engineer ($300–$600) to confirm before cutting — removing a load-bearing wall without a proper beam can cause serious structural damage.
Frequently Asked Questions
How do I find out if a wall is load-bearing?
Four checks: (1) Go to the basement or crawl space — if there is a beam, wall, or post directly below the wall in question, it is likely load-bearing. (2) Check the direction of floor joists — walls running perpendicular to joists carry load; walls parallel to joists usually don't. Find joist direction in the attic or basement. (3) Look at the wall's position — exterior walls are always load-bearing. Interior walls near the center of the house or that align with walls above and below are likely load-bearing. (4) Hire a structural engineer if uncertain — the cost of a consultation ($300–$600) is trivial compared to the cost of getting it wrong.
What is a structural beam and when do I need one?
When you remove a load-bearing wall, the weight it was carrying doesn't disappear — it needs a new path to the foundation. A structural beam (LVL, glulam, or steel) spans the opening and transfers load to posts at each end, which carry it to the foundation. Beam sizing depends on the span and load — a structural engineer calculates this. For openings up to 10 feet in most single-story homes, a 3.5x9.5-inch LVL beam is common. For two-story applications or longer spans, larger beams are required.
Do I need a permit to remove a wall?
For any load-bearing wall removal: yes, always. Most jurisdictions require a permit, structural drawings, and inspection. Non-load-bearing partition walls: rules vary — many jurisdictions allow removal of partition walls without a permit, but if electrical, plumbing, or HVAC runs through the wall, those systems require permits when rerouted. Check with your local building department. Unpermitted structural work can be discovered during home sale inspection and can void homeowner's insurance.
What is in a typical interior wall?
A typical interior wall contains: wood stud framing (2x4 studs at 16 inches on center), drywall on both sides, possibly insulation (sound insulation or fire-rated insulation between floors), and potentially: electrical wiring, plumbing pipes, HVAC ducts, or low-voltage cabling (ethernet, coax). Before cutting, use a stud finder with electrical detection mode and turn off power to circuits in the area. Check for plumbing by inspecting the basement/crawl space for pipes running up through the wall location.
How long does it take to remove a non-load-bearing wall?
A weekend for a typical 8-foot non-load-bearing partition wall with no utilities: one day for demo and framing cleanup, one day for drywall patching and finishing. Add 1–2 days if utilities need rerouting. Add permit wait time (1–4 weeks) for load-bearing work. Professional wall removal: $1,200–$5,000+ for load-bearing with beam; $500–$1,200 for non-load-bearing.
Before removing any wall: determine if it is load-bearing. Signs a wall may be load-bearing: it runs perpendicular to the floor joists, it sits above a beam or wall in the basement/crawl space, it is near the center of the house.
Removing a wall is a major project. Do the structural homework before swinging a hammer.
What you need
- Stud finder (with AC wire detection)
- Reciprocating saw or drywall saw
- Pry bar and hammer
- Shop vac (demolition creates a lot of dust)
- Plastic sheeting to contain dust (seal doorways)
- Protective equipment: dust mask, safety glasses
- Structural assessment completed first
Step 1: Determine load-bearing status
Use the four checks in the FAQ above. If you have any doubt: hire a structural engineer.
Step 2: Identify utilities in the wall
Turn off power to circuits in the area at the breaker. Open a small inspection hole (6 inches square) near the bottom of the wall. Look for:
- Wiring
- Pipes
- Ducts
Any utilities must be rerouted before full demolition. This is often a significant part of the cost and timeline. Call a licensed electrician for wiring rerouting; a plumber for pipes.
Step 3: Pull permits
For load-bearing walls: pull a structural permit, submit drawings (usually prepared by a structural engineer), and get approval before starting.
For non-load-bearing walls with no utilities: confirm with your local building department if a permit is needed.
Step 4: Prep the work area
Seal all doorways and openings to adjacent rooms with plastic sheeting. Demolition dust is extremely fine and will penetrate everywhere.
Turn off the HVAC system during demo to prevent dust from entering ductwork.
Step 5: Demo sequence
- Remove trim and baseboards by scoring the caulk line and prying gently.
- Score the drywall at the ceiling and floor to minimize damage to adjacent surfaces.
- Cut out drywall sections between studs (reciprocating saw or utility knife and drywall saw).
- Remove insulation if present.
- Remove studs: cut through any remaining nails at top and bottom plate with a reciprocating saw; pry studs free.
- Remove top plate (header): cut through nails and pry down.
- Remove bottom plate: chisel or oscillating tool to cut flush with floor; pry up.
Step 6: Install beam and posts (load-bearing only)
With the wall removed, the ceiling load must immediately transfer to a temporary wall (built from 2x4s parallel to the removed wall, 2 feet away) while the beam is installed.
Beam installation involves cutting the ceiling drywall, removing the top plate, setting the beam on posts, and connecting all structural elements per the engineer’s drawings.
This work requires a structural engineer’s sign-off and a final inspection. Do not skip this — improperly installed beams fail.
Step 7: Patch and finish
Patch the ceiling and floor where the wall was. Refinish flooring to match. Tape and finish drywall at the transitions. Paint.
Related guides
- How to Patch Drywall — patch ceiling and adjacent walls after removal
- How to Replace an Electrical Outlet — reroute outlets when removing wall
- How to Remove Popcorn Ceiling — redo the ceiling while it is opened up
- Determine load-bearing status and locate utilities
Check the basement or crawl space for a beam or wall directly below the wall in question — that indicates a load-bearing wall. Walls perpendicular to floor joists typically carry load; parallel walls often don't. Exterior walls are always load-bearing. If any doubt remains, hire a structural engineer ($300–$600) before touching the wall. Turn off power to nearby circuits and cut a 6-inch inspection hole near the bottom to check for wiring, pipes, or ducts — these must be rerouted before demolition.
- Pull required permits
For load-bearing wall removal: apply for a structural permit and submit drawings (typically prepared by the structural engineer). Wait for approval before starting. For non-load-bearing partition walls with no utilities: confirm with your local building department whether a permit is needed. Unpermitted structural work can surface during home sale inspections and may void homeowner's insurance.
- Prepare work area and demo the wall
Seal all adjacent doorways and openings with plastic sheeting to contain demolition dust. Turn off the HVAC to prevent dust from entering ductwork. Remove trim and baseboards first by scoring the caulk and prying gently. Cut drywall sections between studs with a reciprocating saw, removing one side then the other. Remove insulation. Cut through nails at top and bottom plates with a reciprocating saw and pry studs free. Chisel or cut the bottom plate flush with the floor.
- Install beam and posts (load-bearing walls only)
Build a temporary support wall from 2x4s parallel to the wall being removed, 2 feet away, to carry the ceiling load while the permanent beam is installed. Cut the ceiling drywall above the wall location, remove the top plate, and set the engineered beam (LVL or glulam, sized per the structural engineer's drawings) on posts at each end. Connect all structural elements per the engineer's specifications and get a final inspection before removing the temporary wall.
- Patch and finish
Patch the ceiling where the wall was removed with new drywall, tape, and joint compound — feather the compound in multiple thin coats. Patch the floor at the base plate location with matching flooring material. Repaint the ceiling and adjacent walls. Install new baseboard trim at the transitions.
Free: 10-Point Home Maintenance Checklist
Prevent costly repairs with this seasonal checklist. Save hundreds every year by catching problems early.
Your checklist is ready!
Open Checklist →Something went wrong. View the checklist here.