How to Fix Leaking Gutters: Sealing Seams, End Caps, and Holes (2026)
Gutter leaks typically occur at seams, end caps, or holes from corrosion — all are DIY repairs costing under $20. This guide covers the correct sealant, cleaning prep, and when to replace a section versus sealing it.
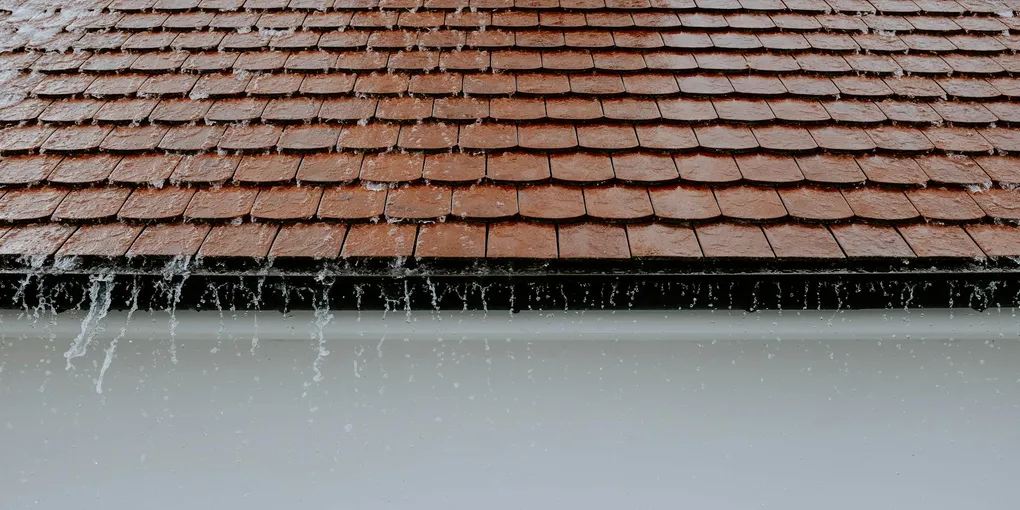
Fix a leaking gutter: (1) Clean and dry the gutter thoroughly — sealant will not bond to wet, dirty metal. (2) The correct product: Gutter and Flashing Sealant (Geocel, Sashco Flash & Foam, or DAP Butyl Rubber Caulk). Do NOT use regular silicone or latex caulk — they do not bond well to aluminum and crack with temperature cycling. (3) Apply from inside the gutter: clean the joint or hole, apply sealant, and tool it into a smooth fillet. (4) End cap leaks: remove the end cap if possible, clean the channel, apply fresh sealant, and press the end cap back. Secure with rivets or sheet metal screws.
Frequently Asked Questions
Why do gutters leak and where do they leak most often?
Common gutter leak locations: (1) Seams — sectional gutters (the most common residential type, made of 10-foot sections) have lapped joints every 10 feet. These joints are sealed with sealant and sometimes rivets at installation. Over 5–10 years, the original sealant dries and cracks, allowing leaks. Seam leaks show up as drips or water stains on the fascia board directly below the joint. (2) End caps — the flat caps at the end of each gutter run. End caps seal the gutter from overflowing at the ends. Failed end cap seals drip at the corners of the house. (3) Downspout outlet — the hole where the downspout connects to the gutter. The connection can pull loose or the sealant around the outlet fitting can fail. Water drips at the downspout location instead of flowing through. (4) Holes from corrosion — aluminum gutters rarely rust, but steel gutters do. Corrosion pinhole leaks appear anywhere along the gutter bottom. Aluminum gutters can develop holes from physical damage or from organic acids in pine needle buildup. (5) Gutter-to-fascia joint — not truly a gutter joint, but water can wick behind a sagging gutter and rot the fascia board. This requires addressing the gutter slope and bracket issues, not just sealant.
What sealant should I use for gutter repairs?
Gutter sealant selection: (1) Gutter and flashing sealant is the correct product — formulations like Geocel 2300 Pro Flex, Sashco Flash & Foam, Tremco Vulkem 116, or DAP Butyl Rubber Caulk. These products are specifically designed to bond to aluminum, galvanized steel, and vinyl gutters, flex with temperature cycles, and remain flexible rather than hard-cracking over time. (2) Products to avoid for gutter repair: standard silicone caulk — does not bond reliably to most gutter metals and loses adhesion. Latex or acrylic caulk — not flexible enough for temperature-cycling metal joints and fails within 1–2 seasons. Roofing cement (tar) — bonds well but is very messy, not UV stable in exposed locations, and difficult to remove when the gutter eventually needs replacement. (3) For application inside the gutter: use a product in a standard caulk tube. For patching small holes: roof patch compound in a can or self-adhesive flashing tape (Eternabond, Flex Seal tape) works as an emergency repair but is less durable than proper sealant. (4) Color match: most gutter sealants are available in white, brown, and gray. Exterior application should be color-matched. Interior application (which is preferred) is not visible.
How do I seal a leaking gutter seam?
Gutter seam sealing procedure: (1) Clean the gutter: remove all leaves, dirt, and debris. The repair area must be clean and dry before applying sealant. (2) Dry the gutter: if the gutter has been wet, use a heat gun or wait for a dry sunny day. Sealant over wet metal will fail within weeks. (3) Clean the old sealant: if old cracked sealant is present in the joint, remove as much as possible with a putty knife or wire brush. You do not need to remove every trace, but loose or crumbled old sealant should be removed. (4) Apply from inside: apply the gutter sealant from inside the gutter, not the outside. The water pressure is inside, so an internal seal is more effective. Apply a bead of sealant along the seam, covering 1–2 inches on each side of the joint. (5) Tool the sealant: press it into the joint and smooth it into a continuous fillet. Wet your finger (for water-based sealant) or use a caulk tool. The sealant should fill the gap and feather smoothly onto both gutter surfaces. (6) Cure time: most gutter sealants cure in 24–48 hours. Do not allow rain to hit the repair for at least 12 hours. (7) Test: run water through the gutter with a hose after curing to confirm the leak is sealed.
How do I fix a leaking gutter end cap?
Gutter end cap repair: (1) If the end cap is still attached and just leaking: try forcing sealant into the joint from the inside. Press sealant around the perimeter where the end cap meets the gutter channel and tool it smooth. (2) If the end cap has pulled away from the gutter: remove it completely. End caps are typically held by a crimped channel and sealant, sometimes with rivets. Pull the cap straight off or use a flat pry bar gently. (3) Clean both the end cap edges and the inside of the gutter end opening. Remove all old sealant. (4) Apply a continuous bead of gutter sealant around the inside perimeter of the end cap. Press the end cap back onto the gutter end, seated fully into the channel. (5) Secure with pop rivets: drill two or three 1/8-inch holes through the end cap and gutter wall, then set aluminum pop rivets (1/8 inch x 1/4 inch). Rivets provide mechanical hold while the sealant seals the gaps. (6) Apply another bead of sealant inside the gutter over the riveted joint for a complete seal. (7) Replacement end caps: if the original end cap is missing or too damaged, universal end caps for 4-inch K-style gutters are available at hardware stores for $3–$8.
How do I patch a hole in a gutter?
Gutter hole patching: (1) Small holes (under 1/2 inch diameter) from corrosion or impact can be patched with roofing cement and a piece of metal mesh, or with self-adhesive flashing tape. (2) Flashing tape method: cut a piece of Eternabond tape or similar self-adhesive flashing membrane (3 inches x 4 inches for a small hole). Clean and dry the surface. Peel the backing and press the tape over the hole firmly, working from the center outward to avoid trapping air. Apply firm hand pressure to adhere all edges. (3) Roof patch + mesh: for holes over 1/4 inch: press a piece of fiberglass mesh or metal window screen over the hole. Apply roofing cement over the mesh and smooth flush with a putty knife. This is more durable than tape alone but messier. (4) Gutter sealant for pinholes: for very small pinholes (corrosion pinholes in steel gutters), apply gutter sealant from inside the gutter directly over the pinhole and feather the edges. The sealant will fill the pinhole under water pressure. (5) When to replace the section: if a gutter section has multiple holes or extensive rust/corrosion, replace the section rather than patching. A 10-foot section of K-style aluminum gutter is $15–$25. Replacement involves removing old hangers, sliding out the section, cutting a new section to length, and re-seaming.
Fix a leaking gutter: (1) Clean and dry the gutter thoroughly — sealant will not bond to wet, dirty metal. (2) The correct product: Gutter and Flashing Sealant (Geocel, Sashco Flash & Foam, or DAP Butyl Rubber Caulk).
Apply sealant from inside the gutter, not outside — the internal seal holds against water pressure where external caulk just peels.
What you need
- Gutter and flashing sealant (Geocel 2300, Sashco Flash & Foam, or DAP Butyl Rubber)
- Wire brush and putty knife (for cleaning old sealant)
- Shop vac or leaf blower (to clean the gutter)
- Pop rivet gun and aluminum rivets (for end caps)
Step 1: Clean and dry the gutter
Remove all debris. Scrape out crumbled old sealant. Wait for the gutter to dry completely — sealant fails on wet metal.
Step 2: Apply sealant from inside
Run a bead of gutter sealant over the seam or hole from inside the gutter. Tool smooth with a wet finger. Cover 1–2 inches on each side of the joint.
Step 3: Fix end caps
Remove failed end cap, clean old sealant, apply fresh bead, press back on, and secure with pop rivets. Apply a second sealant bead inside over the rivets.
Step 4: Test after cure
Wait 24 hours, then run a hose through the gutter to confirm the leaks are sealed.
Related guides
- How to Fix a Sagging Gutter — gutter slope and hanger repair
- How to Clean Gutters — cleaning before sealing and repairing
- How to Extend a Gutter Downspout — directing discharge away from the foundation
- How to Fix a Broken Gutter Downspout — replace a cracked or disconnected downspout section
- Clean and dry the gutter
Remove all debris from the gutter with a scoop or shop vac. Scrape out crumbled old sealant from leaking joints with a putty knife and wire brush — you don't need to remove every trace, but loose or crumbled material must go. Wait for the gutter to dry completely, at least 24 hours after rain. Use a heat gun to speed drying if needed. Sealant applied over wet metal will fail within weeks.
- Apply gutter sealant from inside
Use gutter and flashing sealant (Geocel 2300 Pro Flex, Sashco Flash & Foam, or DAP Butyl Rubber Caulk) — not silicone or latex caulk, which fail on temperature-cycling aluminum. Apply a continuous bead from inside the gutter, covering 1–2 inches on each side of the seam or hole. Press the sealant into the joint with a caulk tool or wet finger, creating a smooth fillet. For corrosion pinholes: apply sealant directly over the hole from inside and feather the edges.
- Repair end caps
Pry the failed end cap straight off the gutter end or use gentle pry bar pressure. Remove all old sealant from both the end cap edges and the inside of the gutter opening. Apply a continuous bead of gutter sealant around the inside perimeter of the end cap. Press the end cap firmly back on. Drill two or three 1/8-inch holes through the end cap and gutter wall and set aluminum pop rivets for mechanical hold. Apply a second sealant bead inside the gutter over the riveted joint.
- Test and confirm the repair
Allow 24–48 hours for the sealant to cure. Run a garden hose through the gutter from the uphill end and watch each repaired location for drips. If a seam still leaks after curing: apply an additional bead of sealant from inside and let cure again. If a section has multiple holes or extensive corrosion: replace the 10-foot section — a new aluminum K-style section costs $15–$25 and installs by removing old hangers and re-seaming.
Free: 10-Point Home Maintenance Checklist
Prevent costly repairs with this seasonal checklist. Save hundreds every year by catching problems early.
Your checklist is ready!
Open Checklist →Something went wrong. View the checklist here.