How to Fix Drywall Cracks
Repair hairline and structural drywall cracks using joint compound, mesh tape, and proper painting techniques for a seamless, long-lasting finish.
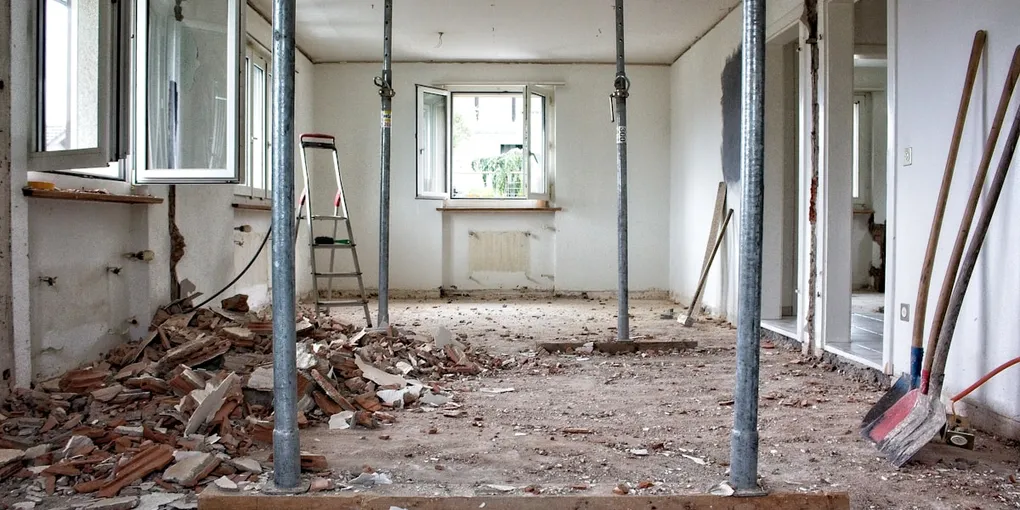
Drywall cracks are one of the most common home repair projects — and one that homeowners often put off because they assume it’s difficult or that the repair will look obvious. The truth is that a well-done drywall crack repair is completely invisible.
Drywall cracks are one of the most common home repair projects — and one that homeowners often put off because they assume it’s difficult or that the repair will look obvious. The truth is that a well-done drywall crack repair is completely invisible. With the right materials, the right technique, and a little patience between coats, you can make a cracked wall look like new.
This guide covers everything from diagnosing the type of crack you’re dealing with, to applying tape and compound, to sanding and painting for a seamless finish. Whether you’re dealing with hairline cracks at door corners or longer cracks running along wall seams, these techniques produce professional results.
What You Need
Before starting, gather these tools and materials:
- All-Purpose Joint Compound — the primary filler; buy the premixed bucket form for convenience
- Self-Adhesive Fiberglass Mesh Tape — for reinforcing cracks to prevent re-opening
- 6-Inch and 10-Inch Drywall Knives — for applying and feathering compound
- Drywall Sanding Sponge and Sandpaper — 120-grit for shaping, 220-grit for final smoothing
- Drywall Primer — essential before painting to prevent flashing (visible sheen differences)
- Flexible Paintable Caulk — for cracks at corners and trim where seasonal movement is expected
Step 1: Diagnose the Crack
Not all drywall cracks are the same, and the right repair approach depends on what type of crack you’re dealing with.
Hairline cracks are thin (under 1/16 inch wide), usually follow drywall seams or corners, and are extremely common in homes of all ages. They’re caused by normal house settling, seasonal wood movement in the framing, and slight shrinkage of joint compound over time. These are cosmetic issues only and can be repaired with confidence.
Stress cracks at door and window corners are the “starburst” or diagonal cracks that appear at the corners of door and window rough openings. These form because the corners of openings are natural stress concentration points during wood movement. They’re very common, especially in newer homes that are still settling, and are cosmetic in the vast majority of cases.
Longer horizontal or vertical cracks along seams follow the drywall seams where sheets of drywall meet and are usually the original factory tape bond failing or a butt joint that was poorly finished. These require tape-based repair.
Wide cracks (1/4 inch or more) with uneven edges — where one side of the crack is slightly higher or deeper than the other — can indicate structural movement. Similarly, diagonal cracks running at 45 degrees from door or window corners that extend several feet across the wall, cracks that continue to grow, or cracks accompanied by sticking doors or sloping floors may signal foundation or structural issues. For these, consult a structural engineer before making cosmetic repairs.
For this guide, we’ll focus on the cosmetic repairs that cover the vast majority of residential drywall cracks.
Step 2: Prepare the Crack for Repair
Proper preparation is what separates repairs that last from repairs that crack again within a year.
Widen and undercut the crack. This sounds counterintuitive, but scratching or scoring along the crack with a utility knife or the corner of a putty knife creates a better mechanical bond for the joint compound. You’re creating a small V-groove that gives the compound more surface area to grip. Remove all loose material and crumbling compound from the crack.
Clean the area. Brush away all dust and loose debris. Wipe the surface with a slightly damp cloth and let it dry. Any dust or oil on the surface will prevent proper adhesion.
Check for popped nails or screws. Often, cracks appear around drywall fasteners that have popped out slightly. Look for small bumps or raised circles on the wall near the crack. If you find any, drive a new drywall screw 2 inches above and below the popped fastener (into the stud), then sink the popped fastener back in with a screwdriver. The two new screws will hold the drywall firmly while you deal with the dimples separately.
Step 3: Apply the First Coat — Tape the Crack
For cracks wider than a hairline (anything you can see clearly at arm’s length), taping is the key to a repair that won’t re-crack.
Apply the mesh tape. Cut a piece of self-adhesive fiberglass mesh tape slightly longer than the crack and press it firmly over the crack. The self-adhesive backing holds it in place. For long cracks, run the tape in one continuous piece. If the crack runs around a corner, use corner bead or corner tape rather than flat mesh.
Apply the first coat of compound. Using a 6-inch drywall knife, apply a generous layer of joint compound directly over the tape. Work it into the mesh, pressing firmly so compound fills the mesh openings and bonds to the wall. The goal of this first coat is to fully embed the tape — not to create a smooth surface. You’ll see texture from the mesh; that’s normal. Feather the edges out about 4–6 inches on each side of the tape.
Let it dry completely. Drying time depends on temperature and humidity — typically 12–24 hours under normal conditions. Don’t rush this step. Compound that isn’t fully dry (still dark or cool to the touch) will shrink and possibly crack when you apply the next coat. A hair dryer on low can help speed drying in a pinch, but avoid high heat close to the surface.
For hairline cracks only: If the crack is truly a hairline (barely visible, no measurable width), you can skip the tape and simply apply compound directly over the crack for the first coat. Fill the crack, scrape flush, and feather the edges. Hairline cracks that are caused by cosmetic shrinkage rather than ongoing movement tend not to re-open and do well with a simple skim approach.
Step 4: Second Coat — Feather and Fill
Once the first coat is fully dry, lightly sand it with 120-grit sandpaper to knock down any ridges or tool marks. Wipe off the dust.
Switch to a 10-inch drywall knife for this coat. Apply a thinner, smoother layer of joint compound, extending the feathered edges an additional 4–6 inches beyond the first coat. The goal of the second coat is to fill in the texture from the mesh and begin building toward a smooth, flat surface. Apply light, even pressure and pull the knife at a low angle to create a thin, consistent layer.
The compound will appear to fill everything perfectly while wet, but it will shrink about 10–15% as it dries. Expect the mesh texture to show slightly through the second coat — that’s why a third coat is almost always necessary.
Let the second coat dry completely before moving on.
Step 5: Third Coat — Skim and Blend
The third coat is the finishing coat that will determine whether the repair is visible under paint. Sand the second coat lightly with 180-grit paper, then wipe clean.
Using the 10-inch knife (or a wider 12-inch knife if available), apply a very thin “skim” coat of compound over the entire repaired area. You’re applying a translucently thin layer — just enough to fill any remaining low spots and texture. Extend the feather edges a few more inches with each coat so the transition from repaired area to surrounding wall is gradual enough to be invisible.
The wider your feathered edges, the less visible the repair will be. A repair that extends only 4 inches on each side will look like a raised bump under a coat of paint. A repair feathered out 12 inches on each side will be nearly invisible even under raking light.
Step 6: Sand to a Smooth Finish
Once the final coat is fully dry, it’s time to sand. Drywall finishing dust is extremely fine and pervasive — cover furniture, use painter’s tape along the floor, and wear a dust mask rated for fine particles.
Start with 120-grit sandpaper or a drywall sanding sponge to remove tool marks and level any high spots. Move in circular motions, then smooth with straight strokes. Avoid sanding too aggressively directly over the tape — you can sand through the compound and into the tape, which weakens the repair.
Finish with 220-grit paper for a smooth surface. Use a bright work light held at a low angle (called raking light) to reveal any remaining ridges, low spots, or texture differences. These will appear as shadows. Mark them lightly with pencil and address them with a final thin coat or additional sanding before priming.
Wipe all surfaces with a damp cloth to remove dust before priming.
Step 7: Prime Before Painting
This step is non-negotiable and the one most DIYers skip — resulting in a repair that’s invisible when wet but appears as a shiny patch (called flashing) after the paint dries.
Joint compound is highly porous and absorbs paint differently than the surrounding wall. Without a coat of drywall primer, the paint will soak into the compound deeply in repaired areas, creating a dull spot or sheen difference that’s visible from certain angles.
Apply one coat of drywall primer to the entire repaired area, extending a few inches past the feathered edges. Let it dry per the manufacturer’s instructions (usually 1–2 hours). Prime may reveal any imperfections you missed — sand them out before painting.
Step 8: Paint to Match
Matching paint on an old wall can be the hardest part of any drywall repair. Even with the exact same paint, colors shift over years of UV exposure and cleaning. Here are your options:
Use saved paint. If you kept a can from the original paint job, this is your best option. Stir it thoroughly, apply it to the primed area, and feather the paint out past the repaired area.
Get a paint match. Take a paint chip (you can carefully scrape a small piece from an inconspicuous area, or purchase a color sample kit) to your local hardware store. Most stores can color-match with good accuracy. Test the matched paint on the wall and check it in both natural and artificial light once dry.
Repaint the entire wall. When all else fails — especially in older homes where the original paint has yellowed significantly — rolling the entire wall is the only way to guarantee an invisible repair.
Apply two coats of finish paint, letting each coat dry completely. Use the same sheen as the surrounding wall (flat, eggshell, satin, or semi-gloss). Mixing sheens is a common mistake that creates visible mismatches.
Special Situations: Cracks at Corners and Trim
Cracks that run along inside corners, where walls meet the ceiling, or where trim (baseboards, door casings) meets the wall are best repaired with flexible paintable caulk rather than joint compound.
These locations experience the most seasonal movement. Rigid compound will crack again within a season or two. Caulk — applied in a smooth, thin bead, smoothed with a wet finger, and allowed to fully cure before painting — accommodates small movement and holds up far longer.
Cut the caulk tube at a 45-degree angle to a small opening (1/8 inch or less). Run a continuous bead along the crack, then wet your fingertip and draw it along the bead in one smooth stroke to tool it into the corner. Remove excess. Allow to cure per the label (typically 24 hours) before painting.
How to Prevent Drywall Cracks
Control humidity levels. Seasonal swings in indoor humidity cause wood framing to expand and contract, which stresses drywall seams. Maintaining indoor humidity between 35–50% year-round significantly reduces crack formation. A whole-house humidifier in winter and dehumidifier in summer achieves this in most climates.
Address foundation drainage. Cracks caused by foundation movement are often related to poor drainage around the foundation. Ensure gutters are clean, downspouts discharge water away from the house, and grading slopes away from the foundation. Keeping water away from the foundation reduces movement and dramatically reduces interior cracking.
Use a whole-house approach. If you have cracks in multiple rooms following the same seams, the original drywall finishing was likely inadequate. Consider a whole-house skim coat if you’re doing a major renovation — it addresses all the seams at once and is faster than repairing them individually over years.
Cost Breakdown
| Repair Level | Materials Cost | Time Required |
|---|---|---|
| Single hairline crack (skim only) | $5–$10 | 1–2 hours (plus dry time) |
| Multiple cracks with tape | $20–$40 | 3–4 hours over 2 days |
| Full wall skim coat | $30–$60 | 4–6 hours over 3 days |
| Professional drywall repair | $200–$500/room | 1–2 days |
Related Reading
- How to Fix a Washing Machine That Won’t Drain
- How to Fix a Toilet That Keeps Running
- How to Paint a Room Like a Pro
- How to Install Drywall Anchors
Drywall crack repair rewards patience more than skill. The actual techniques are simple — tape, compound, sand, prime, paint — but each step must be done completely before moving to the next. Rush the drying time between coats and you’ll end up with a bubbled, re-cracked mess. Let each coat dry fully, sand carefully, prime without exception, and the finished repair will be genuinely invisible. Most homeowners who complete their first drywall crack repair are surprised at how professional the result looks with just a little care and the right materials.
- Diagnose the Crack
Not all drywall cracks are the same, and the right repair approach depends on what type of crack you're dealing with.
- Prepare the Crack for Repair
Proper preparation is what separates repairs that last from repairs that crack again within a year.
- Apply the First Coat — Tape the Crack
For cracks wider than a hairline (anything you can see clearly at arm's length), taping is the key to a repair that won't re-crack.
- Second Coat — Feather and Fill
Once the first coat is fully dry, lightly sand it with 120-grit sandpaper to knock down any ridges or tool marks. Wipe off the dust.
- Third Coat — Skim and Blend
The third coat is the finishing coat that will determine whether the repair is visible under paint. Sand the second coat lightly with 180-grit paper, then wipe clean.
- Sand to a Smooth Finish
Once the final coat is fully dry, it's time to sand. Drywall finishing dust is extremely fine and pervasive — cover furniture, use painter's tape along the floor, and wear a dust mask rated for fine particles.
Free: 10-Point Home Maintenance Checklist
Prevent costly repairs with this seasonal checklist. Save hundreds every year by catching problems early.
Your checklist is ready!
Open Checklist →Something went wrong. View the checklist here.