How to Fix a Rotted or Loose Deck Post: Post Base, Sistering, Footing, and Surface Rot (2026)
A deck post that has rotted at the base or is loose at the footing is a structural safety issue that needs to be fixed before the deck is used again. This guide covers diagnosing post rot, surface rot treatment, post base hardware replacement, sistering a compromised post, and pouring a new footing.
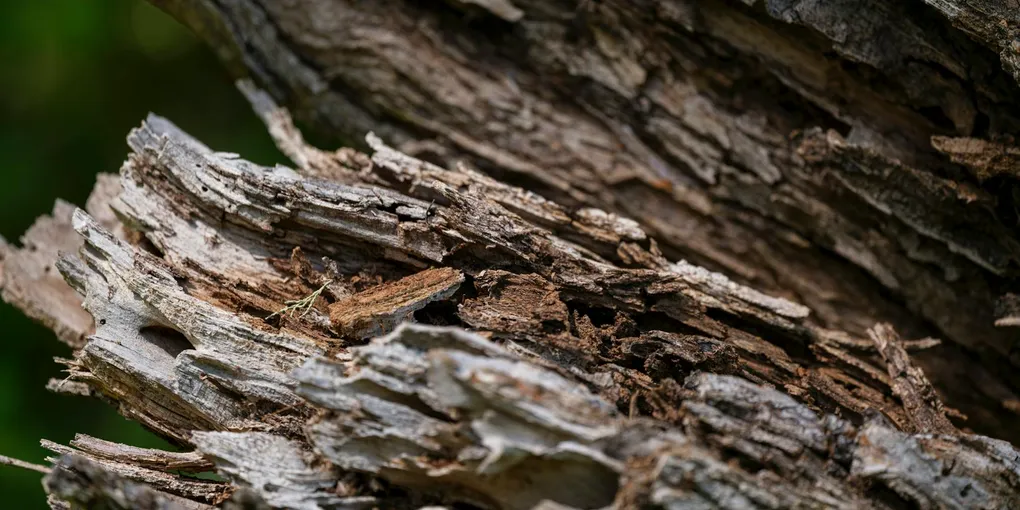
To fix a rotted deck post: (1) Probe the post with an awl or screwdriver — if it sinks more than 1/4 inch into the wood, the post is structurally compromised and must be replaced or sistered. (2) Surface rot only (less than 1/4 inch deep): treat with wood hardener, fill with epoxy filler, and protect with a proper post base to prevent future contact moisture. (3) Base rot with sound wood above: install a new adjustable post base anchor to lift the post off the concrete, cutting the rotted end. (4) Full post replacement: temporary shoring, remove old post, set new post base anchor in existing footing or pour new footing, install new post. This is a structural repair — do not cut corners.
Frequently Asked Questions
How do I know if a deck post is structurally compromised or just has surface rot?
The awl test is the standard field check. Take a sharp awl or ice pick and press it firmly into the wood at the base of the post — particularly at the end grain, at the soil or concrete contact point, and at any visibly discolored or soft areas. (1) If the awl penetrates less than 1/4 inch with firm hand pressure: the wood is sound. Surface discoloration or minor checking is cosmetic. (2) If the awl penetrates 1/4 to 1/2 inch with moderate pressure: there is moderate rot. The extent needs to be mapped — probe around the full perimeter. If it is isolated to the surface, treatment and encapsulation may be adequate. (3) If the awl sinks easily 1/2 inch or more: the post is structurally compromised. The wood fibers have lost their structural integrity. This post must be replaced or fully sistered. (4) Also check by tapping the post with a hammer — solid wood returns a sharp knock; rotted wood returns a dull thud. Use both tests together.
What is sistering a deck post and when is it appropriate?
Sistering is the technique of bolting a new full-length post alongside a damaged one, transferring the structural load to the new member while leaving the original post in place. When it is appropriate: (1) The original post is partially compromised — it has rot at the base but the upper half (where it connects to the beam) is sound. The sister takes the load; the original provides lateral stability and alignment. (2) Access is limited — removing the original post would require dismantling significant portions of the deck structure. Sistering can be done with the deck in place. (3) The original post is loose at the footing but structurally intact above — a sister can be set in a new footing adjacent to the original. Sistering is NOT appropriate when: the original post is completely rotted through, when it has significant lateral movement that a sister cannot correct, or when the footing itself has failed and cannot support two posts.
What is an adjustable post base and how does it prevent rot?
An adjustable post base (also called a standoff post base or elevated post base) is a metal connector that attaches to the concrete footing and holds the post 1 to 3 inches above the concrete surface. This gap allows water to drain away from the end grain of the post rather than wicking up into it. End grain is the most vulnerable surface on a wood post — when it sits directly on or in concrete, it stays wet and rots within 5–15 years even with pressure-treated lumber. Modern building codes in most jurisdictions require post bases that provide positive drainage; direct burial or direct concrete contact is no longer accepted for new construction. For existing decks with posts sitting directly on concrete: install a standoff post base by temporarily shoring the beam, trimming the rotted base of the post (if any), and installing the post base anchor to lift the post end off the concrete surface.
How do I temporarily shore a deck beam to replace a post?
Temporary shoring supports the deck beam while the post is removed and replaced. (1) Build a temporary post from a 4x4 and a screw jack (or a car jack for short lifts) positioned under the beam, offset 2–3 feet from the post being replaced. Place a 2x6 foot pad under the jack to distribute load on the ground. (2) Raise the jack slowly until it contacts the beam with slight upward pressure — just enough to take the load off the post, not to lift the deck. Do not over-jack; this can rack the deck frame. (3) Confirm the temporary support is stable — it should not wobble under the load. If the ground is soft, extend the foot pad or add a concrete block base. (4) Work quickly — temporary shoring is not a long-term solution and should not be left in place for more than a day or two. (5) On multi-post structures, shore both adjacent bays before removing a center post.
Do I need a permit to replace a deck post?
Permit requirements for deck post replacement vary by jurisdiction but the general rule is: if the work is structural repair in kind (same size post, same location, same footing), many jurisdictions classify it as routine maintenance that does not require a permit. However, if the footing needs to be replaced, if the post is being relocated, or if the deck was originally unpermitted, you may need a permit. Check with your local building department before starting. Practical considerations: (1) A structural deck repair that is done without a permit will not be inspected — if the repair is done incorrectly, you have no official check. (2) When selling the house, unpermitted structural work on a deck can complicate the transaction. (3) If your deck is more than 30 inches off the ground or attached to the house, it was almost certainly required to have a permit originally. For post-only replacement on an existing, permitted, properly designed deck: a permit is usually not required. When in doubt, make a phone call to your local building department — it costs nothing and takes 5 minutes.
What type of wood should I use to replace a deck post?
Post material recommendations: (1) Pressure-treated lumber (ground contact rated): Use lumber labeled 'UC4B' or higher for any post that is within 6 inches of the ground or is set in a post base. 'UC3B' is the minimum for above-ground applications. Check the end-tag stamp on the lumber — ground contact posts require a higher preservative retention level than above-ground framing. (2) Size: Match the existing post dimensions. Most residential decks use 4x4 posts for decks under 8 feet high and 6x6 for taller structures. Your local code may specify minimum post sizes based on deck height and tributary load area. (3) Wood species: Southern Yellow Pine and Douglas Fir are the most common pressure-treated species and are structurally rated for post applications. Avoid using SPF (Spruce-Pine-Fir) for posts in contact with or near the ground — it has lower decay resistance. (4) Seal all cut ends: When cutting pressure-treated lumber, the cut end is unprotected. Apply end-cut preservative (copper naphthenate solution) to all field cuts before installation.
To fix a rotted deck post: (1) Probe the post with an awl or screwdriver — if it sinks more than 1/4 inch into the wood, the post is structurally compromised and must be replaced or sistered. (2) Surface rot only (less than 1/4 inch deep): treat with wood hardener, fill with epoxy filler, and protect with a proper post base to prevent future contact moisture.
A wobbly or rotted deck post is not something to live with. Deck post failures have caused serious injuries — the repair is straightforward if caught early, but it must be done correctly.
What You Need
The exact materials depend on your repair method, but here is what covers the full range of repairs in this guide.
- Adjustable standoff post base (4x4 or 6x6) — holds post above concrete to prevent end-grain moisture wicking
- Wood hardener for rot stabilization — penetrates and consolidates soft punky wood for surface rot treatment
- Epoxy wood filler for rot repair — fills and rebuilds wood structure after hardener treatment
- Post hole concrete (fast-setting, 50 lb bags) — for setting a new footing anchor if the existing footing is inadequate
- Copper naphthenate end-cut wood preservative — applied to all field cuts on pressure-treated lumber
- Structural deck screws (3-inch, exterior rated) — for all structural fastening in the repair
Step 1: Assess the Damage
Diagnosis before cutting anything is the most important step. The repair strategy — surface treatment, post base replacement, sistering, or full replacement — depends entirely on how deep the rot goes.
Tools for assessment:
- Sharp awl or ice pick
- Hammer
- Flashlight
- Tape measure
Awl test: Press the awl firmly into the wood at and around the base of the post. Test all four faces and the bottom end grain if accessible. Map where the awl penetrates easily versus where it hits solid resistance.
Hammer test: Tap around the post. Solid wood sounds sharp; rotted wood sounds dull and hollow.
Visual check: Look for:
- Darkening or discoloration at the base (moisture staining)
- Splitting or checking that extends deep into the post
- Paint or finish peeling at the base (moisture pushing from inside)
- Any movement when you push the post laterally — it should not move at all
Decision matrix:
- Awl less than 1/4 inch, no movement: Surface rot only. Proceed to Step 2.
- Awl 1/4–1/2 inch in limited areas, no movement: Moderate rot. Consider post base upgrade. Proceed to Step 3 if base is the source.
- Awl more than 1/2 inch, or any lateral movement: Structural compromise. Proceed to Step 4 (sistering) or Step 5 (full replacement).
Step 2: Treat Surface Rot
Surface rot — where the outer layer of wood is soft but the interior is sound — can be stabilized and sealed if caught early enough.
-
Remove all soft wood: Use a chisel, wire brush, or oscillating tool to remove all punky, soft, or crumbling wood down to firm material. Do not leave any unsound wood in place — the rot fungus will continue to grow under any filler you apply over it.
-
Dry the area: If the wood is wet, allow it to dry thoroughly — at least 48 hours in dry weather. Rot treatment applied to wet wood does not penetrate effectively. A heat gun on low can help accelerate drying on a small area.
-
Apply wood hardener: Brush on a generous coat of penetrating wood hardener (such as Minwax High Performance Wood Hardener). It soaks into the wood fibers and consolidates them with epoxy resin. Apply multiple coats until the wood stops absorbing. Allow to cure per label instructions (typically 2–4 hours).
-
Fill with epoxy wood filler: Mix a two-part epoxy wood filler according to package directions. Pack it firmly into all voids and depressions. Overfill slightly — it does not shrink. Shape it while wet to approximate the original post profile. Allow to cure fully (several hours to overnight depending on temperature).
-
Sand and finish: Sand the cured epoxy flush with the surrounding wood. Prime with an oil-based primer and finish with two coats of exterior paint or stain. The epoxy repair will not accept stain the same as wood — painting is recommended.
-
Address the moisture source: Surface rot happens because moisture is held at that location. Install a standoff post base (Step 3) to lift the end grain off the concrete, or ensure that grading and drainage direct water away from the post base.
Step 3: Replace the Post Base Hardware
If the rot is concentrated at the very bottom of the post (the end grain contact point with concrete) but the rest of the post is sound, a post base hardware upgrade — combined with trimming the rotted end — is the least invasive repair.
Shore the beam: Place a temporary 4x4 post and screw jack under the beam 2–3 feet from the post being worked on. Raise until snug — just taking the post load, not lifting.
Remove the existing base hardware: If the post is attached to the concrete with a standard non-elevated base, remove the fasteners (lag screws, anchor bolts, or through-bolts) and pull the base hardware off the concrete.
Trim the post: If the bottom 1–2 inches of the post are rotted, cut the post squarely with a circular saw to remove all soft wood. Apply copper naphthenate preservative to the fresh cut end and allow to soak in.
Install the standoff base: The new base attaches to the existing footing with a concrete anchor bolt. Drill the anchor hole with a hammer drill and masonry bit at the marked center point. Install the anchor bolt per the hardware instructions. Set the post base and verify it is level. Place the post into the base and secure the side flanges with structural nails or screws specified in the hardware’s installation instructions (use only the specified fastener type and count — these are load-rated connections).
Remove temporary shoring: Lower and remove the jack once the new post base and post are secured.
Step 4: Sister a Compromised Post
Sistering installs a new full-length post alongside the compromised one, transferring the structural load without full post replacement.
-
Shore the beam: As in Step 3, place temporary support under the beam.
-
Position the sister: Place a new pressure-treated post (same size as original) directly adjacent to the existing post. It should run from the beam above to a new footing position below. If the original footing is sound and large enough, you can share it; otherwise pour a separate footing for the sister (see Step 5 for footing work).
-
Connect the sister to the beam: Use structural connector hardware (post cap) or through-bolts to connect the sister post to the beam at the top. The sister must be in full bearing contact with the underside of the beam.
-
Bolt the sister to the original post: Install two rows of 1/2-inch carriage bolts through both posts, staggered. Space rows at least 24 inches apart vertically. This creates a composite assembly where both posts share lateral load.
-
Secure the base: Install a standoff post base for the sister post, anchored to the footing.
-
Do not remove the original post: In a sistering repair, the original post stays. The sister carries the primary vertical load; the original provides lateral stiffness and alignment.
-
Remove temporary shoring once the sister is fully secured top and bottom.
Step 5: Full Post Replacement
When the post is fully rotted or the footing has failed, full replacement is required.
Shore the beam: Shore both adjacent bays if replacing a center post.
Remove the old post: Disconnect the post from the beam and from the footing hardware. The post can then be removed. Do not cut a load-bearing connection until the temporary shoring is confirmed secure.
Evaluate the footing: Probe the concrete. If it is cracked, displaced, or crumbling — or if the original anchor is pulled out — the footing must be replaced. If the concrete is solid and the anchor location is correct, install a new standoff post base on the existing footing.
Pour a new footing (if needed):
- Dig a new hole: depth and diameter per your local frost depth requirements (typically 12 inches below frost line, 12 inches diameter minimum).
- Mix fast-setting concrete per bag instructions. Pour into the hole. Set a J-bolt anchor at the center of the wet concrete, aligning it with the post position. Check that the bolt is plumb.
- Allow to cure 24–48 hours before loading (fast-set concrete allows 4-hour loading, but longer is better for structural applications).
Set the new post: Cut the pressure-treated post to length. Apply preservative to the cut end. Set the post into the standoff base, plumb it in both directions, and secure the base flanges. Connect the top to the beam.
Remove temporary shoring and load the deck gradually.
Related Reading
- How to Build a Deck — complete deck framing and construction guide
- How to Repair Deck Boards — replacing rotted or damaged decking
- Seasonal Home Maintenance Checklist — annual deck inspection tasks to catch problems early
- Diagnose the post condition
Probe the post base with a screwdriver or awl — push firmly into the wood at and below grade level. If the tool penetrates easily (soft, punky wood): the post has active rot. If it is firm: the post is structurally sound even if it looks weathered. Check the post for lateral movement: push the post side to side. Any movement of more than 1/4 inch indicates a loose post base connection or a deteriorated footing. A post that is both rotted and loose is unsafe to use the deck until repaired.
- Treat surface rot and apply preservative
For surface rot that has not penetrated more than 1 inch into the post: use a liquid wood hardener (such as Minwax Wood Hardener or similar epoxy-based consolidant). Brush it into all soft wood fiber, saturating the rot. Let cure per instructions (typically 4–6 hours). Fill any voids with two-part wood epoxy filler, shaped and sanded when cured. Coat the repaired area and the bottom 18 inches of the post with a penetrating wood preservative. This extends a structurally sound post that has only surface damage.
- Replace the post base hardware
If the post base connector (the metal bracket attaching the post to the concrete footing) is corroded or the post has pulled free at the base: replace the hardware without removing the post. Jack the deck beam up slightly at that bay to relieve load from the post. Remove the old post base bolts and bracket. Install a new post base (Simpson Strong-Tie or equivalent) rated for the post size — anchor it to the concrete with 1/2-inch Tapcon anchors or epoxy rebar anchors. Set the post in the new bracket and fasten per the manufacturer's instructions.
- Sister a compromised post
If the post has rot through more than 25% of its cross-section but the footing is sound: sister a new post alongside the old one. Cut a new post (same dimensions) to the correct height. Position it beside the existing post directly on the footing or on a new post base. Fasten the new post to the beam above with an approved post cap, and fasten the old and new posts together with 3-inch structural screws at 12-inch intervals. Do not remove the old post — the sister carries the load while the old post provides lateral stability.
- Replace the post and footing if structurally compromised
Full post replacement is needed when the post is rotted through, the footing is cracked or heaved, or the post has no proper base connection. Jack the deck beam at that bay. Remove the post. Assess the footing — if it is cracked or less than 12 inches below grade (local frost line varies): break it out and pour a new footing. Dig to the local frost depth, set a tube form, pour concrete with a J-bolt anchor for the new post base. After the concrete cures (72 hours minimum), install the post base, set the new post, and lower the beam. Use only pressure-treated lumber rated for ground contact (UC4B rating).
Free: 10-Point Home Maintenance Checklist
Prevent costly repairs with this seasonal checklist. Save hundreds every year by catching problems early.
Your checklist is ready!
Open Checklist →Something went wrong. View the checklist here.