How to Fix a Wall Anchor: Remove, Patch, and Reinstall (2026)
Stripped or pulled-out wall anchors leave holes that look bad and won't hold again. This guide covers removing different anchor types, patching drywall holes, choosing the right anchor for the load, and installing anchors correctly.
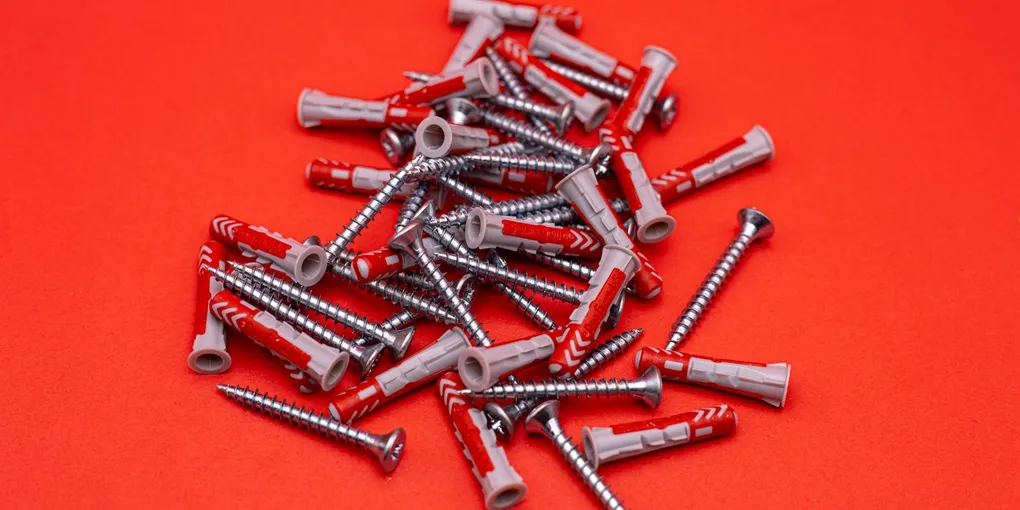
A stripped wall anchor (the screw spins or the whole anchor spins) needs to be replaced — you can't re-tighten a failed anchor. Remove it, patch the hole with spackle (for small holes), and reinstall a better anchor. For heavy items (TV mounts, shelves over 20 lbs): find the stud instead of using an anchor. The strongest anchor is a screw directly into a stud, not any drywall anchor.
Frequently Asked Questions
What are the different types of wall anchors and which is best?
Plastic expansion anchors (the ribbed plastic sleeves): rated for light loads (up to 20 lbs) but strip easily if over-tightened. Cheap and common but often the wrong choice. Toggle bolts (spring-loaded metal wings that open behind the drywall): very strong for drywall — rated 50–100 lbs in 1/2-inch drywall. Require a larger hole (1/4 to 1/2 inch) to insert the wings. TOGGLER SNAPTOGGLE / zip-it style: plastic toggle that locks behind the drywall. Rated 30–50 lbs. Easier to install than traditional toggle bolts. Self-drilling drywall anchors (EZ-Ancor): screw directly into drywall without pre-drilling. Rated 50–75 lbs. Good for most household use. For anything over 50 lbs: use toggle bolts or find the stud.
How do I remove a plastic expansion anchor that won't come out?
Method 1: push it through. Use a screwdriver or nail to push the plastic anchor through the drywall into the wall cavity — it will fall inside the wall and you'll have a clean hole to patch. This works when the anchor is just a tube, not a molly bolt with spread wings. Method 2: pull it out. Grip the anchor face with locking pliers, rock side-to-side, and pull straight out. This is messier and often enlarges the hole. Method 3: drill it out. Use a drill bit the same diameter as the anchor to drill it out flush. Patch the hole after.
How do I patch a stripped anchor hole?
For small holes (1/4 inch or less): press spackle into the hole with your finger or a putty knife, let dry, sand flush. One application is usually enough. For medium holes (up to 3/4 inch): fill with lightweight joint compound in one pass. Let dry (joint compound shrinks — the hole will look correct when dry). Sand, prime, paint. For larger holes torn up by a failed toggle bolt: use a patch kit with self-adhesive mesh tape, apply joint compound over the mesh, let dry, sand, prime, paint.
How do I know if I'm near a stud?
Use a stud finder (most reliable). Alternatively: studs are typically 16 inches on center — measure 16 inches from a corner or from a known stud location. Door and window frames have a stud on each side. If you find a stud location on a wall, the next stud is almost always 16 inches away. Confirm with a small test nail — if it hits solid resistance after 1/2 inch (drywall depth), you're in the stud. If it goes in easily: hollow drywall.
Can I put a new anchor in the same hole as the old one?
Not directly. The existing hole is stripped or enlarged — a new anchor in the same location won't grip. Options: (1) Patch the hole completely, let fully cure, then install a new anchor 1–2 inches away. (2) Use a larger anchor that spans the original hole. (3) Use a toggle bolt — the wings spread behind the drywall and don't depend on the hole edge for grip. (4) Find the stud nearby and screw directly into it.
A stripped wall anchor (the screw spins or the whole anchor spins) needs to be replaced — you can’t re-tighten a failed anchor. Remove it, patch the hole with spackle (for small holes), and reinstall a better anchor.
Fixing a failed anchor is a 20-minute project with the right materials on hand.
What you need
- Locking pliers or screwdriver
- Spackle or lightweight joint compound
- Replacement anchors (match type to load)
- Sandpaper (120-grit)
- Primer and touch-up paint
- Stud finder (for heavy items)
Step 1: Remove the failed anchor
Plastic expansion anchor: Use a screwdriver to push it through into the wall cavity, or grip with locking pliers and rock out.
Molly bolt (spread anchor with metal collar): Insert a screwdriver and fold the wings back in as much as possible, then grip the collar with locking pliers and pull straight out. Expect some drywall damage.
Toggle bolt: Grip the bolt head with locking pliers and pull out — the wings will fall inside the wall.
Step 2: Patch the hole
Push spackle into the hole, slightly overfilling. Let dry. Sand flush. If the hole is larger than 3/4 inch: apply joint compound over self-adhesive mesh tape, feathering the edges. Let dry 24 hours, sand, and apply a second thin coat if needed.
Prime patched areas before painting — bare compound absorbs paint differently and leaves a visible dull spot (flashing) without primer.
Step 3: Choose the right anchor for the load
| Load | Best anchor |
|---|---|
| Under 10 lbs (picture frames) | Plastic expansion anchor |
| 10–50 lbs (shelves, mirrors) | Self-drilling EZ-Ancor or toggle bolt |
| 50–100 lbs (heavy shelves, cabinets) | Toggle bolt |
| Over 100 lbs (TV mounts, grab bars) | Screw into stud — no anchor |
Step 4: Install the new anchor
Self-drilling anchor: Hold the anchor point against the wall. Turn with a screwdriver (no pre-drill needed) until the collar is flush with the drywall. Insert the screw.
Toggle bolt: Drill a hole sized for the folded wings. Thread the bolt through your mounting hardware and through the hole. Pinch the wings flat, push through the hole, release. Pull back on the bolt while turning it clockwise — the wings open and tighten against the back of the drywall.
Finding a stud: If load exceeds 50 lbs, locate the stud with a stud finder and screw directly in with 3-inch wood screws. Always the strongest option.
Related guides
- How to Patch Drywall — larger hole repairs after anchor removal
- How to Hang Shelves — anchor and stud planning for wall shelves
- Remove the failed anchor
Plastic expansion anchors (the most common type): insert a screw into the anchor, grip the screw head with pliers, and pull the anchor straight out of the wall. If it won't pull out: use a utility knife to score around the anchor flange, push the anchor into the wall cavity with a screwdriver, then patch over the hole. Toggle bolts (the ones with spring wings): unscrew the bolt — the wings fold and the toggle falls inside the wall cavity. The bolt is reusable; the toggle is not. Snap-toggle metal anchors: rotate the anchor collar counterclockwise to release and remove.
- Patch the hole if reusing the same location
For holes under 1/2 inch: fill with lightweight spackle, let dry, sand flush, and prime before painting. For holes between 1/2 inch and 2 inches: use a self-adhesive mesh patch backed with joint compound for two thin coats — let each dry completely, sand smooth. For holes over 2 inches: use a drywall patch kit or a California patch (cut a clean square, install a backer board, cut a matching patch, tape and compound). Allow all patching to cure fully before drilling in the same area.
- Choose the right anchor for the load
Match the anchor to the load weight and wall material. For loads under 20 lbs in drywall: plastic expansion anchor or self-drilling anchor. For 20–50 lbs: snap-toggle or toggle bolt — these grip behind the drywall and are significantly stronger. For loads over 50 lbs: locate a wall stud with a stud finder and drive a screw directly into the framing — no anchor needed. For masonry or concrete: use a hammer drill and sleeve anchor or Tapcon screw. Never use plastic anchors for TVs, shelving, or anything that could cause injury if it falls.
- Install the new anchor correctly
For plastic self-drilling anchors: drill a pilot hole the size specified on the anchor package (usually 1/4 inch for standard anchors), tap the anchor flush with a hammer, drive the screw into the anchor until snug. For toggle bolts: drill a hole just large enough for the collapsed toggle to pass through, thread the bolt through the item being hung and through the toggle, push into the wall, pull back firmly while tightening the bolt. For Toggler snap-toggles: drill the specified hole size, collapse the toggle, insert until the collar clicks, break off the strap, drive the bolt. Test by applying firm downward and outward pressure before loading.
Free: 10-Point Home Maintenance Checklist
Prevent costly repairs with this seasonal checklist. Save hundreds every year by catching problems early.
Your checklist is ready!
Open Checklist →Something went wrong. View the checklist here.