How to Fix a Slow Draining Tub: Hair Clogs, Stoppers, and Drain Traps
Clear a slow draining bathtub yourself by removing hair clogs, cleaning the pop-up stopper, and understanding the difference between drum traps and P-traps.
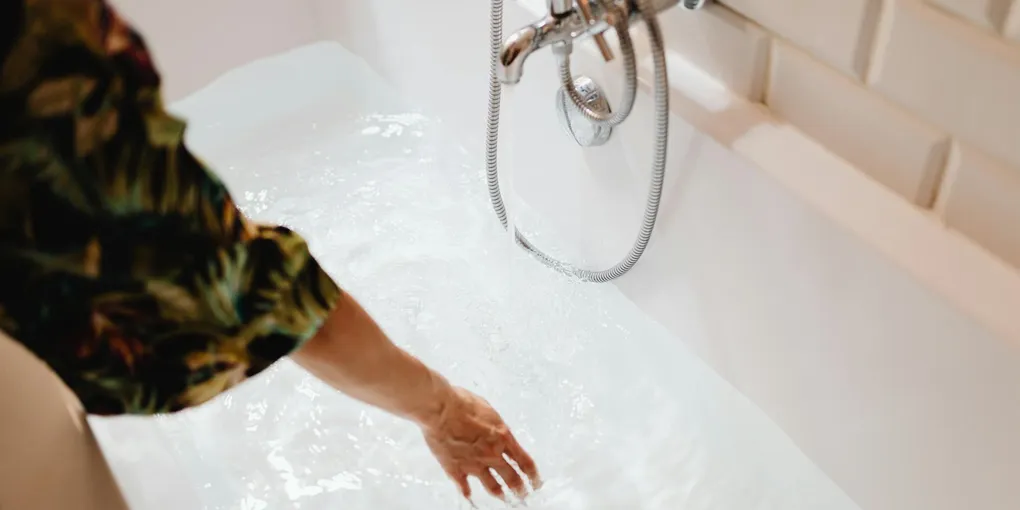
A bathtub that takes ten minutes to empty is one of those problems that feels minor until it becomes a daily aggravation. Standing ankle-deep in soapy water every morning wears on you fast.
A bathtub that takes ten minutes to empty is one of those problems that feels minor until it becomes a daily aggravation. Standing ankle-deep in soapy water every morning wears on you fast. The good news is that the vast majority of slow bathtub drains can be fixed in under an hour with nothing more than a screwdriver, a pair of needle-nose pliers, and a little patience. This guide walks you through every likely cause — from the hair nest lurking just beneath the drain cover to the more stubborn issue of a partially blocked drum trap — and shows you exactly how to clear it.
What You Need
Having the right supplies on hand before you start means you won’t be hunting through cabinets with wet hands halfway through the job. Here is what you’ll want within reach:
- Drain snake / hair clog remover tool — a flexible plastic barb tool is cheap and enormously effective
- Needle-nose pliers — for pulling hair and adjusting the trip-lever linkage
- Enzymatic drain cleaner — safer for pipes than caustic alternatives
- Plumber’s snake / drain auger — for blockages deeper in the pipe
- Screwdriver set — to remove drain covers and overflow plates
- Rubber gloves — because what’s inside that drain is not pleasant
Step 1 — Remove and Inspect the Drain Cover
Before doing anything else, pull the stopper or drain cover out of the tub. The method depends on the style of drain your tub has.
Push-pull stoppers unscrew from a post in the center of the drain. Turn the stopper counterclockwise by hand or with a flathead screwdriver. Once it’s off, unscrew the post with a flathead and lift the whole assembly out.
Lift-and-turn stoppers also unscrew, but the set-screw is often on the side of the knob. Look for a small Phillips or hex screw and loosen it before turning.
Flip-it stoppers simply pull straight up and out with a firm tug — no tools needed.
Snap-in drain covers (found on trip-lever drains) pry out gently with a flathead screwdriver. With the cover off, shine a flashlight into the drain and prepare yourself for what you’ll find.
In most tubs, there is a dense mat of hair, soap scum, and debris sitting right on top of the crossbars or wrapped around the stopper body. Use your gloved fingers or the plastic barb drain tool to pull it out. Work slowly and in a circular motion to grab material from around the edges of the drain opening. You may need to make two or three passes before the drain feels clear.
Drop the stopper assembly into a bowl of warm water with a splash of white vinegar and let it soak while you move on to the next step.
Step 2 — Clear Hair From the Trap Arm and Drain Pipe
Removing the visible clog from the drain cover helps, but the hair that escaped through the screen over months and years has settled deeper in the pipe. This is where the barb tool and the drain snake come in.
Insert the plastic barb tool (also called a Zip-It or drain weasel) into the drain opening as far as it will go — typically 18 to 24 inches. Twist it slowly as you push it in so the barbs engage with debris along the pipe walls. Pull it out slowly while continuing to twist. You will almost certainly extract a substantial amount of material on the first pull. Repeat three or four times.
For deeper blockages, feed the drain snake into the opening instead. Crank the handle clockwise as you push the cable forward. When you feel resistance, you’ve hit the clog — continue cranking to break it up or hook it, then pull back slowly. Run hot water for thirty seconds to flush loosened debris toward the main line.
Step 3 — Clean the Pop-Up Stopper Mechanism
The soaking stopper assembly you set aside in step one is ready to clean now. Use an old toothbrush or a small bottle brush to scrub soap scum and biofilm off every surface. Pay special attention to the threads and the pivot rod hole if your stopper has one.
Rinse it thoroughly, then reassemble and reinstall. Test the stopper’s action — it should open and close smoothly with light pressure. If it feels sticky or doesn’t seat properly, the pivot rod may need adjustment.
On pop-up stoppers connected to a trip-lever (the kind with an overflow plate on the tub wall), the stopper is linked to the lever by a long metal rod called the plunger rod. If your drain has been slow for a while, there is often hair wrapped around the bottom of this plunger rod as well. Remove the two screws on the overflow plate, pull the plate and attached rod up and out of the overflow tube, and clean all the debris off the bottom of the rod. This alone can dramatically improve drainage.
Step 4 — Identify Your Trap Type: P-Trap vs. Drum Trap
Most modern bathtubs use a P-trap — the curved section of pipe directly beneath the tub drain that forms a water seal against sewer gas. P-traps are self-cleaning to a degree because water always flows through them, and they can be snaked from the drain opening above.
Older homes (typically pre-1960) often have a drum trap instead. A drum trap is a cylindrical canister, usually made of lead or cast iron, installed in the floor beside or under the tub. It has a removable screw cap on top that serves as a cleanout. Drum traps are notorious for accumulating sediment, hair, and soap scum because water sits in them rather than flowing through continuously.
To clean a drum trap:
- Locate the cleanout cap — it’s typically a round cap on the bathroom floor near the tub, 4 to 6 inches in diameter.
- Place a bucket beneath the cap before opening it, as water will spill out.
- Use a pipe wrench to unscrew the cap counterclockwise. Apply penetrating oil if it’s stuck.
- Scoop out accumulated debris with a stiff brush and a bucket.
- Feed a drain snake through the outlet side (toward the main drain) to clear any downstream blockage.
- Replace the cap with a new rubber gasket and tighten firmly.
If the drum trap cap is hopelessly corroded or the trap itself is leaking, consult a plumber about replacing the drum trap with a modern P-trap. This is a larger job but eliminates the drum trap’s chronic clogging problem permanently.
Step 5 — Use an Enzymatic Drain Cleaner as a Maintenance Flush
Once the mechanical clog is clear, an enzymatic drain cleaner helps dissolve the soap scum and grease coating the pipe walls that would otherwise trap new hair quickly. Enzymatic cleaners use beneficial bacteria and enzymes to break down organic matter — they are safe for all pipe types including PVC, copper, cast iron, and ABS.
Pour the recommended amount down the drain (typically 4 to 8 ounces) in the evening so it has several hours of contact time without being flushed by showering or bathing. Repeat monthly to keep the pipe interior clean.
Avoid using caustic chemical drain cleaners like sulfuric acid or sodium hydroxide products regularly. These products generate heat, can crack older pipe joints, damage rubber gaskets, and eat through chrome plating on older drain assemblies. They also create hazardous fumes and pose a splash risk if the drain is partially blocked.
Step 6 — Test and Confirm the Fix
Run the hot water tap at full pressure for one full minute and watch how quickly the water drains. A healthy bathtub drain should keep up with a running faucet easily — water should not pool at all under normal shower flow rates.
If the water now drains quickly, you’re done. Reinstall the clean stopper, wipe down the drain area, and set a calendar reminder to run an enzymatic cleaner monthly and pull the stopper for a quick cleaning every four weeks.
If the drain is still slow after clearing the hair clog and cleaning the trap, the blockage is likely deeper in the drain line — past the trap — or there may be a venting problem causing the pipe to drain slowly. At this point, renting a power auger to reach deeper into the line is worthwhile before calling a plumber.
Preventing Slow Drains Going Forward
The single most effective preventive measure is a drain hair catcher — a small mesh or silicone basket that sits over the drain opening and catches hair before it enters the pipe. Clean it after every shower and it takes about five seconds. This one habit eliminates the overwhelming majority of drain clogs.
Run hot water for thirty seconds after every bath or shower to help flush soap residue through the trap. Once a week, pour a kettle of near-boiling water slowly down the drain to melt grease and soap buildup clinging to the pipe walls.
Related Reading
- How to Unclog a Kitchen Sink Drain
- How to Fix a Running Toilet
- How to Replace a Bathroom Faucet
- Step 1 — Remove and Inspect the Drain Cover
Before doing anything else, pull the stopper or drain cover out of the tub. The method depends on the style of drain your tub has.
- Step 2 — Clear Hair From the Trap Arm and Drain Pipe
Removing the visible clog from the drain cover helps, but the hair that escaped through the screen over months and years has settled deeper in the pipe. This is where the barb tool and the drain snake come in.
- Step 3 — Clean the Pop-Up Stopper Mechanism
The soaking stopper assembly you set aside in step one is ready to clean now. Use an old toothbrush or a small bottle brush to scrub soap scum and biofilm off every surface.
- Step 4 — Identify Your Trap Type: P-Trap vs. Drum Trap
Most modern bathtubs use a P-trap — the curved section of pipe directly beneath the tub drain that forms a water seal against sewer gas.
- Step 5 — Use an Enzymatic Drain Cleaner as a Maintenance Flush
Once the mechanical clog is clear, an enzymatic drain cleaner helps dissolve the soap scum and grease coating the pipe walls that would otherwise trap new hair quickly.
- Step 6 — Test and Confirm the Fix
Run the hot water tap at full pressure for one full minute and watch how quickly the water drains. A healthy bathtub drain should keep up with a running faucet easily — water should not pool at all under normal shower flow rates.
Free: 10-Point Home Maintenance Checklist
Prevent costly repairs with this seasonal checklist. Save hundreds every year by catching problems early.
Your checklist is ready!
Open Checklist →Something went wrong. View the checklist here.