How to Fix a Rotting Fence Post: Repair and Replacement Options
Learn how to fix a rotting wood fence post using steel menders for partial repair, or replace it completely with pressure-treated lumber and proper concrete footing.
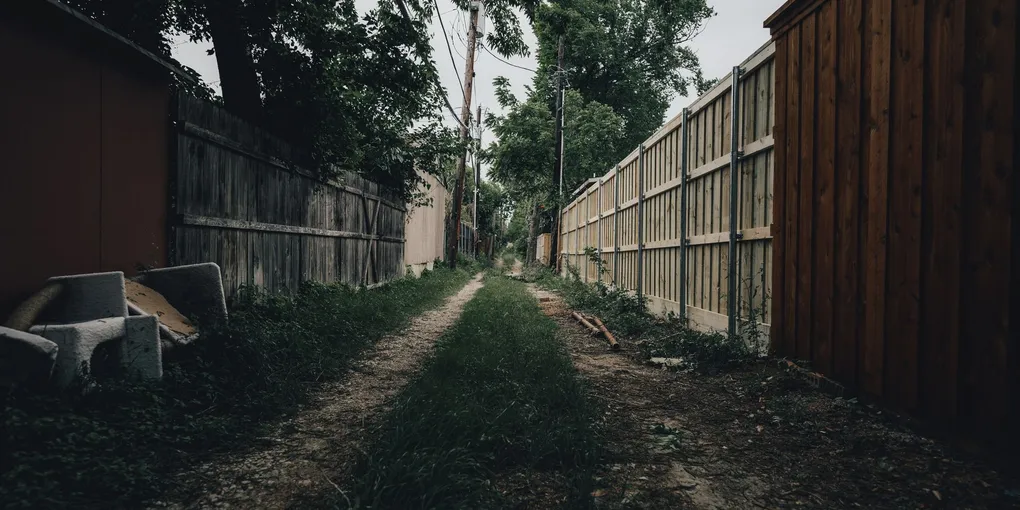
A leaning fence post is a common sight in backyards everywhere, and in most cases the cause is the same: the bottom of the post has rotted away where it meets or enters the soil.
A leaning fence post is a common sight in backyards everywhere, and in most cases the cause is the same: the bottom of the post has rotted away where it meets or enters the soil. Ground contact is brutal on wood — moisture, soil bacteria, and fungi work together to break down wood fibers over 5–15 years depending on climate and wood species. When a post loses its structural integrity at the base, the entire fence panel it supports begins to list.
The good news is that you have options. If the rot is confined to the bottom few inches of an otherwise solid post, a steel post mender can save the repair without removing fence panels. If the post has rotted significantly, replacing it completely with pressure-treated lumber and fresh concrete is the right long-term solution. This guide walks through both approaches.
What You Need
The tools and materials differ depending on whether you are repairing or replacing. Gather what applies to your situation.
- Fence Post Repair Spike / Steel Mender — A drive-in steel bracket that bolts to the existing post above the rot. Sized for 4x4 or 6x6 posts; match to your post size.
- Manual Fence Post Puller — Extracts posts set in soil or concrete using lever action. Saves hours of digging, especially when the old concrete plug comes out with the post.
- Fast-Setting Concrete Mix (50 lb bags) — Pour dry into the hole, add water, and it sets in 20–40 minutes without mixing. Much faster than traditional concrete for fence post applications.
- Pressure-Treated 4x4 Fence Posts (Ground Contact Rated) — Look for UC4B or UC4C designation for ground-contact applications. Available in 8-foot lengths for standard 6-foot fences.
- Post Hole Digger / Clamshell Digger — The manual digger works well in most soils. For rocky or clay-heavy soil, renting a gas-powered auger dramatically reduces effort.
- Wood Preservative / End-Cut Sealer — Brush onto the cut ends and below-grade surfaces of new pressure-treated posts to restore the protective treatment at sawn surfaces.
Step 1: Assess the Damage
Before deciding between repair and replacement, you need to know how much of the post is compromised.
Probe the post with a screwdriver or awl at ground level and 6 inches up from grade on all four sides. Push firmly — you are looking for any give. Sound pressure-treated wood is hard and will resist the point cleanly. Rotted wood feels soft or spongy and the tool sinks in with little resistance.
Rock the post from the top. A small amount of movement is normal. If the post rocks more than a few inches, or if you can feel it moving freely at the base, the structural wood is gone.
Grade the damage:
- Surface rot only (discoloration, softness within 1/4 inch) — treat with wood preservative and monitor.
- Rot in bottom 6–12 inches but solid above — good candidate for a steel post mender repair.
- Rot more than 12 inches above grade, or crumbling core — full replacement required.
Option A: Repair with a Steel Post Mender
Post menders (also called fence repair spurs or repair stakes) are designed exactly for this situation: a post that has rotted at the bottom but is structurally sound above. The mender bypasses the rotted section by providing new ground support via a steel spike that you drive in beside the old post.
Step 1 — Expose the rot. Dig down around the base of the post 6–8 inches to expose the transition zone between rotted and sound wood. Use a hand saw or reciprocating saw to cut off the rotted section cleanly, leaving only solid wood. Make the cut at least 2 inches above the last soft spot you find when probing.
Step 2 — Straighten the post. Use a level on two adjacent faces of the post. Brace the fence panel temporarily if needed so the post stands plumb while you work.
Step 3 — Position the mender. The steel repair spike slips over or bolts to the side of the post (designs vary by brand). Position it so the upper bracket aligns with the cut end of the post and the spike extends downward into the ground.
Step 4 — Drive the spike. Using a sledgehammer or post driver, drive the mender spike into the ground beside the old post. Drive until the bracket is snug against the post at the correct height. Most menders go 18–24 inches into the ground.
Step 5 — Bolt through the post. Drill through the post and the bracket’s bolt holes, then install the carriage bolts, washers, and nuts provided. Tighten firmly.
Step 6 — Backfill and tamp. Fill the excavated area around the mender with gravel and tamped soil, or pour a small amount of fast-setting concrete for additional stability.
The mender repair is completed without removing fence panels and without concrete work. It is the right call for a sound post in a well-built fence — you are extending its life by another decade.
Option B: Full Post Replacement
When the post is too far gone to save, full replacement is the better investment. It takes more work, but a new pressure-treated post set in concrete correctly will last 15–25 years.
Remove the Old Post
Step 1 — Remove fence panels. Unscrew or pry away the fence pickets or panels attached to the damaged post on each side. You typically only need to free the sections immediately adjacent to the post.
Step 2 — Pull the post. If the post is set in concrete, use a manual post puller. Position the puller’s chain or grips around the post just above grade, brace the tool’s foot against the ground, and apply lever pressure. The mechanical advantage is substantial — most posts in concrete plugs come out with steady effort. Rock the post side-to-side as you pull to break the bond.
If the post breaks off at grade, use a digging bar or long pry bar to break up the concrete plug in the hole. Work the bar around the perimeter to loosen it, then use the post puller’s grips on the concrete itself.
Step 3 — Clear the hole. Remove all old concrete, rotted wood debris, and loose soil from the hole. Check the diameter — you want the hole to be at least 3 times the width of your post for concrete to bond properly (so an 8-inch diameter hole for a 4x4 post).
Set the New Post
Step 4 — Check the hole depth. For a 6-foot fence, you need a 2-foot deep hole minimum. In freeze-thaw climates, dig below the frost line — check your local frost depth, which may be 30–48 inches or more.
Step 5 — Add a gravel base. Pour 4–6 inches of gravel into the bottom of the hole. This improves drainage and prevents water from pooling against the post end.
Step 6 — Treat the post end. Brush end-cut wood preservative generously onto the cut end and the bottom 24 inches of the new post. Allow it to soak in before proceeding.
Step 7 — Set and brace the post. Lower the post into the hole. Use a level on two adjacent faces to confirm it is plumb, then nail diagonal 2x4 braces from the post to stakes in the ground to hold it perfectly vertical while the concrete sets. This step is critical — once concrete cures, the post position is permanent.
Step 8 — Pour concrete. Pour dry fast-setting concrete mix into the hole around the post. Fill to within 3–4 inches of grade. Add water according to package directions by pouring it slowly over the dry mix — do not pre-mix in a wheelbarrow. The concrete will absorb the water and begin setting.
Step 9 — Crown the concrete. Before it fully sets, mound the surface of the concrete slightly above grade and slope it away from the post on all sides. This directs rainwater away from the post base — the single most effective thing you can do to extend post life.
Step 10 — Allow cure time. Fast-setting concrete achieves working strength in 20–40 minutes and full strength in 24–48 hours. Leave the braces in place for at least 4 hours, and ideally overnight before reattaching panels.
Reattach Fence Panels
Step 11 — Reinstall panels. Reattach fence rails to the new post using galvanized or stainless steel screws or carriage bolts. Never use plain steel fasteners in direct contact with pressure-treated lumber — the chemicals in the wood corrode standard steel rapidly. Use fasteners rated for use with ACQ or CA treated lumber.
Why Fence Posts Rot — and How to Prevent It Next Time
Understanding the failure mode helps avoid repeating it:
Ground contact is the enemy. The zone where the post enters the soil is where oxygen, moisture, and bacteria create the perfect rot environment. Anything that keeps this zone drier extends post life dramatically.
Prevention strategies:
- Crown the concrete footing at installation so water runs away rather than pooling at the post base.
- Seal end cuts whenever you cut pressure-treated lumber — the factory treatment does not penetrate deeply into the wood, and a fresh cut exposes untreated interior fibers.
- Choose the right lumber grade. Posts rated UC4B (for ground contact in most applications) or UC4C (for soil with high decay potential) last significantly longer than UC3B-rated wood used above grade.
- Consider composite or steel posts for gate posts and corner posts that bear the most stress and are most expensive to replace.
- Keep sprinklers from hitting posts — irrigation water that regularly wets the base of a post dramatically accelerates decay even on pressure-treated lumber.
When to Hire Out the Work
Most fence post repairs are genuinely DIY-friendly. Consider hiring a fencing contractor if:
- Multiple consecutive posts are rotted — a run of bad posts may indicate a drainage problem with the fence line that needs engineering.
- Posts are set in extremely hard clay or rock that makes hole digging impractical without equipment.
- The fence carries significant load — retaining walls, heavy gates, or privacy fences in high-wind zones need properly engineered footings.
Related Reading
- Assess the damage
Before deciding between repair and replacement, probe the post with a screwdriver. Press firmly into the wood at and below ground level. Solid resistance means the core is intact and repair is viable. If the screwdriver penetrates more than half an inch, the post is too far gone to save reliably.
- Repair with a steel post mender (Option A)
Post menders are steel repair stakes designed for this situation. Drive the pointed end of the mender into firm soil next to the rotted post. Bolt the existing post to the mender using the supplied hardware. This transfers the structural load from the rotted base to the new steel spike — no digging or concrete required.
- Replace the post fully (Option B)
For severely rotted posts: dig out around the old post and remove the old concrete footing if possible. Set a new pressure-treated post in a hole at least 1/3 the total post height deep. Pour concrete around the post, brace plumb, and let cure 48 hours before reattaching fence panels.
- Prevent future rot
Apply a wood preservative to the bottom 12 inches of the new or repaired post before backfilling. Ensure the post top is cut at an angle to shed water. Grade soil so water drains away from the post base.
Free: 10-Point Home Maintenance Checklist
Prevent costly repairs with this seasonal checklist. Save hundreds every year by catching problems early.
Your checklist is ready!
Open Checklist →Something went wrong. View the checklist here.