How to Fix a Leaky Outdoor Hose Bib: Packing Nut, Stem, and Cartridge Repair (2026)
A leaking outdoor hose bib (spigot) drips either from the spout when off or from around the handle when on. This guide covers tightening the packing nut, replacing the stem washer, swapping a cartridge, and when to replace the full spigot — including frost-free models.
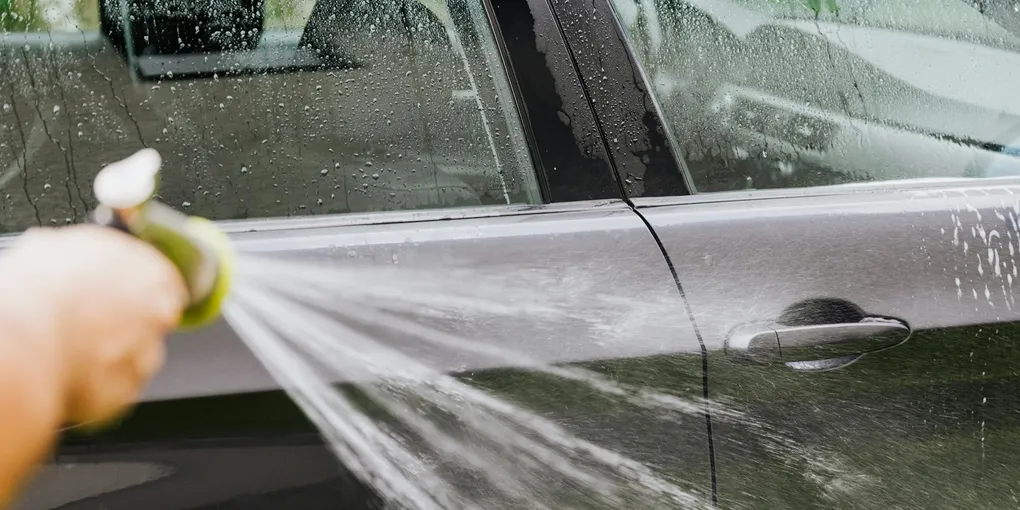
Leaky hose bib fix: (1) Dripping from spout when off — the stem washer or cartridge is worn; replace the washer ($1) or cartridge ($10). (2) Leaking around the handle stem when the water is on — the packing nut is loose; tighten it 1/4 turn with an adjustable wrench and test. (3) Frost-free spigot leaking inside the wall — the stem is cracked from a freeze event; replace the full frost-free sillcock. Most hose bib repairs cost under $10 and take 30 minutes.
Frequently Asked Questions
What is the difference between a standard hose bib and a frost-free sillcock?
A standard hose bib has the water shutoff at the spigot itself, right at the exterior wall. When you turn it off, water stops at the valve seat just inside or behind the exterior wall. This means a small amount of water remains in the section of pipe between the valve and the hose connection, which can freeze and crack the pipe in cold climates. A frost-free sillcock (also called an anti-siphon hose bib or frost-free spigot) has an extended stem — typically 8 to 18 inches long — that reaches through the wall into the heated interior. When you turn the handle, the valve seat closes at the interior end of the stem, where the pipe is warm. Water drains from the extended pipe section back into the house, leaving no standing water in the cold zone. If a frost-free sillcock leaks inside the wall after a winter, the stem is likely cracked from water that was trapped when a hose was left connected during a freeze.
Why does my hose bib drip only when the water is turned on full force?
Dripping or leaking from around the handle or the packing nut area specifically when water is flowing (not when it is off) indicates packing failure. The packing is a rubber washer or graphite packing string that surrounds the valve stem, creating a watertight seal where the stem passes through the valve body. When the packing wears, pressurized water works past the stem and leaks around the handle. The first fix is to tighten the packing nut — the hex nut immediately behind the handle — by 1/4 to 1/2 turn. If tightening makes the handle stiff but stops the leak, the packing is still viable. If tightening does not stop the leak or the nut is already tight, replace the packing washer or packing string inside the valve body.
How do I shut off water to a single outdoor hose bib for repairs?
Most hose bibs have a dedicated interior shutoff valve on the supply pipe, typically located in the basement, crawlspace, or utility room on the interior side of the wall where the spigot exits. It may be a ball valve (lever handle) or gate valve (round wheel handle). Turn it fully off and open the hose bib to release pressure and drain residual water. If there is no dedicated shutoff, you will need to shut off the main water supply to the house. Some older homes have a whole-house shutoff only — turn it off, make the repair, and restore. If you are installing a frost-free sillcock for the first time, this is a good opportunity to add a dedicated shutoff with a ball valve on the supply side.
Can I repair a frost-free hose bib or do I have to replace the whole thing?
Frost-free hose bibs are designed so the stem assembly is serviceable from the outside, without cutting into the wall. The stem — which runs through the wall and carries the valve seat washer at the far end — can be removed by unscrewing the packing nut and pulling the stem straight out from the front of the spigot. Replacement stems are available for most major brands (Woodford, BK Mueller, Cambridge) and cost $15–$25. If the spigot body itself is cracked, or if the leak is from the pipe inside the wall (not the stem), replacement of the entire sillcock is necessary. Replacement requires cutting the supply pipe and soldering or using push-fit connectors — a 30-minute job if the interior shutoff is accessible.
My hose bib leaks inside the wall. How do I find and fix it?
A frost-free spigot that leaks inside the wall almost always means the stem was damaged by freezing — typically because a hose was left connected during cold weather, trapping water in the stem and causing it to crack when it froze. Signs: water stains on the interior wall, damp drywall, or visible dripping from the pipe inside the basement or crawlspace when the hose bib is used. To confirm: turn on the spigot and have a second person watch the interior pipe connection. If water appears inside the wall or at the interior pipe junction, the stem is cracked. Solution: replace the stem assembly or the full frost-free sillcock. This is also a good time to verify that your outdoor spigot has an anti-siphon vacuum breaker — required by plumbing codes to prevent backflow.
How do I prevent my hose bib from freezing and cracking again next winter?
Three steps prevent freeze damage: (1) Disconnect all hoses before the first freeze. A connected hose traps water in the frost-free stem, negating the design entirely. (2) Shut off the interior dedicated shutoff valve to the spigot in late fall and open the spigot to drain any remaining water. (3) If your spigot is not frost-free, install an outdoor faucet cover — an insulated foam dome — over the spigot for the winter season. These cost $3–$8 and significantly reduce freeze risk for standard hose bibs in mild climates, though they do not fully protect in sustained hard freezes. In climates that regularly drop below 15°F, upgrading to a frost-free sillcock is the correct permanent solution.
Leaky hose bib fix: (1) Dripping from spout when off — the stem washer or cartridge is worn; replace the washer ($1) or cartridge ($10). (2) Leaking around the handle stem when the water is on — the packing nut is loose; tighten it 1/4 turn with an adjustable wrench and test.
An outdoor hose bib that drips or leaks around the handle is one of the easiest plumbing repairs in the house. You typically need no soldering, no specialty tools, and under $10 in parts.
What You Need
- Replacement stem washer assortment — flat and beveled — matches the valve seat washer in most standard hose bibs
- Frost-free sillcock stem replacement — if replacing the internal stem on a frost-free spigot
- Teflon packing string — graphite-impregnated — for repacking the stem on older compression-style spigots
- Adjustable wrench — 10-inch — for packing nut and bonnet nut removal
- Thread seal tape — PTFE plumber’s tape — for reassembling threaded connections
- Outdoor hose bib frost-free replacement — 3/4 MIP x 1/2 FIP — for full replacement when the spigot body is damaged
Step 1: Identify the Leak Location
Before buying any parts, pinpoint exactly where the leak is coming from.
Turn on the hose bib and observe:
- Dripping from the spout nozzle when the handle is fully closed: The valve seat washer or cartridge is worn and not sealing fully. This is a stem washer repair.
- Water weeping from around the handle shaft when the water is on: Packing failure. Start with packing nut tightening.
- Leak at the connection between the spigot body and the house siding: The spigot was installed without sufficient caulk or the mounting has shifted. Recaulk after the other repairs.
- Dripping or water inside the house when the spigot is used: Cracked frost-free stem — see Step 4.
Step 2: Tighten the Packing Nut
If the leak is around the stem (handle area) when water is flowing, start here — it costs nothing and takes 2 minutes.
- Turn off the water supply to the spigot at the interior shutoff valve.
- Open the spigot to relieve pressure and drain the spout.
- Locate the packing nut — the hex nut immediately behind and below the handle, where the stem enters the valve body.
- Use an adjustable wrench to turn the packing nut clockwise by 1/4 turn.
- Restore water and test: Turn the water back on and open the spigot fully. Check around the handle for weeping. If the leak has stopped, you are done. If it reduced but persists, tighten another 1/4 turn.
Do not overtighten — if the handle becomes very stiff to turn, the packing is being compressed too tightly. Loosen 1/8 turn.
Step 3: Replace the Stem Washer (Spout Drip)
If the spigot drips from the spout when closed, the stem washer is worn.
- Turn off the interior shutoff and open the spigot to drain.
- Remove the handle: Usually a single screw on top of the handle, then the handle pulls off.
- Remove the packing nut with an adjustable wrench (counterclockwise). The entire stem assembly will slide out.
- Look at the bottom of the stem: A rubber washer is held in place by a brass screw. This washer presses against the valve seat when closed and creates the seal.
- Remove the brass screw and the old washer. Note the washer’s diameter and whether it has a beveled or flat face — take it with you to match the replacement.
- Install the new washer: Seat it firmly in the cup at the bottom of the stem and replace the brass screw. Do not overtighten — the washer should be snug but not deformed.
- Reinstall the stem: Thread the stem back into the valve body, tighten the packing nut firmly, reinstall the handle.
- Restore water and test: Close the spigot and watch the spout. The drip should be gone.
Step 4: Replace the Frost-Free Stem
For frost-free hose bibs where the stem is damaged or the seat washer at the interior end is worn:
- Turn off the interior shutoff and open the spigot to drain.
- Remove the handle (usually one screw).
- Remove the packing nut (the large hex nut at the spigot body) counterclockwise with an adjustable wrench.
- Pull the stem straight out. Frost-free stems are 8–18 inches long — pull straight out without twisting. The stem will come out the front of the spigot.
- Note the stem length in inches (measured from the front of the valve body to the end of the stem where the washer is) and the brand (stamped on the stem body or the spigot body).
- Take the stem to a plumbing supply store or look up the stem by brand and length to order a replacement.
- Inspect the valve seat inside the spigot body with a flashlight — if it is visibly damaged, replace the entire sillcock.
- Install the new stem: Apply plumber’s grease to the O-rings. Insert straight, thread in the packing nut, and tighten firmly.
- Restore water and test. Run the spigot at full pressure and check the interior wall (basement or crawlspace) for any dripping.
Step 5: Replace the Full Sillcock
If the spigot body is cracked, corroded through, or the leak is at the wall connection, replace the unit.
Standard push-fit / threaded replacement (no soldering):
- Turn off the interior shutoff, drain the spigot and the supply pipe.
- Unscrew the old spigot from the exterior of the house — counterclockwise, viewed from outside. It should unthread from the supply pipe stub.
- Clean the pipe threads inside the wall.
- Apply PTFE thread tape to the threads of the new frost-free sillcock — 3–4 wraps clockwise as viewed from the threaded end.
- Thread the new sillcock into the supply pipe, turning clockwise. Aim the spigot handle upward. Hand-tighten, then use a wrench for 1–2 more turns — do not overtighten cast iron or old galvanized threads.
- Caulk around the sillcock flange at the exterior wall with polyurethane or silicone caulk. The flange should sit flush against the siding.
- Restore water and test for leaks at the interior pipe connection.
Preventing Future Hose Bib Leaks
- Disconnect hoses before the first freeze — the single most important step for frost-free bibs
- Shut off the interior valve and open the spigot each fall to drain the supply line
- Check the packing nut annually — a quarter-turn tightening in spring prevents most stem leaks from developing
- Caulk the flange — the joint between the spigot flange and siding collects water. Keep it caulked and inspect every other year
Related Reading
- How to Fix a Leaky Faucet — same valve repair principles applied to indoor compression faucets
- How to Winterize Your Home — full outdoor plumbing shutdown checklist for fall
- How to Fix a Running Toilet — another quick plumbing fix with big water savings
- Identify the leak location
Turn on the hose bib and observe where the water appears: spout drip when off (worn stem washer or cartridge), leak around the handle stem while on (loose packing nut or worn packing), leak at the wall connection (thread sealant failure), or water inside the wall (cracked frost-free stem from freezing).
- Tighten the packing nut
Locate the hex-shaped packing nut directly behind the handle. Use an adjustable wrench to tighten it clockwise one quarter turn. Turn the water back on and test. For leaks around the handle when water is running, this is often the complete fix.
- Replace the stem washer (spout drip)
Turn off the interior shutoff valve. Remove the handle (set screw or Phillips screw) and unscrew the packing nut. Slide the stem out. At the far end of the stem is a brass screw holding the rubber washer — remove the screw, swap in a matching washer, and reassemble. Reinstall in reverse order.
- Replace the frost-free stem (internal leak)
Turn off the interior shutoff. Remove the handle and packing nut. Pull the long stem straight out of the spigot body — it may be 8–18 inches long. Measure its length and note the brand. Purchase a replacement stem ($15–$25). Apply plumber's grease to the new stem's O-rings before inserting. Reinstall the packing nut and handle.
- Replace the full sillcock (cracked body)
If the spigot body is cracked or corroded, turn off the interior shutoff and unscrew the old spigot from the wall. Wrap the threads of the new frost-free sillcock with PTFE thread tape (3 wraps). Thread it in clockwise, angled slightly downward to allow drainage. Caulk around the exterior flange at the wall.
Free: 10-Point Home Maintenance Checklist
Prevent costly repairs with this seasonal checklist. Save hundreds every year by catching problems early.
Your checklist is ready!
Open Checklist →Something went wrong. View the checklist here.