How to Fix a Leaking Washing Machine Hose
Learn how to identify, remove, and replace a leaking washing machine supply or drain hose to prevent water damage before it becomes a flood.
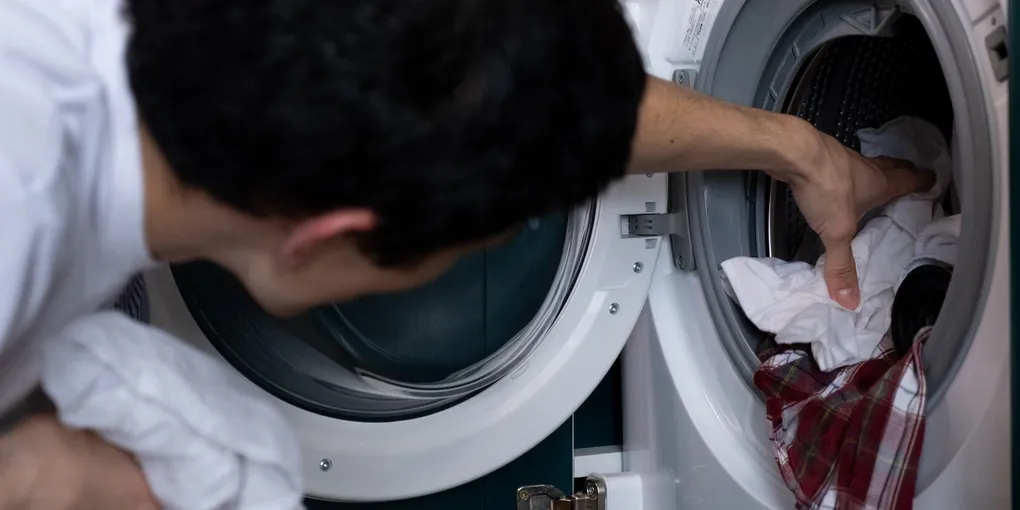
A washing machine hose failure is one of the most destructive water leaks a homeowner can face.
A washing machine hose failure is one of the most destructive water leaks a homeowner can face. Unlike a dripping faucet that wastes water slowly, a burst supply hose can discharge hundreds of gallons of water per hour into your home — potentially flooding a finished basement, ruining flooring, and causing thousands of dollars in structural damage. The Federal Emergency Management Agency lists washing machine hose failures among the top causes of residential water damage.
The fix is one of the easiest plumbing jobs you can do. New braided stainless steel hoses cost under $30 for a pair, installation requires no special tools, and the whole job takes about 30 minutes. This guide covers both supply hose replacement (the high-pressure hoses connecting the wall valves to the machine) and drain hose issues, plus how to identify whether you have a hose problem or a different type of washing machine leak.
What You Need
- Fluidmaster Stainless Steel Washing Machine Hose Set (6 ft., 2-pack) — Braided stainless steel hoses with reinforced ends and rubber gaskets pre-installed. Far more durable than standard rubber hoses. The 6-foot length works for most washer installations; measure your current hoses if yours are unusually long or short.
- Washing Machine Hose Replacement Washers (Assorted Pack) — If your existing hoses are in good condition but leaking at the fittings, new rubber washers inside the fittings may solve the problem without replacing the entire hose.
- Channel-Lock Pliers (10-Inch) — For disconnecting and reconnecting the hose fittings at the wall valves and machine inlets. Do not use an adjustable wrench — it can slip and round off the fittings.
Additional items: a bucket or shallow pan to catch residual water, old towels, and a flashlight to see behind the machine.
Step 1: Diagnose the Source of the Leak
Before buying parts, confirm that the hoses are actually the problem. Common washing machine leak sources and how to identify them:
Supply hose leak at the fitting: Water drips from where the hose meets the wall valve or the machine’s inlet port. The fitting may show white mineral deposits or corrosion from slow, long-term dripping. This is the most common hose leak.
Hose body failure: A bulge, blister, or crack in the body of the rubber hose. Often preceded by a visible swelling in the hose — if you see any bulge, replace the hose immediately before it ruptures.
Drain hose leak: Water on the floor only during or after a wash cycle (not while the machine sits idle between uses). Check whether the drain hose is properly inserted into the standpipe and whether the hose itself is cracked or split.
Internal pump or tub seal leak: Water appears on the floor but no supply or drain hose shows moisture. This is a machine repair issue, not a hose issue. Look for water under the machine centered below the drum, not near the back connections.
Lid or door gasket: On front-loaders, water on the floor during the wash cycle often comes from a worn door boot gasket — not the hoses.
This guide focuses on supply and drain hose issues.
Step 2: Shut Off the Water Supply
Locate the hot and cold water shutoff valves behind the washing machine. They look like standard hose bibb valves or lever-handled ball valves and are typically mounted on the wall behind the machine or recessed in a box in the wall.
Turn both valves clockwise until they stop. Fully closed valves have no play — if a valve turns endlessly without resistance, the mechanism may be broken and you will need to use the main house water shutoff while working.
If the valves are corroded or will not turn: Do not force them. Apply a penetrating lubricant and wait 15 minutes, then try again with firm, steady pressure. If they still will not move, shut off the main water supply and consider replacing the valves at the same time — a stuck valve that you cannot operate in an emergency is a problem waiting to happen.
Step 3: Disconnect the Old Supply Hoses
Pull the washing machine away from the wall enough to access the hose connections. Most washers have leveling feet that can be retracted to lower the machine and make it easier to move — tilt the machine back slightly and pull forward.
Place a bucket or shallow pan beneath the wall valves to catch water. Even with the valves shut, there will be residual water in the hoses.
Use channel-lock pliers to grip the fitting nut where the hose meets the wall valve. Hold the valve body steady with your other hand — you do not want to twist the valve body, which can break the solder joint behind the wall. Turn the fitting counterclockwise to loosen.
Once the fitting breaks free, unscrew it by hand and pull the hose away. Water will drain from the hose — direct it into the bucket. Repeat for the second hose at the wall valve.
Move to the back of the machine and disconnect both hoses at the machine inlet ports using the same process. Note which hose connects to the hot inlet and which connects to the cold — the inlets are labeled on the machine, typically with H and C or with red and blue markings.
Set the old hoses aside. Before discarding them, pull out the rubber washer from each fitting and inspect it. If it is hard, cracked, or flattened, this washer failure was your leak. New hoses include new washers.
Step 4: Inspect the Valve Threads and Machine Inlets
Before installing the new hoses, inspect the threaded connections they will attach to.
At the wall valves: look at the male threads on the valve outlet. Corrosion, mineral buildup, or damaged threads will prevent a good seal. Clean off mineral deposits with a wire brush. Damaged threads require valve replacement.
At the machine inlets: inspect the female threads on the back of the machine. These are plastic on most modern washers — gently clean any buildup with a soft brush. Check that the threaded ports are not cracked.
Do not apply Teflon tape to these threads. Washing machine hose connections seal with the rubber washer inside the fitting — not thread sealant.
Step 5: Install the New Supply Hoses
The new braided stainless steel hoses have rubber washers pre-installed inside each fitting end. Verify the washers are present and seated flat in the fitting before connecting.
Connect to the machine first. Thread the hot hose onto the hot inlet and the cold hose onto the cold inlet by hand. Thread carefully — these are often plastic threads and will cross-thread if you force them. Hand-tighten until snug, then add one quarter to one half turn with the channel-lock pliers. No more.
Connect to the wall valves. Thread each hose onto its corresponding valve outlet by hand, then tighten the same way — hand-tight plus a quarter turn with pliers. Hold the valve body steady while tightening.
Verify the hoses are not kinked. They should form a gentle curve between the wall and the machine with no sharp bends. A kinked hose creates a weak point that can fail under pressure.
Step 6: Open the Valves and Check for Leaks
Slowly turn both wall valves counterclockwise to open them. Do not fully open them quickly — open each one gradually over several seconds to allow pressure to build gently.
Watch each connection point for drips as the pressure comes up. Check:
- Both fittings at the wall valves
- Both fittings at the machine inlets
- The full length of each hose body
A slow drip at a fitting means the washer is not seating correctly. Turn the water off and tighten the fitting a quarter turn at a time until the drip stops. If the connection still leaks after additional tightening, disconnect the hose and inspect the washer — it may have shifted or been damaged during installation.
A drip at the hose body (not at a fitting) means the hose is defective. Return it and get a replacement.
Step 7: Address Drain Hose Issues
If your leak occurs during or after a wash cycle and the supply hoses are dry, the drain hose is likely the culprit.
The drain hose exits the back of the machine and routes to either a standpipe (a vertical pipe stub in the wall), a laundry tub, or a floor drain. Check these common issues:
Drain hose not secured to standpipe: The hose can vibrate out of the standpipe during high-spin cycles, flooding the floor with gray water. Secure it with a drain hose guide or a cable tie that prevents the hose from backing out.
Standpipe height: The top of the standpipe should be between 18 and 96 inches from the floor. Too low causes siphoning — water drains out during the wash cycle. Too high and the pump cannot clear the water.
Cracked or split drain hose: Inspect the full length of the drain hose for cracks. Drain hoses are typically corrugated plastic and can develop stress cracks where they are bent too sharply. Replace the entire drain hose if cracked — patches do not hold.
To replace a drain hose: remove the clamp at the machine outlet (typically a spring clamp you squeeze with pliers), slide the hose off the outlet, and slide the new hose on. Secure with the clamp and route to the drain.
Step 8: Push the Machine Back and Test a Full Cycle
Once all connections are confirmed leak-free, push the washing machine back into its alcove. Leave at least 4 inches of space between the machine and the wall so the hoses are not pinched or kinked.
Run a full wash cycle and remain nearby for the first 10 minutes to verify no leaks appear. Check the floor around and behind the machine after the cycle completes.
Set a reminder to inspect the hose connections annually and to replace the hoses proactively in 5 years — or immediately if you ever see any bulging or cracking in the hose body.
Related Reading
- How to Fix a Leaky Faucet: Compression, Ball, and Cartridge Types
- How to Unclog a Drain Without Chemicals
- How to Fix a Running Toilet: Flapper, Fill Valve, and Float
- Diagnose the Source of the Leak
Before buying parts, confirm that the hoses are actually the problem. Common washing machine leak sources and how to identify them:
- Shut Off the Water Supply
Locate the hot and cold water shutoff valves behind the washing machine. They look like standard hose bibb valves or lever-handled ball valves and are typically mounted on the wall behind the machine or recessed in a box in the wall.
- Disconnect the Old Supply Hoses
Pull the washing machine away from the wall enough to access the hose connections. Most washers have leveling feet that can be retracted to lower the machine and make it easier to move — tilt the machine back slightly and pull forward.
- Inspect the Valve Threads and Machine Inlets
Before installing the new hoses, inspect the threaded connections they will attach to.
- Install the New Supply Hoses
The new braided stainless steel hoses have rubber washers pre-installed inside each fitting end. Verify the washers are present and seated flat in the fitting before connecting.
- Open the Valves and Check for Leaks
Slowly turn both wall valves counterclockwise to open them. Do not fully open them quickly — open each one gradually over several seconds to allow pressure to build gently.
Free: 10-Point Home Maintenance Checklist
Prevent costly repairs with this seasonal checklist. Save hundreds every year by catching problems early.
Your checklist is ready!
Open Checklist →Something went wrong. View the checklist here.