How to Fix a Leaking Shower Pan: Crack Repair, Liner Replacement, and Re-Grouting (2026)
A leaking shower pan can rot your subfloor and cause mold in weeks. This guide covers diagnosing the leak source, patching cracks in the pan, replacing a failed liner, resetting the drain flange, and re-grouting tile to stop water intrusion for good.
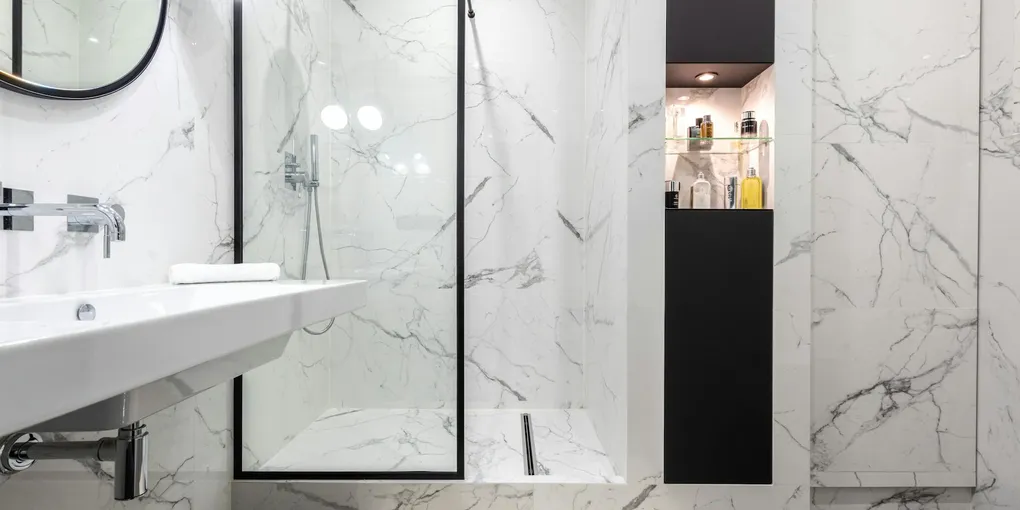
A leaking shower pan is one of those problems that gets dramatically worse the longer you wait. Water that migrates through cracked grout or a failed liner soaks into the mortar bed, reaches the subfloor, and starts rotting the wood within weeks.
A leaking shower pan is one of those problems that gets dramatically worse the longer you wait. Water that migrates through cracked grout or a failed liner soaks into the mortar bed, reaches the subfloor, and starts rotting the wood within weeks. By the time you notice soft spots in the bathroom floor or water stains on the ceiling below, significant damage has already occurred. The good news: catching a shower pan leak early and making the right repair — whether that’s patching a surface crack, re-grouting the pan, or replacing the liner entirely — is well within DIY reach if you’re willing to commit the time.
This guide walks you through diagnosing exactly where your shower pan is leaking, then covers each repair tier from the simplest (re-caulking and re-grouting) to the most involved (full liner replacement with mortar bed).
What You Need
The tools and materials depend on the repair scope. Gather these before you start:
- Shower pan liner replacement kit (PVC or CPE) — for liner replacement; typically $40–$80 for a standard shower
- Shower drain body and clamp ring — the drain flange often needs replacing with the liner; $15–$40
- Fiberglass and acrylic shower pan repair kit — for surface crack repair on fiberglass or acrylic pans; $20–$45
- Unsanded tile grout — for joints under 1/8 inch; use unsanded in shower pans to avoid scratching tile; $10–$20
- 100% silicone caulk, white or custom color — for the pan-to-wall transition and drain edge; grout cracks here, silicone flexes; $8–$15
- Floor-level mortar (deck mud) — for liner replacement; the pre-sloped mortar bed beneath the liner; $15–$30 per bag
Estimated materials cost: $30–$80 for grout and caulk repairs. $200–$500 for a full liner replacement with new mortar bed and tile.
Step 1: Diagnose the Leak Source
Before spending money on materials or tearing out tile, confirm where the water is actually coming from. There are three possible sources in a shower: the supply plumbing, the drain connections, or the pan itself.
The flood test isolates the pan. Remove the drain screen and plug the drain with a rubber test plug (available at plumbing supply stores for about $8) or pack rags tightly into the drain opening. Fill the pan with 1 to 2 inches of water and mark the water line on the pan wall with a piece of tape. Note the time and come back in 24 hours without using the shower.
- If the water level dropped: the pan or liner is leaking. Proceed with pan repair.
- If the water level held but you have water damage below: the plumbing is the culprit — supply lines or drain connections. This guide focuses on pan repair; plumbing leaks need separate diagnosis.
Also inspect the grout lines in the pan floor and along the bottom perimeter where the pan meets the wall. Missing grout, cracked grout, or grout that sounds hollow when tapped (tap with a coin — a hollow tink versus a solid thud) indicates water is already migrating through.
Inspect the caulk bead at the pan-to-wall transition. This joint should be silicone, not grout. Grout here will always crack eventually because the pan and wall move independently. Cracked or missing caulk at this joint is one of the most common causes of shower pan leaks and the easiest to fix.
Step 2: Re-Caulk the Pan Perimeter (Simplest Fix)
If the flood test shows the pan holds water and the grout lines look intact, but you have a failed caulk joint at the pan-to-wall transition, re-caulking alone may solve the problem.
Remove all old caulk from the joint using a caulk remover tool or a sharp utility knife. Be thorough — new caulk won’t bond over old caulk. Clean the joint with rubbing alcohol and let it dry completely.
Apply a bead of 100% silicone caulk (not latex, not “kitchen and bath” acrylic caulk — silicone only for submerged joints). Tool the bead smooth with a wet finger or caulk tool. Let it cure 24 to 48 hours before using the shower.
Cost: $10–$20 in caulk. Time: 1–2 hours including cure prep.
Step 3: Re-Grout the Shower Pan Tile
If grout in the pan floor is cracked, missing, or hollow, removing and replacing it stops the water infiltration path.
Remove old grout with an oscillating multi-tool with a grout removal blade or a manual grout saw. Work carefully — you’re trying to remove the grout without cracking or chipping the tile. Remove grout to a depth of at least 1/8 inch so the new grout has enough thickness to bond properly.
Clean the joints with a stiff brush and vacuum out all debris. Rinse with water and let dry completely — 24 hours minimum for a wet shower.
Apply new grout with a rubber grout float, pressing it firmly into the joints at a 45-degree angle. Work in small sections. Scrape off excess with the float edge.
Wipe excess grout from tile faces with a damp (not wet) sponge before it sets — typically within 15 to 30 minutes depending on temperature. Rinse the sponge frequently.
Let grout cure for 72 hours before getting it wet. After curing, apply a penetrating grout sealer to protect the joints.
Drain edge: where the tile meets the drain cover, use silicone caulk instead of grout. This joint takes direct water impact and needs the flexibility silicone provides.
Cost: $25–$50 in grout, float, and sealer. Time: 4–6 hours over two days.
Step 4: Repair a Cracked Fiberglass or Acrylic Pan
If your shower has a one-piece fiberglass or acrylic pan (no tile) with surface cracks, a repair kit can restore the waterproof surface without replacing the pan.
First, confirm the pan isn’t flexing. Step on the cracked area — if the pan gives noticeably, it has lost structural support from below. A flexible pan means the foam or mortar support beneath has deteriorated, and you’ll need to address that before a surface repair will hold.
If the pan is solid:
- Clean the crack area thoroughly with acetone or rubbing alcohol.
- Open the repair kit — most include filler compound, fiberglass cloth, and gel coat or paint matched to standard shower pan colors.
- Sand the crack area lightly with 120-grit sandpaper to give the repair compound something to grip.
- Apply filler compound into the crack, pressing firmly. For longer cracks, apply fiberglass cloth over the filler for added strength.
- Sand smooth after curing (usually 2–4 hours).
- Apply gel coat or finish coat to match the surrounding surface.
- Wet-sand with 400 then 800-grit sandpaper to blend the repair.
Cost: $20–$45 for a repair kit. Time: 3–4 hours plus cure time.
This repair is cosmetically good and functionally sound for hairline cracks. For through-cracks or any crack that flexes when pressed, liner replacement is the right approach.
Step 5: Replace the Shower Pan Liner
A failed liner — typically indicated by a pan that fails the flood test even with intact grout — requires full demolition and reinstallation. This is the most involved repair, but it is the permanent fix for a leaking shower pan.
Demolition: Remove the drain cover and drain body. Cut out grout joints with an oscillating tool and remove tile using a floor chisel and hammer. Work carefully if you plan to reuse tile — tile removal often breaks 20 to 40 percent of tiles. Budget for replacement tile. Once tile is out, chip up the mortar bed with a jackhammer or rotary hammer. Expose the old liner and subfloor.
Subfloor inspection: Check the subfloor for rot and soft spots. Probe with a screwdriver — soft wood indicates rot. Replace rotted sections with exterior-grade plywood before proceeding. This is also when you’ll find out how long the leak has been going on. A little discoloration is normal; full rot means the leak has been active for months or years.
Pre-slope the subfloor: The liner needs to slope toward the drain weep holes. Build a pre-slope using deck mud (5 parts sand to 1 part Portland cement, with minimal water — the mix should hold its shape when squeezed). The standard pre-slope is 1/4 inch drop per foot toward the drain. Let the pre-slope cure 24 hours.
Install the liner: Cut the liner to size — it should extend up the walls 3 inches above the finished dam height (typically 3 inches above the shower curb). Fold corners carefully using the manufacturer’s instructions; most liner systems include pre-formed corners or require hot-air welded corner pieces. Set the liner over the pre-slope.
Install the drain body: The drain body clamps to the liner — the liner sandwiches between the bottom and top halves of the drain body. Tighten the clamping bolts evenly. The liner must not be punctured by any fasteners except at the drain clamp. Do not nail or staple the liner to the walls — it must float freely to allow expansion.
Test the liner: Flood test the liner before pouring the mortar bed. Plug the drain weep holes with a test plug, fill with 2 inches of water, and let it sit for 24 hours. It should hold. Fix any leaks now — you cannot fix them after the mortar bed is poured.
Pour the mortar bed: Mix deck mud to the same consistency as before. Build the mortar bed over the liner to a finished depth of 1.5 to 2 inches at the drain, sloping 1/4 inch per foot. Work carefully to avoid puncturing the liner with tools. Float the surface smooth and let cure 24 to 48 hours.
Tile and grout: Set tile using a latex-modified thin-set mortar. Use silicone at the drain edge and at the pan-to-wall transition. Grout after thin-set cures (24 hours), seal after grout cures (72 hours).
Cost: $200–$500 in materials. Time: 1 week including all cure times.
Step 6: Reset or Replace the Drain Flange
The drain flange — the visible ring around the drain opening — is a common secondary leak point even when the liner is sound. The flange threads into the drain body, and over time the seal can degrade.
If the flood test showed the pan holds water but you see seepage specifically around the drain, try removing the flange (it typically unscrews counterclockwise) and applying fresh plumber’s putty or silicone under the flange seat before re-threading.
If the drain body is corroded or cracked (common in older lead or cast-iron drain bodies), replace the entire drain assembly with a new PVC drain body rated for your liner type. This is done during the liner replacement step when the drain body is already removed.
A new drain body costs $15–$40 and ensures a clean, leak-free connection to the liner.
What to Expect Long-Term
A properly installed shower pan liner should last 20 to 30 years or more under normal use. The most common reasons for premature failure are drain clamp bolts that weren’t tightened evenly (liner tears at the clamp), liner punctured by a nail or staple during installation, or a mortar bed that wasn’t properly pre-sloped (water pools under the liner instead of draining through the weep holes).
After any shower pan repair, re-apply grout sealer annually and re-inspect the caulk joint at the pan perimeter each year. Replace caulk at the first sign of cracking. These simple maintenance steps prevent the next liner failure.
Related Reading
- How to Fix a Leaky Faucet — tackle other common bathroom water problems
- How to Re-Caulk a Bathtub — the same silicone principles applied to tub surrounds
- How to Repair Drywall Water Damage — fix the wall damage caused by a leaking shower
- Diagnose the Leak Source
Before spending money on materials or tearing out tile, confirm where the water is actually coming from. There are three possible sources in a shower: the supply plumbing, the drain connections, or the pan itself.
- Re-Caulk the Pan Perimeter (Simplest Fix)
If the flood test shows the pan holds water and the grout lines look intact, but you have a failed caulk joint at the pan-to-wall transition, re-caulking alone may solve the problem.
- Re-Grout the Shower Pan Tile
If grout in the pan floor is cracked, missing, or hollow, removing and replacing it stops the water infiltration path.
- Repair a Cracked Fiberglass or Acrylic Pan
If your shower has a one-piece fiberglass or acrylic pan (no tile) with surface cracks, a repair kit can restore the waterproof surface without replacing the pan.
- Replace the Shower Pan Liner
A failed liner — typically indicated by a pan that fails the flood test even with intact grout — requires full demolition and reinstallation. This is the most involved repair, but it is the permanent fix for a leaking shower pan.
- Reset or Replace the Drain Flange
The drain flange — the visible ring around the drain opening — is a common secondary leak point even when the liner is sound. The flange threads into the drain body, and over time the seal can degrade.
Free: 10-Point Home Maintenance Checklist
Prevent costly repairs with this seasonal checklist. Save hundreds every year by catching problems early.
Your checklist is ready!
Open Checklist →Something went wrong. View the checklist here.