How to Fix a Leaking Pipe Inside a Wall
Learn how to locate a hidden pipe leak, safely open drywall, repair the pipe with a clamp or coupling, and patch everything back up like a pro.
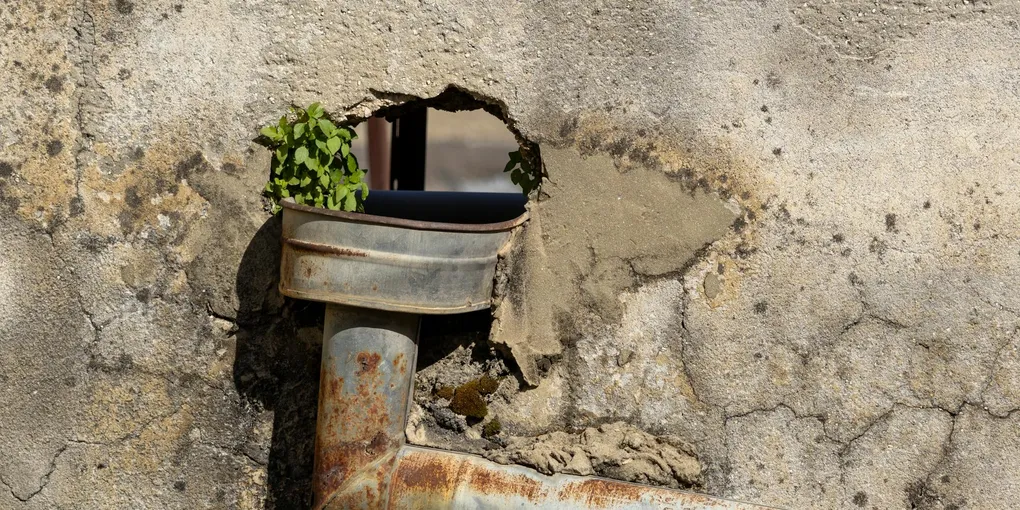
A leaking pipe inside a wall: (1) Confirm it's a pipe (water meter test — read meter, wait 15 min, read again; if it moved, you have an active leak). (2) Turn off the main water supply. (3) Locate the leak zone with a moisture meter. (4) Cut drywall access panel over the leak using an oscillating multi-tool. (5) Repair with a SharkBite push-to-connect coupling or pipe clamp — no soldering. (6) Let dry completely, then patch drywall. Professional repair: $400-$1,500 depending on pipe access and damage.
Frequently Asked Questions
How do I know if I have a leaking pipe inside a wall?
Warning signs: water stains or discoloration on drywall, soft or bubbling paint, a musty smell (mold), warped baseboards, and visible water dripping from a ceiling or wall. The most reliable test: turn off every faucet and fixture, then check if your water meter is still spinning. If the dial moves, there's an active supply-line leak somewhere in the house.
How much does it cost to repair a leaking pipe in a wall?
DIY repair: $20-$80 in parts (SharkBite coupling, drywall patch, joint compound). Professional plumber: $400-$1,500 depending on pipe accessibility, pipe material (copper vs. PEX vs. CPVC), and extent of water damage. If mold is present, remediation adds $500-$5,000+ depending on severity.
Can I fix a wall pipe leak without cutting drywall?
Only for minor pinhole leaks accessible near a seam or access panel. Most wall pipe repairs require opening the drywall — there's no way to permanently repair a fitting or section of burst pipe without direct access. Self-fusing silicone tape and pipe repair clamps are temporary fixes only, not permanent solutions.
Should I call a plumber or DIY a wall pipe leak?
DIY if: you have the tools (oscillating multi-tool, moisture meter), the leak is localized to one spot, and the pipe is accessible. Call a plumber if: the leak has spread moisture to multiple areas, there's visible mold or rot, the pipe is behind concrete or tile, or you can't find the source. Any leak that's been running more than a few days likely has water damage that a plumber should assess.
How long does it take to fix a leaking pipe in a wall?
The pipe repair itself takes 1-3 hours if you have direct access. Finding the leak source adds 30-60 minutes. Opening and patching drywall adds 2-4 hours plus drying time before painting (24-48 hours). Total weekend project. Professional plumbers typically complete the pipe repair in 2-4 hours — the drywall patch is separate and may involve a drywall contractor.
A leaking pipe inside a wall: (1) Confirm it’s a pipe (water meter test — read meter, wait 15 min, read again; if it moved, you have an active leak). (2) Turn off the main water supply.
A leaking pipe inside a wall is one of those home repair problems that can sneak up on you. One day you notice a damp patch on the drywall, a faint musty smell, or a water stain creeping down the baseboard. Left unchecked, a hidden pipe leak can rot framing, fuel mold growth, and cause thousands of dollars in structural damage. The good news is that with the right tools and a methodical approach, many homeowners can locate the leak, open the wall, repair the pipe, and restore the drywall themselves — all in a weekend.
This guide walks you through every step, from detecting the source of the leak to patching the wall so cleanly your guests will never know anything happened.
What You Need
Before you start, gather everything so you are not running to the hardware store mid-repair. Here are the key supplies with Amazon links:
- Pipe repair clamp (Fernco or SharkBite brand) — the fastest fix for a pinhole or hairline crack
- SharkBite push-to-connect couplings — no soldering needed for copper or PEX repairs
- Drywall repair patch kit — for closing the access hole cleanly
- Moisture meter — essential for mapping how far the dampness has spread
- Oscillating multi-tool — makes precise drywall cuts without damaging wiring or pipes
- Joint compound and drywall tape — for a seamless wall finish after the repair
You will also want: a utility knife, a stud finder, a bucket, towels, a flashlight, safety glasses, and a wrench set.
Step 1: Confirm You Have a Pipe Leak (Not Condensation or a Roof Issue)
Before ripping open a wall, make sure the moisture actually comes from a pipe. Check these clues:
- Water meter test. Turn off every fixture in the house, then read the water meter. Wait 15 minutes without using water and read it again. If the dial moved, you have an active supply-line leak somewhere.
- Location clues. Stains or dampness near a bathroom, kitchen, or laundry wall strongly suggest a supply or drain pipe. Dampness on an exterior wall could be a roof or flashing issue instead.
- Moisture meter readings. Press the probes against the suspect drywall. Readings above 17% indicate elevated moisture. Scan the surrounding area to find the wet center — that is usually closest to the leak.
- Sound. In a quiet house, press your ear against the wall. A slow drip or a hiss can sometimes be heard through the drywall.
Identifying the correct spot before cutting saves you from opening multiple unnecessary holes.
Step 2: Shut Off the Water and Protect the Work Area
Once you have a strong candidate location, act immediately:
- Shut off the main water supply valve — usually in the basement, crawlspace, or outside near the meter.
- Open the lowest faucet in the house to drain pressure from the lines.
- Lay plastic sheeting and old towels on the floor below the wall. Water trapped behind drywall can pour out when you cut.
- Turn off electricity to any outlets or switches on that wall at the breaker panel. Water and electricity are a lethal combination.
Step 3: Open the Wall
Use a stud finder to mark the stud locations flanking your target area. Plan your cut so the opening edges land in the center of studs — this gives you a nailing surface when you reinstall the drywall.
Cut carefully with an oscillating multi-tool. Its controlled blade depth reduces the risk of nicking a pipe or wire hiding just behind the drywall. Make a small exploratory cut first — about 4 inches square — to peek inside with a flashlight. Once you confirm the pipe location, enlarge the opening to give yourself comfortable working room (typically 12 to 18 inches wide).
Save the cut drywall pieces. If they are in reasonable shape and the moisture has not crumbled them, you can sometimes reuse them as patch backing.
When you open the wall, document everything with photos before touching anything. This helps immensely when you reassemble.
Step 4: Assess the Pipe Damage
With the pipe visible, identify exactly what you are dealing with:
- Pinhole or hairline crack. Common in older copper pipes affected by corrosion or water chemistry. A pipe repair clamp can handle this if the surrounding pipe is otherwise sound.
- Split or burst section. Requires cutting out the damaged section and installing a coupling.
- Corroded joint or fitting. The solder joint at an elbow or tee may have failed. You will need to cut out the fitting and install a new one.
- Loose drain fitting. Drain pipes (ABS or PVC) can separate at glued joints. This is a re-glue or coupling job.
Also check the surrounding framing and insulation. If the wood shows dark staining or soft spots, you may need to replace a section of stud or blocking — address this before closing the wall.
Step 5: Repair the Pipe — Clamp vs. Coupling
Option A: Pipe Repair Clamp
For a pinhole or crack on an otherwise solid pipe, a rubber-lined pipe repair clamp is the fastest fix. Dry the pipe thoroughly (use a heat gun or hair dryer on low). Center the clamp over the damage, tighten the bolts evenly, and you are done. This works on copper, galvanized, CPVC, and PEX. It is code-compliant in most jurisdictions as a permanent repair.
Option B: Push-to-Connect Coupling (SharkBite)
When you need to remove a section of damaged pipe, SharkBite couplings are the go-to choice for DIYers because they require zero soldering. Here is the process:
- Use a tube cutter to make two clean, square cuts — one on each side of the damaged section. Remove the bad piece.
- Deburr the cut ends with a deburring tool or fine-grit sandpaper.
- Mark the insertion depth on each pipe end with a marker (depth gauge comes with SharkBite fittings).
- Push the coupling onto one end until it clicks, then onto the other end.
Turn the water back on slowly and watch for drips. SharkBite fittings work on copper, CPVC, and PEX without any special tools.
Option C: Soldered Copper Coupling
If you are comfortable with a torch, a traditional sweated copper coupling is the most permanent solution and preferred by some inspectors. Drain and dry the pipe completely, flux the fittings, heat evenly, and feed solder until it wicks in. Let it cool before turning water on.
Step 6: Test Before Closing the Wall
This step saves you from opening the wall a second time. Turn the water supply back on slowly. Watch the repair for a full 10 minutes. Check with a dry paper towel — any moisture at all means the repair is not sealing. Do not skip this step.
If everything is dry, run a few fixtures for a minute, then recheck. Only when you are fully confident should you move on to patching.
Step 7: Address Moisture Damage Inside the Wall
Before closing up, deal with what the leak left behind:
- Remove any wet or moldy insulation completely. Do not try to dry and reuse it.
- If you see mold growth on the framing (dark spots, fuzzy patches), treat with a mold-killing primer or a diluted bleach solution (1 cup bleach per gallon of water). Let it dry fully.
- Use a fan or dehumidifier aimed at the open cavity for at least 24 hours before closing.
- Replace any insulation you removed with new faced batt insulation cut to fit.
Step 8: Patch the Drywall
For a clean patch, use the California patch method or a drywall repair clip system:
- If your cutout edges land on studs, measure and cut a piece of new drywall to fit exactly.
- Secure it with drywall screws into the studs.
- Apply joint compound over the seams, press paper tape into the wet compound, and feather outward.
- Let each coat dry fully (4 to 6 hours), then sand lightly between coats. Two to three coats gives a flat, invisible seam.
- Prime the patch before painting — unprimed joint compound absorbs paint unevenly and will show through.
Match the existing paint color and apply with a roller for a texture that blends with the surrounding wall.
Frequently Asked Questions
-
question: “How do I know if the leak is from a supply pipe or a drain pipe?” answer: “Supply pipes are always under pressure, so they drip or spray continuously whether or not you are using water. Drain pipes only carry water when a fixture is in use. Run the water meter test: if the meter moves with all fixtures off, it is a supply line leak.”
-
question: “Can I use a pipe repair clamp as a permanent fix?” answer: “Yes. Rubber-lined repair clamps are considered permanent repairs by most plumbing codes when installed correctly on sound pipe. However, if the pipe is generally corroded or thin-walled, replacing the section with a coupling is the more durable long-term fix.”
-
question: “Do I need a permit to repair a pipe inside a wall?” answer: “Most jurisdictions exempt minor repairs like replacing a section of pipe from permit requirements, but policies vary. Call your local building department to confirm. Opening a wall and replacing a fitting may require a permit in some municipalities.”
-
question: “How long does it take for wet drywall to dry out before I can patch it?” answer: “After stopping the leak, run a fan or dehumidifier aimed into the open cavity for a minimum of 24 to 48 hours. Use a moisture meter to confirm the framing reads below 15% before closing the wall. In humid climates, allow up to 72 hours.”
-
question: “What causes pinhole leaks in copper pipes?” answer: “Pinhole leaks in copper are usually caused by aggressive water chemistry — specifically water that is slightly acidic or has high chloramine content. Over time, the water etches tiny pits in the pipe wall until it perforates. If you have multiple pinholes, consider a whole-house water filter or re-piping with PEX.”
-
question: “Can I repair a leaking pipe without turning off the main water supply?” answer: “Technically, some plumbers use pipe freezing kits to create a temporary ice plug and work without shutting the main off. For DIY work, this is risky and unnecessary. Always shut off the main supply — the repair will be cleaner and safer.”
When to Call a Plumber
While many pipe-in-wall repairs are solidly within DIY territory, a few situations warrant professional help:
- The leak is on a main supply line 3/4 inch or larger.
- You find evidence of widespread corrosion throughout the wall cavity.
- The pipe runs through load-bearing framing that you cannot safely cut without structural support.
- You discover significant mold growth that has spread beyond a small area.
- The leak is on a hot water recirculation line or near the water heater.
A licensed plumber can also pull the necessary permits and arrange inspections, which protects you if you ever sell the home.
Related Reading
- Confirm You Have a Pipe Leak (Not Condensation or a Roof Issue)
Before ripping open a wall, make sure the moisture actually comes from a pipe. Check these clues:
- Shut Off the Water and Protect the Work Area
Once you have a strong candidate location, act immediately:
- Open the Wall
Use a stud finder to mark the stud locations flanking your target area. Plan your cut so the opening edges land in the center of studs — this gives you a nailing surface when you reinstall the drywall.
- Assess the Pipe Damage
With the pipe visible, identify exactly what you are dealing with:
- Test Before Closing the Wall
This step saves you from opening the wall a second time. Turn the water supply back on slowly. Watch the repair for a full 10 minutes. Check with a dry paper towel — any moisture at all means the repair is not sealing. Do not skip this step.
- Address Moisture Damage Inside the Wall
Before closing up, deal with what the leak left behind:
Free: 10-Point Home Maintenance Checklist
Prevent costly repairs with this seasonal checklist. Save hundreds every year by catching problems early.
Your checklist is ready!
Open Checklist →Something went wrong. View the checklist here.