How to Fix a Leaking Outdoor Spigot Handle
When your outdoor faucet handle spins freely but water keeps running, the packing nut or stem assembly is to blame. This guide walks you through diagnosing and fixing the problem yourself.
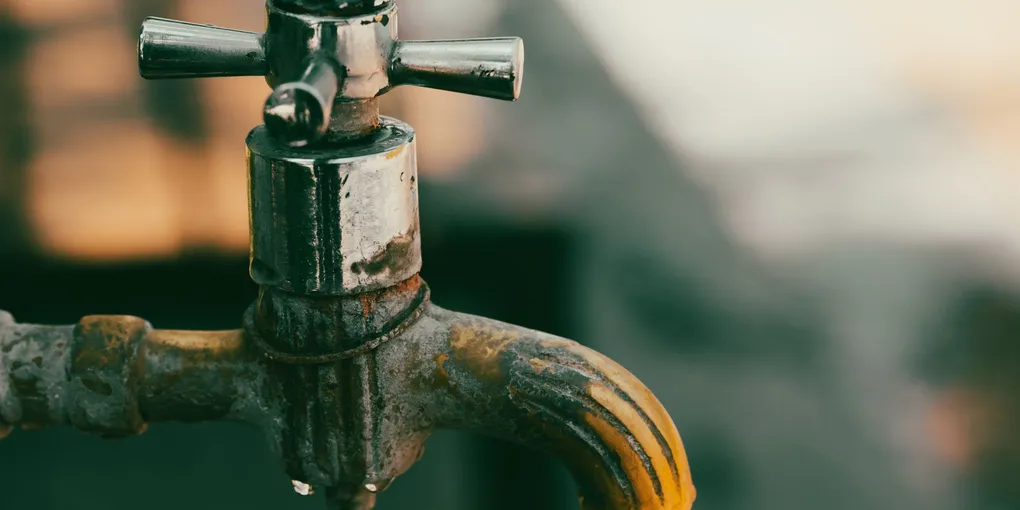
Outdoor spigot handle spins but won't shut off: the packing nut is loose or the stem assembly is worn. Fix: turn off water at the shutoff valve for that spigot (or main shutoff), unscrew the packing nut behind the handle with an adjustable wrench, replace the rubber washer or O-ring at the end of the stem ($2-$5 in parts), reassemble and test. If the spigot still won't shut off after replacing the washer, the stem is damaged — replace the whole stem assembly ($10-$30).
Frequently Asked Questions
Why does my outdoor faucet spin but water keeps running?
The rubber washer or O-ring at the end of the valve stem is worn out and no longer seals against the valve seat. Every time you close the faucet, it rotates the stem down to press the washer against the seat — when the washer fails, water leaks through regardless of position. The packing nut can also work loose, allowing the stem to move without creating enough pressure to seal.
How do I fix a leaking outdoor spigot myself?
Turn off the water supply (shutoff valve below the spigot or main shutoff). Remove the handle (usually one screw under a decorative cap). Unscrew the packing nut with an adjustable wrench (counterclockwise). Pull out the stem. Replace the washer at the tip (standard washer sizes at any hardware store, $1-$3). If the seat is pitted, resurface with a valve seat wrench or replace the stem. Reassemble and turn water back on.
How much does it cost to fix an outdoor spigot?
DIY repair costs $2-$15 in parts (washer, O-ring, or replacement stem). Hiring a plumber for a simple outdoor faucet repair runs $75-$200 including service call fee. Full spigot replacement (frost-free hose bib): $100-$300 installed by a plumber.
Should I replace my spigot with a frost-free model?
Yes if you live where temperatures drop below freezing. Frost-free hose bibs have the shutoff valve 6-12 inches inside the wall (above the frost line) and drain automatically when you turn them off. Standard spigots freeze and burst — frost-free models eliminate this risk. Replacement runs $100-$300 installed and pays back after the first winter with no burst pipes.
Outdoor spigot handle spins but won’t shut off: the packing nut is loose or the stem assembly is worn. Fix: turn off water at the shutoff valve for that spigot (or main shutoff), unscrew the packing nut behind the handle with an adjustable wrench, replace the rubber washer or O-ring at the end of the stem ($2-$5 in parts), reassemble and test.
An outdoor faucet that turns and turns without shutting off is one of those problems that demands immediate attention. Every minute the water runs, you are paying for it — and if the spigot is on a supply line shared with the house, you cannot ignore it. The good news is that this is almost always a repair you can handle yourself in under an hour with basic tools and a few inexpensive parts.
This guide covers the three most common culprits: a worn packing nut, a failed stem assembly, and a damaged frost-free stem. By the time you are done reading, you will know exactly what you are dealing with and how to fix it for good.
What You Need
Before you touch the spigot, gather your supplies. Having everything on hand before you open the wall or shut off the water means you will not be stuck mid-repair running to the hardware store.
- Adjustable wrench or slip-joint pliers — for loosening the packing nut and retaining nut
- Replacement packing washer or packing string kit — most repairs start here
- Replacement stem assembly for your faucet brand — needed if the stem is corroded or cracked
- Frost-free sillcock replacement — for full stem replacement on anti-freeze models
- Teflon plumber’s tape — wraps threaded connections to prevent future leaks
- Pipe thread compound / pipe dope — for reassembling threaded fittings securely
Understanding Why the Handle Spins But Won’t Shut Off
A standard outdoor spigot (also called a hose bib or sillcock) works by turning a threaded stem that presses a rubber washer or seat washer down against a seat inside the valve body. When you turn the handle clockwise, the stem threads deeper into the body, the washer compresses against the seat, and water stops flowing.
When the handle spins freely with no resistance and water keeps flowing, it means the mechanical connection between the handle motion and the stem compression has broken down. There are three specific failure points:
The packing nut is loose or the packing material is gone. The packing nut sits just behind the handle on the exterior of the faucet. It compresses a ring of graphite rope or a rubber washer (called packing) around the stem to create a watertight seal. When this packing wears out or the nut backs off over years of temperature cycling, the stem can spin without generating enough grip to seat properly.
The stem threads are stripped. The stem itself is a brass rod with coarse threads on the outside. Those threads engage the threads inside the valve body to drive the stem in and out. If the brass threads have corroded badly, or if someone overtightened the handle and crossed the threads, the stem will spin without advancing.
The frost-free stem is broken internally. On frost-free sillcocks — the most common type installed in the last 30 years — the stem extends 8 to 12 inches into the heated space of the house and the actual shutoff happens deep inside. If the anti-siphon stem rod separates from the washer at the far end, the handle will turn freely while water continues to pass.
Step 1 — Shut Off the Water Supply
This is non-negotiable. Locate the shutoff valve for the outdoor faucet. In many homes, there is a dedicated shutoff inside the basement or crawl space on the supply pipe that feeds the spigot. Turn it clockwise until it stops. If there is no dedicated shutoff, close the main house shutoff.
Open the outdoor faucet handle to drain any remaining pressure in the line. Have a bucket or towels handy at the spigot location because there will still be some residual water in the pipe.
Step 2 — Remove the Handle and Expose the Packing Nut
Most outdoor faucet handles are held by a single screw hidden under a decorative cap or at the center of the handle. Pop off the cap with a flathead screwdriver and remove the screw. Pull the handle straight off the stem.
Behind the handle you will see the packing nut — a hex-shaped nut that threads into the faucet body. It is typically brass and ranges from 3/4 inch to 1 inch across the flats. Grip it with your adjustable wrench and turn counterclockwise to loosen it. Do not remove it yet — just break it loose.
Before you unscrew the packing nut completely, check whether simply tightening it a quarter turn or half turn stops the spinning. Thermal expansion and contraction over many seasons can back a packing nut off enough to cause the problem. Try snugging it down and then reinstall the handle to test whether the valve closes again. If tightening cures it, you are done.
Step 3 — Replace the Packing Material
If tightening the nut did not help, unscrew the packing nut the rest of the way and slide it off the stem. Inside the nut or wrapped around the stem you will find the old packing — either a rubber O-ring, a molded rubber washer, or a graphite-impregnated rope. Pull it all out and inspect it.
For O-ring or rubber washer packing: Take the old piece to the hardware store to match the diameter exactly, or buy a universal packing washer kit. Slide the new washer onto the stem and seat it where the old one sat.
For graphite rope packing: Wind several turns of new graphite packing string clockwise around the stem just behind where the packing nut will sit. Use enough material to fill the void snugly — about the same total thickness as what you removed.
Reinstall the packing nut, threading it in by hand first, then snugging with the wrench. Do not overtighten; it should be firm, not cranked down hard. Reinstall the handle, restore the water supply, and test. The handle should now turn with clear resistance and stop water flow completely when closed.
Step 4 — Replace the Stem Assembly if Packing Is Not the Problem
If the handle still spins without shutting off after replacing the packing, the stem itself is the issue — either stripped threads or a broken stem rod.
With the water shut off, remove the packing nut completely and then unscrew the stem from the valve body by turning it counterclockwise. The stem will back all the way out. You can now visually inspect the threads. If they look crushed, corroded, or obviously stripped, you need a replacement stem.
Take the old stem to a plumbing supply store or search by faucet brand and model number online. Most major brands — Woodford, BrassCraft, American Valve — sell replacement stems that drop right into the existing body.
Apply a layer of pipe thread compound or a wrap of Teflon tape to the stem threads before reinstalling. Thread the new stem into the body by hand, going slowly to catch the threads correctly, then snug it with the wrench. Reinstall the packing nut, replace the packing material, and test.
Step 5 — Full Frost-Free Stem Replacement
On a frost-free sillcock, if the internal rod has separated from the seat washer at the end of the long stem, you need to replace the entire stem — a rod that can be 8 to 14 inches long depending on the wall thickness.
This repair is slightly more involved but still a DIY job. With water shut off and pressure bled:
- Remove the handle and packing nut.
- Unscrew the stem by turning it counterclockwise. A frost-free stem unscrews from the body just like a standard stem, but it will be much longer when it comes out.
- Inspect the far end of the stem for the rubber seat washer. If it is missing, cracked, or has separated from the threaded rod that holds it, that is your failure point.
- Match the stem by length (measure in inches) and by the thread size that engages the faucet body.
- Some frost-free stems also include an anti-siphon vacuum breaker at the top — make sure your replacement includes the same feature.
- Thread in the new stem, reinstall the packing, and test.
If the faucet body itself is cracked or corroded at the threads, replacing the entire sillcock may be necessary. That is a slightly larger job involving cutting the supply pipe and sweating or using a push-fit connector, but still well within DIY territory.
Preventing Future Spigot Problems
A few simple habits extend the life of your outdoor faucet dramatically:
Never force a seized handle. If you have to crank hard to open or close the faucet, the packing is too tight or the stem is starting to corrode. Address it early rather than stripping threads.
Disconnect hoses before winter. Even on frost-free sillcocks, a connected garden hose traps water in the external portion of the faucet where it can freeze, crack, and destroy the spigot. Disconnect every hose in the fall.
Exercise the valve seasonally. Turn outdoor faucets fully open and fully closed a few times each spring when you bring the water back up for the season. This prevents the stem from seizing in place from lack of movement.
Check the packing nut annually. A one-minute visual inspection each spring to confirm the packing nut is snug catches most problems before they become water-wasting emergencies.
FAQ
-
question: “Can I fix a spinning outdoor faucet handle without shutting off the main water?” answer: “No. You must shut off the water supply before removing the packing nut or stem. Working on a pressurized faucet will cause an uncontrolled flood inside the wall or at the spigot location.”
-
question: “How do I know if I have a frost-free sillcock?” answer: “Look at the faucet from outside. A frost-free sillcock has a body that extends through the wall at an angle or straight through, usually 8 to 14 inches long rather than sitting flush against the siding. Many also have a red or yellow anti-siphon cap at the top of the handle assembly.”
-
question: “The packing nut is so corroded I cannot get it off. What should I do?” answer: “Soak the joint with penetrating oil and let it sit for 30 minutes. Try again with a larger wrench for more leverage. If it will not move at all, you may need to replace the entire sillcock rather than repair it in place.”
-
question: “Is it safe to use Teflon tape on stem threads?” answer: “Yes. Teflon tape on stem threads is standard practice and helps create a leak-free connection. Wrap it clockwise (when viewed from the threaded end) so it tightens as you thread the stem into the body rather than unraveling.”
-
question: “My frost-free faucet drips from the spout after I close it fully. Is that a different problem?” answer: “Yes. A drip from the spout after closing usually means the seat washer at the end of the stem is worn. This is a separate repair from the spinning handle problem, though both involve removing the stem. Replace the seat washer screw and washer while you have the stem out.”
-
question: “How much does a frost-free stem replacement cost compared to calling a plumber?” answer: “A replacement frost-free stem typically costs $15 to $35 at a hardware store. A plumber visit to do the same repair typically runs $100 to $250 including labor and markup on parts. The DIY savings are substantial for this repair.”
Related Reading
- How to Fix a Leaky Faucet Handle Inside the House
- How to Unclog a Slow Bathroom Drain
- How to Install a New Kitchen Faucet
- Step 1 — Shut Off the Water Supply
This is non-negotiable. Locate the shutoff valve for the outdoor faucet. In many homes, there is a dedicated shutoff inside the basement or crawl space on the supply pipe that feeds the spigot. Turn it clockwise until it stops.
- Step 2 — Remove the Handle and Expose the Packing Nut
Most outdoor faucet handles are held by a single screw hidden under a decorative cap or at the center of the handle. Pop off the cap with a flathead screwdriver and remove the screw. Pull the handle straight off the stem.
- Step 3 — Replace the Packing Material
If tightening the nut did not help, unscrew the packing nut the rest of the way and slide it off the stem.
- Step 4 — Replace the Stem Assembly if Packing Is Not the Problem
If the handle still spins without shutting off after replacing the packing, the stem itself is the issue — either stripped threads or a broken stem rod.
- Step 5 — Full Frost-Free Stem Replacement
On a frost-free sillcock, if the internal rod has separated from the seat washer at the end of the long stem, you need to replace the entire stem — a rod that can be 8 to 14 inches long depending on the wall thickness.
Free: 10-Point Home Maintenance Checklist
Prevent costly repairs with this seasonal checklist. Save hundreds every year by catching problems early.
Your checklist is ready!
Open Checklist →Something went wrong. View the checklist here.