How to Fix a Leaking Bathtub Faucet: Stem Washers, Cartridges, and Diverter Valves
Stop a dripping bathtub faucet yourself — learn how to replace stem washers on two-handle faucets, swap a single-handle cartridge, fix a diverter valve, and shut off the water supply safely.
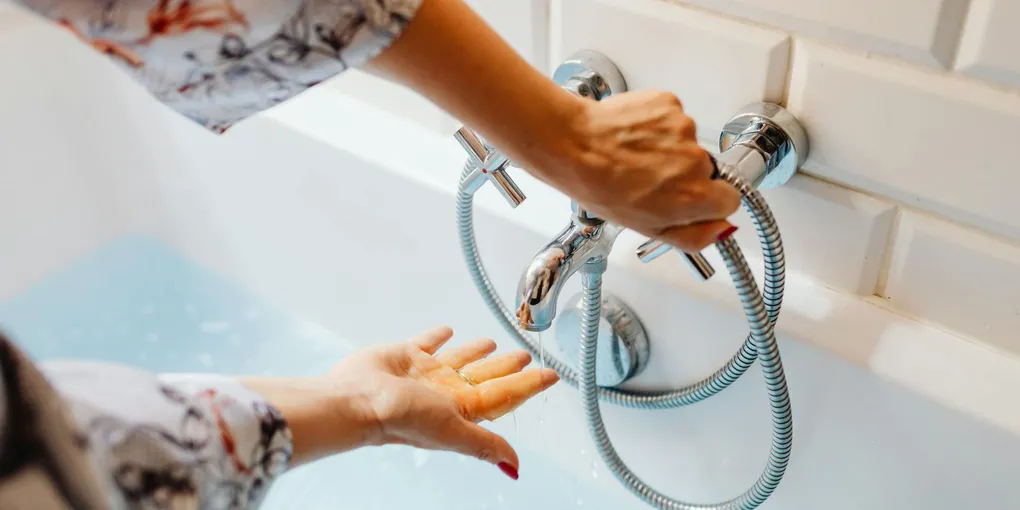
A dripping bathtub faucet is the kind of problem that’s easy to ignore — until you notice the rust stain in the tub, hear the drip at 2 a.m., or open your water bill. The good news is that most tub faucet leaks have a straightforward fix: a worn rubber washer or a degraded cartridge.
A dripping bathtub faucet is the kind of problem that’s easy to ignore — until you notice the rust stain in the tub, hear the drip at 2 a.m., or open your water bill. The good news is that most tub faucet leaks have a straightforward fix: a worn rubber washer or a degraded cartridge. Neither repair requires a plumber, and both are achievable in under two hours with basic hand tools.
This guide covers all the main scenarios: replacing stem washers in a two-handle faucet, swapping a cartridge in a single-handle faucet, fixing a leaky diverter valve, and safely shutting off your water supply before any of it begins.
What You Need
- Faucet Cartridge Replacement — match your faucet brand and model; bring the old cartridge to the hardware store if you’re unsure
- Seat Washer Assortment Kit — flat and beveled rubber washers in common sizes for two-handle stem repairs
- Basin Wrench or Adjustable Pliers — for removing packing nuts and cartridge retaining clips in tight spaces
- Handle Puller Tool — prevents damage to old handles that are stuck from mineral buildup
- Plumber’s Grease — silicone-based grease for lubricating new washers, O-rings, and cartridge seals before installation
- Thread Seal Tape (Teflon Tape) — used to seal threaded connections when reinstalling spouts and diverter assemblies
Estimated costs: A cartridge runs $15–$45 depending on brand. A washer kit costs $5–$10. Teflon tape and plumber’s grease together are about $8–$12. Total repair cost is typically $20–$60 in parts — far less than a plumber visit.
Step 1 — Locate and Shut Off the Water Supply
This is the step most DIYers skip until water is spraying everywhere. Always do it first.
Look for a bathtub access panel. Many homes have a small panel — typically in a closet or hallway on the other side of the tub wall — that provides access to the supply valves for the bathtub. Open it and you’ll usually find two shutoff valves: one for hot, one for cold. Turn both clockwise until they stop (right-tighty = closed).
If no access panel exists: You’ll need to shut off the main water supply valve. This is typically located:
- In the basement or crawl space, on the wall where the main line enters the house
- In a utility room near the water heater
- Outside near the water meter (in warmer climates)
Turn the main shutoff clockwise until it stops.
Relieve pressure after shutoff. Open the tub faucet handles fully to drain any residual water from the supply lines. This prevents a surprise splash when you open the faucet assembly.
Plug the drain. Before disassembling anything, put the drain stopper in or use a rag. Small screws and springs have a way of finding open drains at the worst possible moment.
Step 2 — Diagnose the Leak Location
Before you start disassembling handles, confirm where the leak is actually coming from. The fix differs by location.
Drip from the tub spout when faucet is off: This is the most common complaint and indicates a worn washer (two-handle faucet) or failed cartridge (single-handle faucet). Water is leaking past the valve seat because the seal no longer makes watertight contact.
Water from the spout while the shower is running: This is a diverter issue. The diverter should redirect all flow to the showerhead, but a worn diverter seal lets some water continue flowing through the spout.
Leak around the handle base: Water coming from the stem packing rather than from inside the valve. The packing nut or O-ring needs attention.
Drip from the showerhead when shower isn’t in use: Water is pooling in the shower arm and dripping out. This is usually normal pressure bleed-off rather than a valve leak. If it continues for more than a few minutes, the diverter may not be fully returning to the tub position.
Step 3 — Replacing Washers in a Two-Handle Faucet
Two-handle faucets (separate hot and cold controls) use a stem valve mechanism with a rubber seat washer at the bottom. When that washer wears out, water drips continuously. This is one of the oldest and most reliable plumbing repairs around.
Identify which handle is leaking. Grip each handle and test whether it feels loose or takes extra turns to fully stop the drip. The offending side often feels slightly different. You can also close one at a time and observe whether the drip continues or stops.
Removing the handle:
- Look for a decorative cap in the center of the handle — pry it off with a flathead screwdriver. A Phillips screw is underneath.
- Remove the handle screw and lift the handle off. If it’s stuck, wiggle it while pulling up. If it won’t budge, use a handle puller tool to avoid cracking it.
- Underneath you’ll find an escutcheon (decorative collar) — unscrew or pull it off to expose the packing nut.
Removing the stem:
- Use an adjustable wrench or channel-lock pliers to loosen the packing nut — turn counterclockwise.
- Once the nut is off, grasp the stem and turn it counterclockwise (as if you’re turning the handle to open the faucet). The stem will unscrew from the valve body.
- Pull the stem straight out.
Replacing the washer:
- At the bottom of the stem you’ll find a rubber washer held by a brass screw. Remove the screw and washer.
- Take the old washer to the hardware store or match it to your washer assortment kit. Washers come in flat and beveled styles — match the shape.
- Install the new washer and brass screw. Don’t overtighten — snug is enough.
- Apply a thin coat of plumber’s grease to the washer and to the O-rings on the stem body.
Reassembly:
- Screw the stem back into the valve body clockwise. Hand-tighten, then snug with pliers — don’t gorilla-grip it.
- Replace the packing nut and tighten.
- Replace the handle and screw, then the decorative cap.
- Restore water supply slowly and test for the drip. It should be gone.
Cost estimate: Washer kit ($5–$10), your time: about 45 minutes per handle.
Step 4 — Replacing a Single-Handle Cartridge
Single-handle bathtub faucets — dominant in homes built after the 1980s — use a cartridge: a self-contained valve assembly that controls both temperature and flow. When the cartridge fails, the faucet drips, leaks, or becomes difficult to control. Cartridge replacement is cleaner and faster than washer repair once you’ve done it once.
Identify your faucet brand. Look for logos on the handle, trim plate, or tub spout. Moen, Delta, Kohler, and American Standard are the most common. Each brand uses a proprietary cartridge design — a Moen cartridge won’t fit a Delta faucet. Write down the brand and model number (often stamped on the cartridge itself once removed).
Removing the handle:
- Pry off the decorative cap covering the handle screw.
- Remove the handle screw and pull the handle off.
- Remove any decorative trim sleeve or escutcheon to expose the cartridge retaining clip or nut.
Removing the cartridge:
- Moen cartridges: A U-shaped retaining clip holds the cartridge at the top. Use needle-nose pliers to pull this clip straight out. Then grip the cartridge with pliers and pull straight up — this often requires firm, steady pressure.
- Delta cartridges: Use a hex key or cartridge puller to remove the cartridge bonnet and stem.
- Kohler and other brands: May use a retaining nut that unscrews with a socket wrench.
Note the orientation of the cartridge before removing it — the hot side faces a specific direction (usually marked HOT on the cartridge or valve body). Installing the new cartridge backwards gives you cold when you want hot.
Install the new cartridge:
- Apply a thin coat of plumber’s grease to the O-rings on the new cartridge.
- Align the cartridge with the orientation tabs in the valve body and push it firmly into place.
- For Moen: replace the retaining clip.
- Reassemble trim and handle.
- Restore water slowly and test: turn the handle through its full range and confirm temperature responds correctly. Turn it fully off and verify no drip.
Moen lifetime warranty: If your Moen faucet is leaking and you have the model number, call Moen’s customer service (1-800-BUY-MOEN). They’ll often send you a replacement cartridge for free, even without a receipt.
Step 5 — Fixing a Leaky Diverter Valve
When water continues flowing from the tub spout during a shower, or the diverter knob is stiff and hard to pull up, the diverter valve seal has worn out.
Two types of diverters:
- Tub spout diverter (pull-up pin on the spout): The diverter mechanism is built into the spout itself. Replacement means replacing the entire spout.
- Separate diverter valve (third knob or handle between hot and cold): This is a separate valve with its own stem and washer or cartridge. Repair it the same way you’d fix a two-handle stem — remove the handle, unscrew the stem, and replace the washer.
Replacing a pull-up tub spout:
- Look underneath the spout for a setscrew (Allen key size, usually 4mm). If present, loosen the setscrew and slide the spout off the pipe stub.
- If there’s no setscrew, the spout is threaded. Turn it counterclockwise to unscrew it from the supply pipe.
- Clean the pipe stub with a rag.
- Wrap the threads with two layers of Teflon tape clockwise.
- Thread on the new spout, tighten until snug and oriented correctly (drain hole facing down).
- Restore water and test: pull the diverter up and confirm water flows fully to the showerhead.
Spout cost: $15–$50 depending on finish and style. Match the existing finish (chrome, brushed nickel, oil-rubbed bronze) for a cohesive look.
Step 6 — Fixing Leaks at the Handle Base (Packing)
If water seeps out around the stem where the handle meets the wall, the packing material inside the packing nut has worn out. This is common in older faucets with compression-style stems.
- Turn off the water supply.
- Remove the handle and expose the packing nut.
- Wrap three or four layers of plumber’s packing string (graphite or Teflon type) clockwise around the stem, just above the packing nut seat.
- Replace the packing nut, tightening it just enough to compress the packing.
- Restore water and test. The handle should still turn without binding — if it’s stiff, loosen the packing nut a quarter turn.
Alternatively, modern faucets use O-rings instead of packing string. Remove the stem, slide off the old O-rings, and install new ones of the same size coated in plumber’s grease.
Step 7 — Reassembly Checks and Final Testing
Once the repair is complete, a quick checklist before calling the job done:
- No drip from the spout when the faucet is off — turn the handle firmly and watch for 2–3 minutes
- No leak at the handle base — check around the stem while water is flowing
- Diverter works fully — water routes entirely to showerhead with no spout bleed
- Temperature responds correctly — hot and cold are on the expected sides
- No drip from showerhead when tub faucet is off — the check valve inside the showerhead or the diverter should prevent this
If a drip from the tub spout persists after cartridge or washer replacement, the valve seat inside the faucet body may be pitted or corroded. A seat wrench can be used to remove and replace the valve seat, or a seat grinder tool can resurface it. This is a less common scenario but worth knowing.
When to Call a Plumber
- Corroded or cracked valve body — if the brass valve body itself is cracked or has green corrosion patches, the faucet needs replacement beyond a cartridge swap
- Supply pipe leaking at the wall connection — this is in-wall plumbing and often requires opening the wall
- No local shutoff valves in a multi-unit building where shutting the main affects neighbors
- Faucet more than 20–25 years old — sometimes the economical choice is full replacement rather than repair of aging parts
Plumbers charge $150–$300 for a bathtub faucet repair visit. A full faucet replacement runs $300–$600 including parts and labor. DIY repair with a $30 cartridge is a compelling alternative.
Related Reading
- How to Fix a Running Toilet
- How to Unclog a Bathroom Drain
- How to Replace a Kitchen Faucet
- Step 1 — Locate and Shut Off the Water Supply
This is the step most DIYers skip until water is spraying everywhere. Always do it first.
- Step 2 — Diagnose the Leak Location
Before you start disassembling handles, confirm where the leak is actually coming from. The fix differs by location.
- Step 3 — Replacing Washers in a Two-Handle Faucet
Two-handle faucets (separate hot and cold controls) use a stem valve mechanism with a rubber seat washer at the bottom. When that washer wears out, water drips continuously. This is one of the oldest and most reliable plumbing repairs around.
- Step 4 — Replacing a Single-Handle Cartridge
Single-handle bathtub faucets — dominant in homes built after the 1980s — use a cartridge: a self-contained valve assembly that controls both temperature and flow. When the cartridge fails, the faucet drips, leaks, or becomes difficult to control.
- Step 5 — Fixing a Leaky Diverter Valve
When water continues flowing from the tub spout during a shower, or the diverter knob is stiff and hard to pull up, the diverter valve seal has worn out.
- Step 6 — Fixing Leaks at the Handle Base (Packing)
If water seeps out around the stem where the handle meets the wall, the packing material inside the packing nut has worn out. This is common in older faucets with compression-style stems.
Free: 10-Point Home Maintenance Checklist
Prevent costly repairs with this seasonal checklist. Save hundreds every year by catching problems early.
Your checklist is ready!
Open Checklist →Something went wrong. View the checklist here.