How to Fix a Drafty Basement
Stop cold air and energy loss in your basement by insulating and sealing rim joists, weatherstripping basement windows, and sealing bulkhead doors.
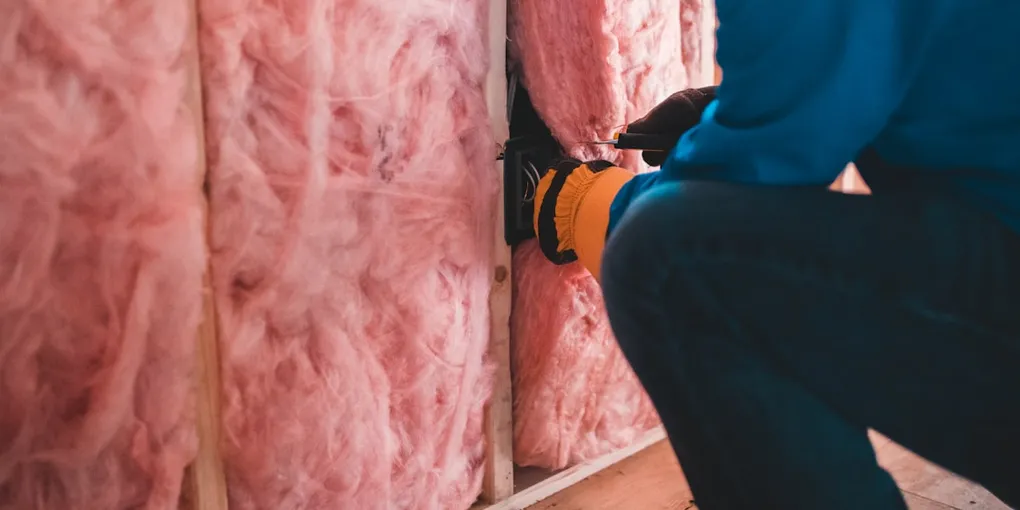
A drafty basement costs you real money every month.
A drafty basement costs you real money every month. According to the Department of Energy, air infiltration through basements accounts for a significant share of heating and cooling loss in many homes — and the three biggest culprits are almost always the same: the rim joist area along the top of the foundation walls, old or poorly fitted basement windows, and bulkhead or bilco doors that let the outside in. The encouraging news is that fixing all three is a straightforward weekend project that typically pays for itself in energy savings within one to two heating seasons.
This guide covers each repair area in full detail, with material recommendations and step-by-step instructions any homeowner can follow.
What You Need
- Rigid Foam Insulation Board (2-inch, R-10) — The best cost-effective option for rim joist cut-and-cobble insulation. Two inches of polyisocyanurate or extruded polystyrene (XPS) provides R-10 per layer and acts as a vapor retarder.
- Canned Spray Foam (Great Stuff or equivalent) — Used to seal the perimeter of every rigid foam piece after it is cut and fitted. Choose “Gaps and Cracks” foam for gaps under 1 inch. Have at least 3 to 4 cans on hand for a typical basement.
- Self-Adhesive Foam Weatherstrip Tape — For sealing basement window frames, bulkhead door edges, and the sill plate against the foundation.
- V-Strip Weatherstripping — For double-hung or sliding basement windows. The V-shape compresses when the window closes, creating an airtight seal.
- Door Sweep with Adhesive Backing — Install on the interior door at the top of bulkhead stairs to stop cold air from flowing into the main basement.
- Caulk Gun and Masonry Caulk — For sealing gaps between the sill plate and the top of the foundation wall before insulating.
Step 1: Understand Where Basement Drafts Come From
Before cutting any foam or applying any tape, spend 20 minutes doing a thorough draft audit of your basement. On a cold or windy day, move a lit incense stick or a thin strip of tissue paper slowly along the top of the basement walls (the rim joist area), around each window frame, and around the perimeter of any exterior basement door. Anywhere the smoke drifts or the tissue moves noticeably, you have found an air leak.
Mark each leak location with painter’s tape or a sticky note so you can find it again once the materials are ready. Pay special attention to:
- The joint between the foundation wall top and the wood sill plate
- The ends of floor joists where they rest on the sill plate
- Any penetrations through the rim joist (pipes, wires, dryer vents)
- Window frame-to-wall transitions
- Bulkhead door frame perimeter
Most homeowners are surprised to discover how many gaps exist even in a home that looks finished and tidy from the inside.
Step 2: Seal the Sill Plate Gap
The sill plate is the bottom piece of wood framing that sits directly on top of the foundation wall. Concrete and block walls are never perfectly flat, and gaps between the sill plate and the foundation can range from hairline cracks to openings you can see daylight through.
Apply masonry caulk or low-expansion spray foam to the entire perimeter where the sill plate meets the foundation wall. Work in 3-foot sections, pressing the caulk into the gap firmly. Tool the surface smooth with a wet finger or plastic spreader to improve adhesion and appearance.
Allow the caulk to cure before proceeding to the rim joist insulation — typically 4 to 8 hours depending on the product.
Step 3: Insulate and Air-Seal the Rim Joists
The rim joist area runs around the entire perimeter of your basement ceiling. It consists of the rim joist board itself, the sill plate below it, and the spaces between floor joists — called joist bays. Each joist bay needs to be individually filled and sealed.
Measure each bay. Floor joist spacing is typically 16 or 24 inches on center. Measure the height of the rim joist area in each bay (usually 7 to 9 inches from sill plate to subfloor). Cut rigid foam board pieces to fit each bay using a utility knife and straightedge — the pieces should fit snugly but not be forced.
Insert the foam pieces. Press each rigid foam piece firmly into its bay so it sits flush against the interior face of the rim joist. If the piece is slightly loose, that is fine — the spray foam seal will hold it.
Seal every edge with spray foam. Run a bead of canned spray foam around all four edges of each foam piece where it contacts the framing, sill plate, and adjacent joists. The foam should fill all gaps completely. Do not rely on the rigid foam alone — the spray foam perimeter seal is what actually stops air movement.
Address penetrations. Seal around any pipes, wires, or vents that pass through the rim joist area using backer rod stuffed into larger gaps first, then spray foam over the top.
One standard basement typically requires four to six cans of spray foam and one sheet of rigid foam board (4x8 feet) per 40 to 60 linear feet of rim joist.
Step 4: Weatherstrip Basement Windows
Basement windows are often original to the house and may be decades old. Even if the glass is intact, the frames have typically shrunk, warped, or lost their original weatherstripping, leaving gaps you can feel with your hand.
For casement and awning windows: Apply self-adhesive closed-cell foam tape around the entire perimeter of the sash where it meets the frame when closed. Clean the contact surfaces with rubbing alcohol first to ensure the adhesive bonds properly. The compressed foam should create a firm seal when the window is latched.
For single and double-hung windows: V-strip weatherstripping is more durable for moving sashes. Cut strips to fit each channel (the vertical tracks where the sash slides) and peel the backing to stick them in place with the open side of the V facing the direction the sash will compress it. Also apply foam tape along the horizontal sill and top stop.
For hopper windows (which tilt in from the top): Apply foam compression tape around the entire opening perimeter. Hopper windows are common in basements and tend to seal well once weatherstripped because the weight of the sash compresses the tape.
After applying weatherstripping, open and close each window several times to verify smooth operation. If the window now sticks, the foam tape is too thick — use a thinner profile.
Basement window well insulation: If your basement windows sit in window wells, check that the well covers are intact and seal at the house foundation. A cracked or missing window well cover allows rain, snow, and cold air to pool against the glass and foundation.
Step 5: Seal the Bulkhead or Bilco Door
Bilco-style bulkhead doors are notorious air leakers. They are typically made of galvanized steel, hinged at the top, and meet at an angled center joint when closed. The perimeter where the frame contacts the foundation is another major gap.
Seal the center joint. Apply self-adhesive closed-cell foam tape to the top edge of the lower door panel where the upper panel overlaps it when closed. This is the most significant air entry point.
Seal the frame perimeter. Apply foam tape or caulk where the metal bulkhead frame contacts the concrete foundation all the way around. Use masonry sealant for long-lasting adhesion on concrete.
Install a door sweep on the interior stair door. Even after sealing the bulkhead itself, the door at the top of the exterior stairs (if your bulkhead has an interior access door) is often a major source of cold air in the main basement. Install a door sweep on the bottom of this door and apply foam weatherstrip tape to the door stop on the top and sides.
Check the bulkhead hinge gaps. Heavy-duty piano hinges on bilco doors often develop gaps over time. Apply butyl rubber sealant tape (available in the HVAC aisle) to close these gaps.
Step 6: Verify Your Work
After completing all three areas, repeat the incense or tissue test on a cold day. Move slowly along the previously leaky areas and confirm that air movement has stopped or been significantly reduced.
Common spots that still show leakage after the first pass:
- Corners of the rim joist where two pieces of rigid foam meet — apply extra foam
- Window frame corners where two strips of tape meet — overlap the tape instead of butting it
- Where utility penetrations (electrical panels, water service entry) pass through the rim joist
In addition to the draft test, check your heating system’s run time on the first cold week after completing the work. Many homeowners report noticeably shorter furnace cycles and a warmer, more comfortable basement temperature within days of completing a thorough air-sealing project.
Step 7: Consider a Whole-Basement Insulation Upgrade
The rim joist and window sealing work covered in this guide is the highest-return insulation investment you can make in a basement. But if your basement walls are completely uninsulated, adding insulation to the full height of the walls is the next logical step.
For finished basements, 2-inch rigid foam panels adhered directly to the foundation wall (before framing) provide an excellent thermal break. For unfinished basements, a continuous layer of 2-inch foam glued to the wall and covered with a fire-rated material (drywall or thermal barrier coating) meets most building codes and significantly improves comfort.
Consult your local building code before embarking on full wall insulation — vapor barrier placement requirements vary by climate zone, and improper installation can trap moisture and cause mold.
Related Reading
- How to Winterize Your Home
- How to Install a Sump Pump
- How to Seal Leaky Ductwork — seal duct leaks in the basement that waste heating and cooling
- How to Insulate an Attic
- Understand Where Basement Drafts Come From
Before cutting any foam or applying any tape, spend 20 minutes doing a thorough draft audit of your basement.
- Seal the Sill Plate Gap
The sill plate is the bottom piece of wood framing that sits directly on top of the foundation wall. Concrete and block walls are never perfectly flat, and gaps between the sill plate and the foundation can range from hairline cracks to openings you...
- Insulate and Air-Seal the Rim Joists
The rim joist area runs around the entire perimeter of your basement ceiling. It consists of the rim joist board itself, the sill plate below it, and the spaces between floor joists — called joist bays.
- Weatherstrip Basement Windows
Basement windows are often original to the house and may be decades old. Even if the glass is intact, the frames have typically shrunk, warped, or lost their original weatherstripping, leaving gaps you can feel with your hand.
- Seal the Bulkhead or Bilco Door
Bilco-style bulkhead doors are notorious air leakers. They are typically made of galvanized steel, hinged at the top, and meet at an angled center joint when closed. The perimeter where the frame contacts the foundation is another major gap.
- Verify Your Work
After completing all three areas, repeat the incense or tissue test on a cold day. Move slowly along the previously leaky areas and confirm that air movement has stopped or been significantly reduced.
Free: 10-Point Home Maintenance Checklist
Prevent costly repairs with this seasonal checklist. Save hundreds every year by catching problems early.
Your checklist is ready!
Open Checklist →Something went wrong. View the checklist here.