How to Fix a Cracked Terrazzo Floor
Repair cracks in terrazzo flooring using epoxy filler, color-matched pigment, and surface polishing to restore a nearly invisible result without full floor replacement.
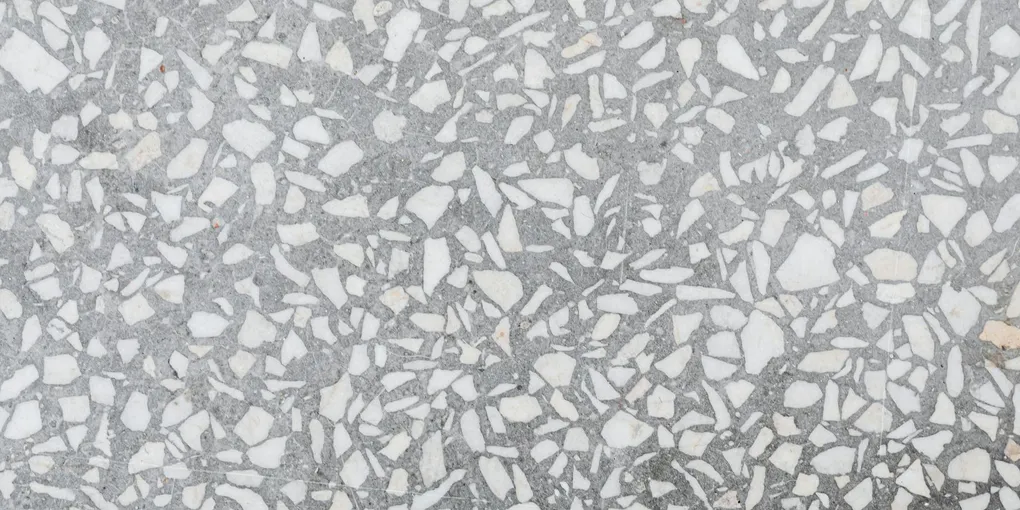
Terrazzo floors are prized for their durability and beauty, but they are not indestructible. The cement or epoxy matrix that holds the aggregate in place can crack from slab movement, settlement, or impact.
Terrazzo floors are prized for their durability and beauty, but they are not indestructible. The cement or epoxy matrix that holds the aggregate in place can crack from slab movement, settlement, or impact. A crack in terrazzo is not just an aesthetic problem — it allows moisture, cleaning solutions, and dirt to penetrate beneath the surface, which can weaken the substrate over time and widen the crack further.
Fortunately, terrazzo crack repair is a highly refined skill with clear techniques, and the results with the right materials can be nearly invisible. This guide walks through cleaning and preparing the crack, selecting and mixing the right epoxy filler, achieving a color match, and polishing the repair to blend with the surrounding floor.
What You Need
Terrazzo repair requires more specific materials than most flooring repairs. Sourcing the right products before starting makes the difference between a visible patch and a nearly seamless repair.
- Low-viscosity two-part epoxy for terrazzo and concrete — fills hairline cracks completely; regular epoxy is too thick
- Epoxy tinted filler or terrazzo repair compound — for building the repair flush and adding color match
- Universal tint pigment set — for color-matching the matrix
- Wet/dry sandpaper assortment 80 to 400 grit — silicon carbide type for wet sanding terrazzo
- Terrazzo or concrete polishing compound — for restoring sheen after sanding
- Angle grinder or rotary tool with small diamond blade — optional, for cleaning and widening the crack slightly
- Vacuum and compressed air — for removing all dust from the crack before filling
- Acetone and clean rags — for degreasing the crack surfaces before epoxy application
Estimated cost: $50 to $120 depending on crack size and whether polishing equipment needs to be rented.
Step 1: Assess the Crack
Before preparing any materials, thoroughly assess what you have.
Measure the crack width. A hairline crack (under 1/16 inch) and a medium crack (1/16 to 1/4 inch) require different products and techniques. Hairline cracks can be filled with very thin-viscosity penetrating epoxy. Wider cracks need filling in stages — thin epoxy first, then filler putty to bring the repair flush.
Check for aggregate loss. Look closely at both edges of the crack. If marble or glass chips are missing along the crack edges, you have voids that will need to be filled with matching aggregate, not just epoxy. Aggregate loss makes color matching significantly harder.
Check for a height difference. Run your finger across the crack. Both sides should be flush. A step indicates the slab beneath has moved vertically — one side has risen or dropped relative to the other. Filling this crack is still possible, but if the movement is ongoing, the repair may re-crack within a season.
Tap test around the crack. Knock with your knuckles along the crack and for several inches on each side. Solid terrazzo sounds dense. A hollow tap means the terrazzo has delaminated from the substrate beneath, which is a more serious issue requiring the full section to be re-bonded or replaced.
Step 2: Clean and Prepare the Crack
The strength of an epoxy crack repair depends entirely on how clean and dry the crack is before the epoxy goes in.
-
Vacuum the crack. Use a shop vacuum with a narrow attachment or a regular vacuum with a crevice tool. Work the full length of the crack, vacuuming out all loose dust and debris.
-
Blow out the crack with compressed air. Direct the air stream into the crack from multiple angles to dislodge fine particles that vacuuming misses.
-
Widen if needed. For cracks that are very tight (under 1/32 inch), use a rotary tool with a small diamond blade or a cold chisel to open the crack slightly to a consistent width. A crack that is too tight will not allow even thin epoxy to penetrate fully. This step is optional but produces a better result on very fine cracks.
-
Degrease with acetone. Dampen a clean rag with acetone and wipe it into and along the crack. Terrazzo floors that have been waxed, oiled, or treated with topical sealers will have residue in the crack that prevents epoxy adhesion. Acetone removes wax, oil, and most sealers. Allow the acetone to evaporate completely before applying any epoxy — at least 15 to 30 minutes.
-
Mask the surrounding area. Apply masking tape along both sides of the crack, positioned tightly to the crack edges. The tape protects the surrounding polished terrazzo from epoxy drips and from the pigmented filler that goes on in the next step.
Step 3: Color-Match the Epoxy
Color matching is best done before mixing your repair epoxy so you are not rushing the pigment trial while the epoxy pot life runs down.
-
Wet a section of the floor near the crack. Pour a small amount of water on the terrazzo surface. The wet color is the true color of the matrix — this is what your epoxy should match when cured, not the dry color.
-
Mix a small test batch. Combine equal parts of the two-part epoxy in a disposable cup. Add universal tint pigment drop by drop, stirring thoroughly after each addition. Test the color by spreading a small amount on a tile or glass surface and letting it partially cure. Compare to the wetted floor matrix.
-
Adjust the pigment. Most terrazzo matrices are gray, off-white, cream, or a pale color. Start with gray or raw umber tints and adjust. It is easier to darken the mix than to lighten it, so add color conservatively.
-
Record your mix ratio. Note how many drops of each pigment color you used relative to the epoxy volume. You may need to mix a second batch.
Step 4: Fill the Crack
For hairline cracks: Use the thin-viscosity epoxy without filler added first. Pour or carefully pour the mixed epoxy directly into the crack. The goal is to let it penetrate to the full depth. Use a stiff card or putty knife to work the epoxy into the crack and prevent air pockets. Fill slightly above flush — some shrinkage occurs as epoxy cures.
For wider cracks and after the initial penetrating fill has cured: Mix the tinted epoxy with a small amount of silica powder or the manufacturer-specified filler aggregate to create a stiffer putty consistency. Apply this filler putty over the initial epoxy fill, pressing it firmly into any remaining voids and building the repair slightly above the surrounding floor level.
Allow each fill layer to cure the time specified by the manufacturer before adding the next layer. Most low-viscosity terrazzo epoxies have an initial gel time of 20 to 40 minutes and a full handling cure of 6 to 12 hours at room temperature.
Remove the masking tape while the epoxy is still slightly flexible — before full cure. Tape removed after full cure can lift the edges of the repair.
Step 5: Sand and Polish the Repair
Once the epoxy filler is fully cured and hard, the surface will be slightly raised above the surrounding floor. Sanding brings it flush, and polishing restores the sheen.
Coarse sanding: Starting with 80 or 120-grit wet/dry silicon carbide sandpaper, wet the repair area and sand the epoxy down until it is flush with the surrounding terrazzo. Keep the paper wet — wet sanding prevents heat buildup and produces a more consistent surface. Use a rubber sanding block rather than your hand to keep the surface flat.
Progressive fine sanding: Move through progressively finer grits: 120, 220, and 400 grit. Each finer grit removes the scratches left by the previous grit. After 400-grit, the repair should look smooth but matte.
Polishing: Apply a small amount of terrazzo or marble polishing compound to the repair area and work it with a soft cloth or a low-speed rotary polisher with a polishing pad. Work in circular motions. The polishing compound removes the fine scratches from the 400-grit sandpaper and raises a sheen that approaches the surrounding floor.
Final blend: Buff the transition area between the repair and the surrounding terrazzo with the polishing compound so there is no sharp boundary between the two areas.
Step 6: Seal if the Floor Has a Topical Sealer
If the surrounding terrazzo has a topical sealer (a surface coating that gives a high-gloss wet look), the repair area will need sealer applied after polishing to match the sheen. Apply a thin coat of matching terrazzo or concrete sealer to the repair and a foot or two of surrounding area, feathering the edges to avoid a visible line.
Terrazzo that is polished without a sealer (impregnating sealers that do not change the appearance are different from topical sealers) may not need this step.
Preventing Future Cracking
If the crack you repaired ran through an existing divider strip — the thin metal or plastic strips visible in terrazzo floors — inspect the strip for buckling or separation. Divider strips are designed to be the controlled weak point where the terrazzo cracks rather than cracking randomly. A failed or missing strip concentrates stress elsewhere.
Replacement of divider strips requires grinding out the old strip and re-embedding a new one, which is a task for a terrazzo professional. However, keeping the overall slab healthy through proper drainage around the foundation and addressing any soil settlement is the most effective long-term prevention strategy.
Related Reading
- Assess the Crack
Before preparing any materials, thoroughly assess what you have.
- Clean and Prepare the Crack
The strength of an epoxy crack repair depends entirely on how clean and dry the crack is before the epoxy goes in.
- Color-Match the Epoxy
Color matching is best done before mixing your repair epoxy so you are not rushing the pigment trial while the epoxy pot life runs down.
- Fill the Crack
For hairline cracks: Use the thin-viscosity epoxy without filler added first. Pour or carefully pour the mixed epoxy directly into the crack. The goal is to let it penetrate to the full depth.
- Sand and Polish the Repair
Once the epoxy filler is fully cured and hard, the surface will be slightly raised above the surrounding floor. Sanding brings it flush, and polishing restores the sheen.
- Seal if the Floor Has a Topical Sealer
If the surrounding terrazzo has a topical sealer (a surface coating that gives a high-gloss wet look), the repair area will need sealer applied after polishing to match the sheen.
Free: 10-Point Home Maintenance Checklist
Prevent costly repairs with this seasonal checklist. Save hundreds every year by catching problems early.
Your checklist is ready!
Open Checklist →Something went wrong. View the checklist here.