How to Fix a Cracked Stone Veneer Wall
Learn how to repair cracks in manufactured stone veneer siding or interior accent walls using mortar, color-matched caulk, and simple hand tools.
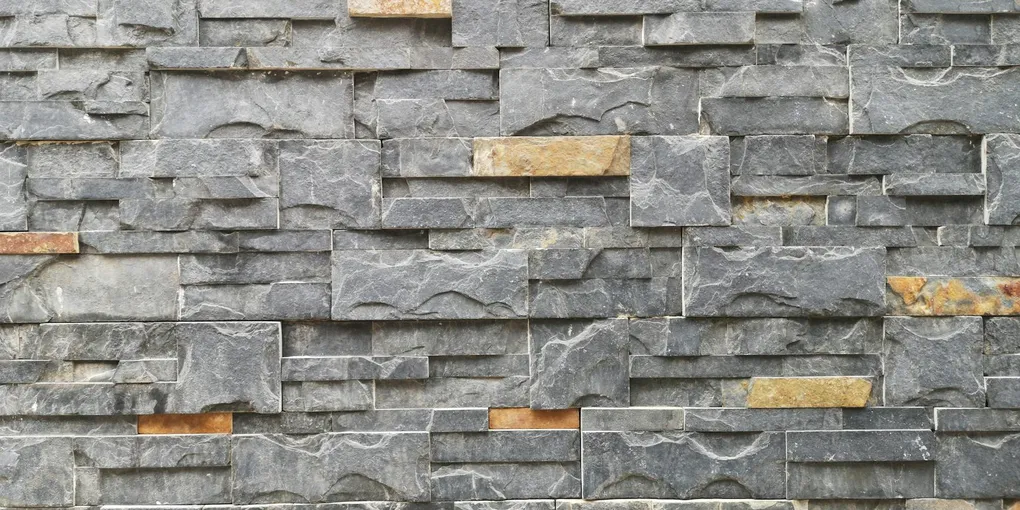
Manufactured stone veneer is one of the most popular exterior and interior wall treatments, but the mortar joints and stone faces can crack over time from settling, thermal movement, and moisture.
Manufactured stone veneer is one of the most popular exterior and interior wall treatments, but the mortar joints and stone faces can crack over time from settling, thermal movement, and moisture. Catching cracks early and repairing them promptly prevents water infiltration that can undermine the scratch coat and lead to full veneer failure. This guide covers the complete DIY repair process.
Assessing the Damage
Start by classifying what you are dealing with. Run your finger along the crack — if it is hairline (less than 1/16 inch) and contained to the mortar joint, it is a surface repair. If the crack runs through the face of a stone unit, you will patch the stone face separately. If you can press on a stone and feel it move or hear a hollow sound, the bond has failed and that stone must be reset before patching.
Probe a few stones around the cracked area to check for additional debonding. A small section that sounds solid surrounding the cracked joint is good news.
Tools and Materials
- Cold chisel and hammer
- Wire brush and shop vacuum
- Margin trowel or grout bag
- Type S masonry mortar mix (for larger repairs)
- Pre-mixed masonry crack filler or colorfast caulk (for hairline cracks)
- Spray bottle with water
- Penetrating masonry sealer
- Safety glasses and gloves
For small joint cracks, a pre-mixed masonry repair caulk on Amazon that matches your mortar color is the most convenient approach. For larger or deeper repairs, a Type S mortar mix on Amazon gives the best durability.
Step 1: Open Up and Clean the Crack
Never fill a crack without first opening it slightly to remove loose material. Use a cold chisel to widen hairline cracks to at least 1/8 inch so the repair material has something to grip. Work carefully along the joint line without striking the stone faces. Brush out all debris with a wire brush and vacuum the crack clean. Dust and loose mortar prevent proper adhesion and are the most common reason patch repairs fail.
Step 2: Wet the Surface
Dry masonry draws moisture out of fresh mortar too quickly, causing shrinkage cracking. Mist the crack and surrounding stones lightly with a spray bottle — damp but not dripping wet. This step is especially important in warm weather or direct sun.
Step 3: Apply the Mortar or Patch Material
For hairline and narrow cracks, load a pre-mixed masonry caulk into a caulk gun and press it firmly into the joint, slightly overfilling. Smooth immediately with a damp finger or small trowel, matching the existing joint profile (typically a concave or flat tooled joint). Wipe off excess with a damp sponge.
For wider gaps or missing sections, mix Type S mortar to a peanut-butter consistency. Pack it into the joint in layers no deeper than 3/4 inch per pass using a margin trowel. Tool the surface to match surrounding joints before the mortar begins to set, usually within 15 to 30 minutes depending on temperature.
Step 4: Repair Stone Face Cracks
If a stone itself has a surface crack, use a color-matched masonry epoxy filler on Amazon rated for freeze-thaw cycles. Press it into the crack, wipe flush, and allow full cure. These repairs are visible up close but blend well from normal viewing distances once the filler weathers slightly.
Step 5: Cure and Seal
Keep freshly mortared areas damp for 24 hours by misting lightly twice a day. Avoid covering with plastic sheeting, which can cause uneven curing. Once fully cured — 28 days for full mortar strength — apply a penetrating masonry sealer to the repaired zone and a band of surrounding veneer. This is a single coat brushed or rolled on; wipe off any surface pooling within 5 minutes.
Ongoing Maintenance
Inspect stone veneer every fall before freeze season and every spring after it. Catching new hairline cracks early — when a $10 tube of caulk is all that is needed — prevents the far more expensive scenario of full stone replacement. Pay special attention to horizontal mortar joints and any areas where trim or flashing meets the veneer, as those transitions are the most common water entry points.
- Open Up and Clean the Crack
Never fill a crack without first opening it slightly to remove loose material. Use a cold chisel to widen hairline cracks to at least 1/8 inch so the repair material has something to grip.
- Wet the Surface
Dry masonry draws moisture out of fresh mortar too quickly, causing shrinkage cracking. Mist the crack and surrounding stones lightly with a spray bottle — damp but not dripping wet. This step is especially important in warm weather or direct sun.
- Apply the Mortar or Patch Material
For hairline and narrow cracks, load a pre-mixed masonry caulk into a caulk gun and press it firmly into the joint, slightly overfilling.
- Repair Stone Face Cracks
If a stone itself has a surface crack, use a color-matched masonry epoxy filler on Amazon rated for freeze-thaw cycles. Press it into the crack, wipe flush, and allow full cure.
- Cure and Seal
Keep freshly mortared areas damp for 24 hours by misting lightly twice a day. Avoid covering with plastic sheeting, which can cause uneven curing.
Free: 10-Point Home Maintenance Checklist
Prevent costly repairs with this seasonal checklist. Save hundreds every year by catching problems early.
Your checklist is ready!
Open Checklist →Something went wrong. View the checklist here.