How to Fix Peeling or Cracked Driveway Sealer
Repair peeling, cracked, or bubbling driveway sealer the right way — strip the old coating, prep the concrete surface, apply fresh sealer, and follow cure times for a lasting finish.
Fixing peeling or cracked driveway sealer: (1) Strip the failing sealer completely — do not apply new sealer over peeling old sealer; use a chemical stripper or pressure washer with a surface cleaner at 2,500+ PSI. (2) Let the concrete dry fully (48+ hours). (3) Identify your concrete type and choose a compatible sealer — penetrating silane/siloxane for natural look, acrylic for sheen, epoxy for high traffic. (4) Apply two thin coats (not one thick coat) with a squeegee applicator; thin coats bond better and resist peeling. (5) Cure 24 hours before foot traffic, 48 hours before vehicles. Root cause: most sealer failures are caused by reapplying too often (every year vs every 3-5 years) or applying incompatible sealer types over each other.
Frequently Asked Questions
Do I have to strip old sealer before applying new sealer?
Yes, if the existing sealer is peeling, cracking, or bubbling. Applying new sealer over failing sealer guarantees the same failure within 1-2 seasons. Strip completely using a chemical concrete sealer stripper or a pressure washer with a surface cleaner. If the old sealer is intact and just faded, a light cleaning and recoat with the same sealer type is acceptable.
How often should I reseal my concrete driveway?
Most penetrating concrete sealers last 5-10 years. Film-forming acrylic sealers last 2-3 years. Resealing too frequently causes buildup and peeling. Test your existing sealer by pouring water on the surface — if water beads up, the sealer is still working and does not need reapplication. If water soaks in immediately, it is time to reseal.
What is the difference between penetrating sealer and film-forming sealer?
Penetrating sealers (silane, siloxane, or silicate) soak into the concrete pores and become part of the surface — they leave no film, cannot peel, and last the longest. Film-forming sealers (acrylic, epoxy, polyurethane) sit on top of the concrete and create a visible sheen. Film sealers enhance appearance and resist stains better but will eventually peel and require stripping before reapplication.
How much does driveway sealer repair cost?
DIY chemical stripper for a standard 2-car driveway: $30-$60. New penetrating sealer: $40-$100. New acrylic sealer with squeegee applicator: $50-$120. Hiring a contractor to strip and reseal: $300-$700 for a standard driveway. Professional application is worth considering for epoxy coatings, which require precise surface prep and application.
Fixing peeling or cracked driveway sealer: (1) Strip the failing sealer completely — do not apply new sealer over peeling old sealer; use a chemical stripper or pressure washer with a surface cleaner at 2,500+ PSI. (2) Let the concrete dry fully (48+ hours).
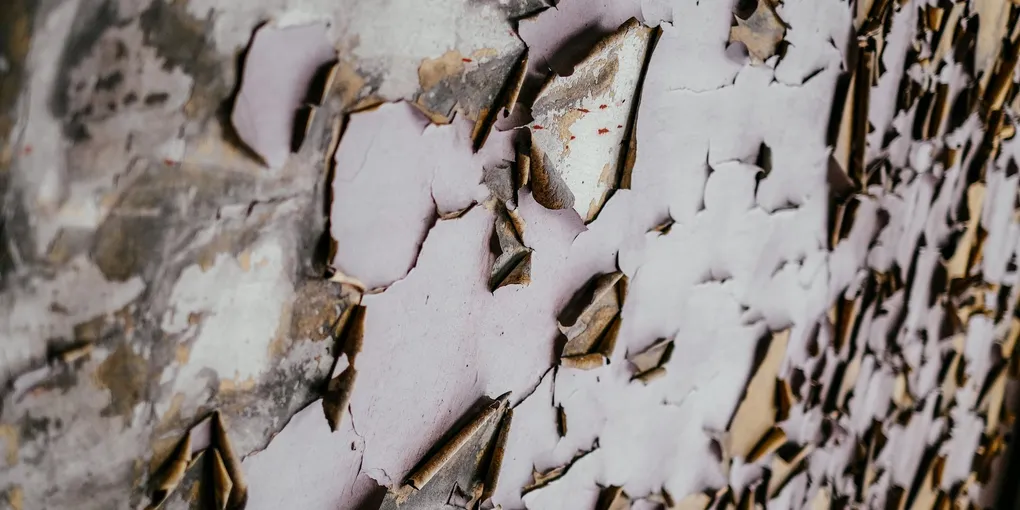
Peeling and cracking driveway sealer is one of the most common exterior home problems, and ironically, it’s often caused by over-sealing rather than neglect. When sealer is applied too frequently or on top of an incompatible previous coating, it bonds poorly, traps moisture, and fails in sheets. The fix isn’t simply rolling on another coat — you need to strip the failing sealer, properly prepare the surface, and apply the right product for your concrete type. Here’s how to do it correctly the first time.
Why Driveway Sealer Fails
Understanding the failure mode helps you avoid repeating the mistake.
Too many coats. Concrete sealer should not be reapplied every year. Most quality sealers are designed for 3–5 year reapplication cycles. Over-application creates a thick film that can’t flex with temperature changes and delaminates in sheets.
Incompatible sealer types. Acrylic sealers, penetrating sealers, and epoxy coatings all have different chemistries. Applying an acrylic over a penetrating silane sealer is a recipe for peeling — the acrylic has nothing to bond to because the penetrating sealer has already sealed the concrete pores.
Surface contamination. Oil stains, algae, loose concrete, and efflorescence (white mineral salt deposits) all prevent proper sealer adhesion. Even a single oily tire track in the wrong spot will cause the sealer to peel in that area.
Moisture trapped beneath. Sealing concrete that has absorbed moisture — after rain or before the concrete is fully dry — traps water vapor underneath the film. As concrete heats and cools, the vapor tries to escape and bubbles or peels the sealer.
UV degradation. Acrylic sealers in particular degrade under UV exposure. Over time they chalk, crack, and lose their protective ability.
What You Need
- Concrete Sealer Stripper / Chemical Paint Remover — strips old acrylic or film-forming sealers
- Pressure Washer (2500–3500 PSI) — essential for cleaning and rinsing
- Concrete Degreaser / Cleaner — removes oil stains and contamination before sealing
- Penetrating Concrete Sealer — silane-siloxane type for long-lasting moisture protection
- Concrete Crack Filler — polyurethane or epoxy for repairing cracks before sealing
- Long-Handle Sealer Applicator Brush or Roller — 18-inch roller with 3/4-inch nap for concrete surfaces
Identifying What Type of Sealer You Have
Before stripping, you need to know what you’re removing. Different sealer types require different removal methods.
Film-forming sealers (acrylic, epoxy, polyurethane) sit on top of the concrete surface. You can usually see them — they leave a shiny or matte coating that is visually distinct from the concrete. When they fail, they peel in sheets or crack like paint. These must be chemically stripped or mechanically ground off.
Penetrating sealers (silane, siloxane, siliconate) soak into the concrete pores and don’t form a visible surface film. They don’t peel because there’s nothing on the surface to peel. If your driveway looks like bare concrete but you know it was sealed, you likely have a penetrating sealer. These can typically be recoated with a compatible product without stripping.
Test with xylene. Soak a rag in xylene (available at hardware stores) and press it on the concrete for 20 seconds. If the sealer softens and peels off, it’s a solvent-based or acrylic film former. If nothing happens, it’s either a water-based penetrating sealer or there’s no sealer left at all.
Stripping the Old Sealer
This is the most labor-intensive step, but skipping it guarantees another failure.
Apply chemical stripper. Choose a stripper rated for concrete sealer — not paint stripper, which may be too mild or leave residue incompatible with the new sealer. Apply according to label directions, typically spreading a thick coat with a stiff brush and allowing 15–30 minutes of dwell time. Keep the surface wet — don’t let the stripper dry on the concrete.
Agitate with a stiff brush. After the dwell time, scrub the softened sealer with a stiff deck brush or a floor buffer with an aggressive pad. You’ll see the old sealer rolling up into gummy clumps.
Pressure wash. Set your pressure washer to 2500–3000 PSI and use a 15–25 degree tip. Work in overlapping passes to remove all the loosened sealer. Stand 8–12 inches from the surface for best results. Closer removes more aggressively but risks etching softer concrete.
Repeat if necessary. Most older driveways with multiple sealer layers need two rounds of chemical stripping. Let the concrete dry between rounds and inspect closely — any remaining glossy patches indicate film-forming sealer still present.
Allow full drying time. Concrete must be completely dry before new sealer is applied. In warm weather this takes 24–48 hours. Cooler or humid conditions may require 72 hours or longer. Check with a plastic sheet test: tape a 24x24 inch piece of plastic to the driveway and leave it for 24 hours. If condensation forms underneath, the concrete is still too wet.
Cleaning and Prepping the Surface
Even after stripping, the surface needs thorough cleaning before sealer application.
Degrease oil spots. Apply concrete degreaser directly to any oil or grease stains. Let it soak in for 10–15 minutes, then scrub and rinse. Oil contamination is invisible to sealer — it simply prevents adhesion.
Remove efflorescence. White chalky staining on concrete is efflorescence — mineral salts that migrate to the surface with water. Clean it off with a diluted muriatic acid solution (1 part acid to 10 parts water) or a dedicated efflorescence remover. Always add acid to water, not water to acid. Rinse thoroughly.
Etch if necessary. If the concrete is very smooth (from over-troweling or heavy previous sealer buildup), acid etching opens the surface pores to improve sealer penetration. Apply a 1:10 muriatic acid solution, let it fizz for 5–10 minutes, then rinse completely. The concrete should feel like medium-grit sandpaper when dry.
Fill cracks. Any cracks wider than 1/8 inch should be filled before sealing. Use a polyurethane concrete crack filler or an epoxy-based product, depending on the depth and width of the crack. Allow the filler to fully cure before applying sealer over it.
Applying the New Sealer
The type of sealer you choose now determines how long this repair lasts and how much maintenance it requires.
Penetrating silane-siloxane sealers are the professional’s choice for driveways in climates with freeze-thaw cycles. They repel water from inside the concrete rather than forming a film on top, which means they can’t peel. They don’t change the appearance of concrete. Reapplication is needed every 5–7 years.
Acrylic concrete sealers are the standard choice for homeowners who want a wet-look sheen. They’re easier to apply and less expensive but form a surface film that will eventually peel and need stripping again.
Application temperature matters. Apply sealer when the air temperature is between 50°F and 90°F, and when no rain is forecast for 24 hours. Avoid applying in direct sunlight, which causes solvent-based sealers to flash (dry too fast) before penetrating properly. Early morning is often ideal.
Application method. For penetrating sealers, spray on with a low-pressure pump sprayer and back-roll with a 3/4-inch nap roller. Work in 4-foot-wide sections and overlap each pass slightly. Apply a flood coat — the concrete should look wet. Brush out any puddles before they dry.
For acrylic film-forming sealers, use a 3/4-inch nap roller and apply two thin coats rather than one thick one. Thin coats cure more uniformly and resist peeling better.
Cure Time and Common Mistakes
Cure time. Most sealers are dry to the touch within 1–2 hours but need 24 hours before foot traffic and 72 hours before vehicle traffic. Parking a car on sealer that hasn’t fully cured can leave tire impressions that become permanent.
Common mistakes to avoid:
- Applying in direct hot sun (causes bubbling and poor penetration)
- Applying over wet or damp concrete (traps moisture, causes peeling)
- Applying too thick (creates a film that peels instead of penetrating)
- Sealing without degreasing (oil contamination causes adhesion failure in that spot)
- Applying incompatible sealer type over an existing sealer
Preventing Future Failure
The best prevention is choosing the right sealer for your climate and sticking to the manufacturer’s reapplication schedule. For most driveways:
- Inspect the sealer each spring after winter
- Reseal every 3–5 years for film formers, every 5–7 years for penetrating sealers
- Clean oil spills promptly — don’t let them sit and soak into the surface
- Seal cracks as soon as they appear to prevent water intrusion and frost damage
Frequently Asked Questions
-
question: “How do I know when my driveway needs to be resealed vs. stripped and resealed?” answer: “If water still beads on the surface and there are no cracks or peeling, you may only need a fresh coat over the existing sealer (provided you use the same compatible product). If water soaks in, the sealer is peeling, cracking, or you don’t know what type was previously applied, strip and start fresh. Over-applying sealer without stripping first is the top cause of peeling driveways.”
-
question: “Can I apply driveway sealer myself or should I hire a professional?” answer: “Most homeowners can handle a driveway sealer job with a pressure washer, a roller, and the right materials. The chemical stripping step is the most physically demanding. Where hiring out makes sense: very large driveways, concrete that needs extensive crack repair or leveling, or if you’ve already had two sealer failures and want professional assessment of the root cause.”
-
question: “What is the best time of year to seal a driveway?” answer: “Late spring through early fall is ideal — concrete temperatures between 50°F and 80°F and low humidity give you the best results. Avoid sealing in the summer heat of midday. Fall application before winter is a good strategy in freeze-thaw climates since fresh sealer blocks water infiltration that causes freeze damage.”
-
question: “How many coats of sealer does a driveway need?” answer: “For penetrating sealers, usually one heavy flood coat is sufficient. For acrylic film-forming sealers, two thin coats applied 1–2 hours apart provides better coverage and durability than one thick coat. Never apply more than two coats of a film-forming sealer in a single application cycle.”
-
question: “Will sealer make my driveway slippery when wet?” answer: “Some film-forming sealers, especially high-gloss acrylic products, can be slippery when wet. To add traction, mix fine silica sand or anti-slip grit (available at hardware stores) into the final coat before application. Penetrating sealers don’t change the texture of the concrete surface and don’t significantly affect slip resistance.”
-
question: “My driveway sealer is bubbling — what caused it and what do I do?” answer: “Bubbling is almost always caused by moisture trapped under the sealer at the time of application, or by sealer applied in hot sun that flashed before penetrating. Small bubbles can sometimes be rolled out while the sealer is still wet. If they’ve dried in place, the affected area will need to be stripped and resealed after the concrete has fully dried.”
Related Reading
- How to Clean and Power Wash Your Home’s Exterior
- Spring Home Maintenance Checklist
- How to Fix a Cracked Concrete Step
- Identifying What Type of Sealer You Have
Before stripping, you need to know what you're removing. Different sealer types require different removal methods.
- Stripping the Old Sealer
This is the most labor-intensive step, but skipping it guarantees another failure.
- Cleaning and Prepping the Surface
Even after stripping, the surface needs thorough cleaning before sealer application.
- Applying the New Sealer
The type of sealer you choose now determines how long this repair lasts and how much maintenance it requires.
- Cure Time and Common Mistakes
Cure time. Most sealers are dry to the touch within 1–2 hours but need 24 hours before foot traffic and 72 hours before vehicle traffic. Parking a car on sealer that hasn't fully cured can leave tire impressions that become permanent.
- Preventing Future Failure
The best prevention is choosing the right sealer for your climate and sticking to the manufacturer's reapplication schedule. For most driveways:
Free: 10-Point Home Maintenance Checklist
Prevent costly repairs with this seasonal checklist. Save hundreds every year by catching problems early.
Your checklist is ready!
Open Checklist →Something went wrong. View the checklist here.