How to Fix a Cracked Composite Deck Board
Learn how to repair a cracked or stained composite deck board using color-matched filler and heat tools without replacing the entire board.
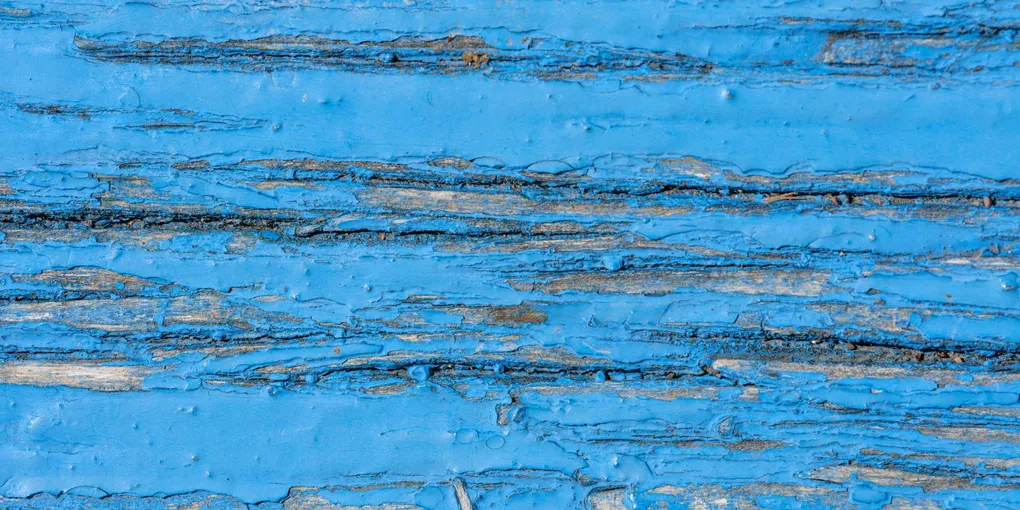
Composite decking is sold as a low-maintenance alternative to wood, but it is not indestructible. Impact from dropped tools, improper installation without expansion gaps, or heat from a grill can split a board and leave an ugly crack that traps water and debris.
Composite decking is sold as a low-maintenance alternative to wood, but it is not indestructible. Impact from dropped tools, improper installation without expansion gaps, or heat from a grill can split a board and leave an ugly crack that traps water and debris. The good news is that many composite deck cracks can be repaired without tearing up the board, saving you the cost and labor of a full replacement.
Assessing the Damage
Before reaching for filler, classify the crack:
- Hairline surface check: A shallow crack in the outer cap layer only — the best candidate for heat-and-press repair or filler
- Moderate surface crack: Wider than 1/16 inch but not through the full board depth — fillable with composite repair compound
- Deep or structural crack: Runs fully through the board thickness or extends more than 12 inches — board replacement is the safest fix
Also look underneath the board. If the crack corresponds to a gap between joists — a board span without support — fixing the substrate is part of the repair.
Tools and Materials
- Heat gun
- Putty knife and margin trowel
- 80-grit and 120-grit sandpaper
- Color-matched composite deck filler or two-part epoxy wood filler
- Stiff-bristle brush and cleaner
- Composite deck stain or color coat (optional, for finishing)
- Safety glasses and gloves
MiraCote Composite Deck Repair Filler is available in multiple wood-tone colors and is formulated to bond to the PVC and wood-fiber surfaces of most composite brands. For a professional heat gun, Wagner Spraytech 0503008 Heat Gun offers adjustable temperature control, which is essential for composite — too much heat can warp the board permanently.
Step 1: Clean the Damaged Area
Scrub the cracked board thoroughly with a composite deck cleaner and stiff brush to remove all mold, mildew, and embedded dirt. Rinse and let it dry completely. Filler will not bond to a wet or contaminated surface.
Use 80-grit sandpaper to lightly abrade the area immediately around the crack — this gives the filler mechanical purchase on the cap surface.
Step 2: Close Hairline Cracks with Heat
For hairline surface checks in capped composite boards, set your heat gun to 250 to 300 degrees Fahrenheit and hold it three to four inches above the crack. Move it slowly along the crack length for 30 to 45 seconds until the cap layer becomes slightly pliable — do not hold it in one spot.
Immediately press the crack edges together firmly with a gloved finger or a smooth putty knife held flat. Hold pressure for 30 seconds and allow to cool. The cap material will often self-seal on thin cracks.
Step 3: Fill Wider Cracks
For cracks too wide to press shut, mix or prepare your composite filler per product instructions. Force the filler into the full depth of the crack with a putty knife, overfilling slightly above the board surface.
Work the filler in firm strokes across the crack direction to pack it without air pockets, then draw the knife along the crack length to level it. Remove excess filler from the board face immediately with a clean rag before it cures.
Step 4: Cure and Sand
Allow the filler to cure fully — typically two to four hours for two-part epoxy, longer in cool weather. Once cured, use 120-grit sandpaper to sand the filled area flush with the board surface, feathering the edges so there is no raised ridge.
Wipe away all dust with a damp cloth and let the area dry.
Step 5: Color Match and Finish
Most composite repair fillers come close to standard deck colors but may not be a perfect match to your weathered boards. Defy Composite Deck Stain applied over the repaired area and blended into the adjacent boards can unify the color and restore a consistent appearance across the deck surface.
For stain-resistant decking lines, check your manufacturer first — some warranties are voided by third-party stains.
Step 6: Address the Root Cause
A repaired crack that returns in a season means the underlying cause was not fixed:
- Unsupported span: Add a blocking joist or sister joist beneath the board
- No expansion gap: Remove the end caps or trim board and re-install with proper gaps per the manufacturer spec (typically 3mm to 5mm between board ends)
- Heat source: Relocate the grill or fire pit away from the deck boards and use a deck protector mat
Knowing When to Replace
If a board has multiple cracks, is delaminating (cap layer peeling from the core), or the crack allows water to reach underlying joists, replacement is the correct call. Most modern composite decking uses hidden fasteners — a replacement board can often be slid in without disturbing neighbors.
A careful repair done with the right filler and technique can extend a composite deck board’s life significantly and maintain the look of your outdoor space without the cost of full board replacement.
- Clean the Damaged Area
Scrub the cracked board thoroughly with a composite deck cleaner and stiff brush to remove all mold, mildew, and embedded dirt. Rinse and let it dry completely. Filler will not bond to a wet or contaminated surface.
- Close Hairline Cracks with Heat
For hairline surface checks in capped composite boards, set your heat gun to 250 to 300 degrees Fahrenheit and hold it three to four inches above the crack.
- Fill Wider Cracks
For cracks too wide to press shut, mix or prepare your composite filler per product instructions. Force the filler into the full depth of the crack with a putty knife, overfilling slightly above the board surface.
- Cure and Sand
Allow the filler to cure fully — typically two to four hours for two-part epoxy, longer in cool weather. Once cured, use 120-grit sandpaper to sand the filled area flush with the board surface, feathering the edges so there is no raised ridge.
- Color Match and Finish
Most composite repair fillers come close to standard deck colors but may not be a perfect match to your weathered boards.
- Address the Root Cause
A repaired crack that returns in a season means the underlying cause was not fixed:
Free: 10-Point Home Maintenance Checklist
Prevent costly repairs with this seasonal checklist. Save hundreds every year by catching problems early.
Your checklist is ready!
Open Checklist →Something went wrong. View the checklist here.