How to Fix a Chimney Cap: Mesh vs. Solid, Sizing, Mortar, and Rust Repair (2026)
A damaged or missing chimney cap lets rain, animals, and debris into your flue. This guide covers inspecting your existing cap, choosing between mesh and solid caps, sizing a replacement, setting it with mortar or self-flashing, and treating rust before it spreads.
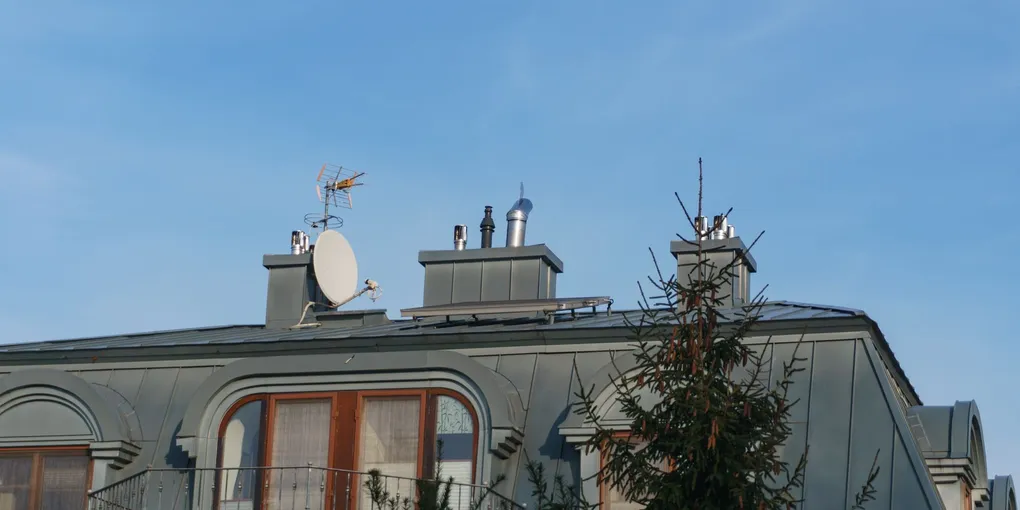
To replace a chimney cap: (1) Measure your flue tile opening (inside dimension) and the chimney crown (outside dimension). (2) Choose a galvanized or stainless steel cap with a mesh spark arrestor. (3) Slide the cap over the flue tile — single-flue caps clamp with set screws; multi-flue or crown-mount caps are secured with mortar or masonry anchors. (4) Seal the base with chimney crown repair sealant. Most caps can be replaced in under an hour with basic tools.
Frequently Asked Questions
What is the difference between a mesh chimney cap and a solid top cap?
Mesh caps have a metal spark-arrestor screen on the sides and a solid top — they keep animals and rain out while allowing flue gases to escape freely. These are the most common residential caps. Solid top caps (also called rain caps without mesh sides) are designed for gas appliances that produce no sparks — they block direct rain but have open sides. For wood-burning fireplaces or stoves, always use a cap with a mesh spark arrestor to meet most local fire codes. Mesh opening size matters: 3/4-inch mesh is the standard for spark arrestors. Smaller mesh clogs with creosote faster. For gas fireplaces, a rain cap without mesh is acceptable and has less flow restriction.
How do I measure a chimney cap correctly?
There are two measurement methods depending on cap type. (1) Flue-mount cap (fits over the flue tile): Measure the outside dimension of the flue tile — width and length at the top. Add 1/2 inch on each side for overlap and order a cap that size or slightly larger. Most single-flue caps fit tiles from 8x8 to 13x13 inches with adjustable clamps. (2) Crown-mount cap (covers the entire chimney crown): Measure the full crown from outside edge to outside edge — both width and length. Also measure the height from the crown to the top of the tallest flue tile, because the cap must clear the flue by 5 inches minimum on the sides and 4 inches minimum above the flue tile. Write down both sets of measurements before ordering.
What is the best material for a chimney cap — galvanized, aluminum, or stainless steel?
Stainless steel is the best long-term material — it does not rust, handles high temperatures, and lasts 25+ years. Galvanized steel is less expensive and adequate for most climates but will rust at welds and edges after 5–10 years, especially in humid or coastal areas. Aluminum is lightweight but softens at high temperatures — it is acceptable for gas fireplaces but not recommended for wood-burning fireplaces or stoves where spark arrestor temperatures can be high. Copper caps are premium and last indefinitely but are expensive. For value, 304 stainless steel is the most widely available and the best cost-performance choice for most homeowners.
How do I attach a chimney cap without mortar?
Self-flashing and clamp-mount caps attach without mortar. (1) Single-flue clamp caps: The cap slides over the flue tile. Tighten the set screws (usually 4, one per side) with a nut driver or wrench until snug — do not overtighten on older, fragile flue tiles. (2) Self-flashing caps: These have a flat flange that lays on the chimney crown. Use masonry anchors (3/16-inch x 1-1/4-inch hammer anchors) at the corners to secure the flange, then seal the flange perimeter with elastomeric chimney crown sealant. (3) For best results on either type, dry-fit the cap first, check that it sits level, then tighten or anchor. A properly fitted clamp cap does not need mortar and can be removed for cleaning.
How do I repair rust on a chimney cap rather than replacing it?
Surface rust on a steel cap can be treated if the metal is not perforated. (1) Remove loose rust with a wire brush or angle grinder with a wire wheel — work down to bright metal where possible. (2) Treat bare metal with a rust converter (phosphoric acid-based) — brush it on, let it react for 15 minutes until it turns dark, then let it cure. (3) Prime with a self-etching rust-inhibiting primer rated for high temperatures. (4) Topcoat with a high-heat spray paint (flat black, 1200°F rated) or a specialty stainless-look high-temp coating. (5) Inspect mesh for holes — replace the entire cap if the mesh screen has rusted through, as spark arrestor integrity is a fire safety issue.
Should I hire a chimney sweep to replace the cap or do it myself?
Most homeowners can replace a single-flue cap themselves if they are comfortable working on a roof. The cap itself costs $30–$80 for a standard galvanized model and $60–$150 for stainless steel. Tools needed are minimal: a nut driver, wire brush, caulk gun, and masonry anchor drill. Hire a professional when: the chimney is very tall (over two stories), the crown needs resurfacing or repair before cap installation, the flue tile is cracked (requires professional evaluation), or you are not comfortable on a roof. A chimney sweep typically charges $100–$250 to supply and install a standard cap. If you hire a sweep for an annual cleaning, ask them to inspect and replace the cap at the same visit to save a trip charge.
To replace a chimney cap: (1) Measure your flue tile opening (inside dimension) and the chimney crown (outside dimension). (2) Choose a galvanized or stainless steel cap with a mesh spark arrestor.
A chimney cap is the first line of defense against rain, animals, and debris entering your flue — and replacing a damaged one is one of the more straightforward chimney repairs you can do yourself.
What You Need
Before you climb on the roof, gather all your materials so you make one trip up and one trip down.
- Stainless steel chimney cap (single-flue, 13x13) — measure your flue tile first and order the correct size
- Galvanized chimney cap with spark arrestor — budget-friendly option for most climates
- Chimney crown repair sealant (elastomeric) — for sealing the cap base and any crown cracks
- Rust converter for metal — if treating an existing cap rather than replacing
- High-temperature spray paint (flat black, 1200°F) — for repainting a treated or repaired cap
- Wire brush set for rust removal — to prep rusty metal before treatment
Step 1: Inspect the Existing Cap and Crown
Safety first — use a ladder rated for your roof pitch and wear rubber-soled shoes. Before touching anything, take photos of the existing installation from multiple angles. You will refer to these when positioning the new cap.
Check the existing cap for:
- Rust-through: Hold the cap up to the sky light. Any pinholes or large holes in the mesh mean the cap must be replaced, not repaired.
- Bent or broken mesh: Bent mesh can be a sign that an animal forced entry. Inspect the flue interior with a flashlight for nesting material.
- Cracked or loose mortar at the base: If the cap is mortar-set, check for gaps at the cap-to-crown joint. Water infiltration at this joint causes most chimney interior water damage.
- Crown condition: While you are up there, inspect the entire chimney crown (the concrete or mortar cap over the top of the chimney masonry). Cracks in the crown allow water to penetrate the chimney structure. Address crown cracks with crown sealant before or at the same time as cap replacement.
If the flue tile at the top is cracked or spalling, have it evaluated by a chimney professional before proceeding — a cracked flue tile is a safety issue that needs to be addressed separately.
Step 2: Measure and Choose the Right Cap
Single-flue cap: Measure the outside dimensions of the flue tile at the top — width and length. Single-flue caps either slip over the tile (clamp style) or sit on the crown around the tile (crown-mount). For a clamp-style cap, add about 1/2 inch to the tile dimensions to get the minimum cap opening size. Most adjustable caps accommodate a range of tile sizes.
Multi-flue or crown-mount cap: Measure the entire chimney crown — width and length from outside edge to outside edge. Also measure the height from the crown surface to the top of the tallest flue tile (the cap must be at least 5 inches taller than the highest flue opening on the sides, and 4 inches above the flue on top to allow proper draft).
Cap material: Stainless steel (304 grade) is the best long-term investment. Galvanized is acceptable for budgets. Avoid aluminum for wood-burning fireplaces.
Mesh size: Standard spark arrestor mesh is 3/4 inch. Smaller mesh restricts airflow and clogs faster with creosote — avoid it.
Step 3: Remove the Old Cap
Clamp-style cap: Loosen the set screws (usually 4, one per side) with a nut driver. The cap should lift straight off. If it is stuck from rust or old mortar, work a flat pry bar gently under the base. Do not lever against the flue tile — flue tiles are fragile.
Mortar-set cap: Use a cold chisel and hammer to break the mortar joint around the base of the cap. Work around the perimeter, not in one spot, to avoid cracking the crown. Once the mortar is broken, the cap lifts off.
Self-flashing (crown-mount) cap: Remove masonry anchors with a drill (reverse). If the base flange is bedded in mortar or sealant, score around it with a utility knife before lifting.
After removing the old cap, inspect the top of the flue tile. Clean off any loose mortar or debris. If the flue tile edge is chipped or damaged, fill small chips with hydraulic cement or refractory mortar before installing the new cap.
Step 4: Treat Rust (If Repairing an Existing Cap)
If the cap is structurally sound (no mesh holes, no perforations in the metal top) but has surface rust, you can treat and repaint it rather than replacing it.
- Use a wire brush or angle grinder with a wire wheel to remove all loose rust. Work down to bare bright metal where possible.
- Apply rust converter with a brush — coat all rusted areas thoroughly. Allow it to react for 15–30 minutes. It will turn the rust black as it converts iron oxide to iron phosphate.
- Let the converter cure for 24 hours before painting.
- Apply one coat of self-etching rust-inhibiting primer. Let dry per label (usually 1 hour).
- Apply 2–3 thin coats of 1200°F high-temperature flat black spray paint. Allow each coat to flash off (5 minutes) before applying the next.
- Let cure fully before reinstalling. The paint will fully harden during the first heating of the fireplace.
Step 5: Install the New Cap
Clamp-style single-flue cap:
- Slide the cap over the flue tile. Center it so the overhang is equal on all sides.
- Hand-tighten all set screws evenly first, then go back and snug them with a nut driver. Snug — do not overtighten on older clay flue tiles, which can crack.
- Tug the cap gently to confirm it is secure. It should not shift.
Crown-mount cap (multi-flue or full-coverage):
- Set the cap in position and check that it is centered over the chimney crown.
- Mark the anchor hole locations on the crown through the flange holes.
- Remove the cap. Drill anchor holes with a hammer drill and masonry bit (3/16-inch for standard hammer anchors).
- Reinstall the cap. Drive masonry anchors through the flange and into the drilled holes. The anchor flanges should draw the cap base snugly to the crown.
- Apply a continuous bead of elastomeric chimney crown sealant around the perimeter of the flange where it meets the crown. Smooth with a wet finger. This bead is the primary weather seal.
Mortar-set cap (traditional installation):
- Mix a small batch of type S mortar to a stiff consistency.
- Apply a 3/4-inch bed of mortar to the crown around the flue tile.
- Set the cap into the mortar bed. Press down firmly and check for level.
- Pack mortar around the full perimeter of the cap base, sloping it away from the cap to shed water.
- Smooth the mortar joint with a trowel. Allow to cure 24–48 hours before exposure to heavy rain or freezing temperatures.
Step 6: Inspect and Test
Once the cap is installed:
- Check that the cap sits level and centered.
- Confirm that the mesh is fully intact — no openings larger than 3/4 inch.
- Verify that the cap clears the flue tile by at least 4 inches on top and 5 inches on the sides.
- Check all sealant joints for continuity — no gaps.
If you have a wood-burning fireplace, do a test fire and observe smoke draft. The cap should not significantly impede draft. If draft is noticeably worse after cap installation, the cap may be undersized or the mesh may be too fine — consult the cap manufacturer’s specifications for your flue size.
When to Call a Professional
Some chimney situations warrant professional help:
- Cracked or missing flue tiles: These are fire and CO hazards and require professional repair or relining.
- Animal nesting inside the flue: Nests must be removed and the flue inspected before sealing with a new cap. Burning a fireplace with a nest in the flue is a serious fire hazard.
- Significant crown damage: Large cracks or a crown that is breaking apart may require a crown rebuild before a new cap will seal properly.
- Roof access difficulty: On very steep roofs or tall chimneys, professional chimney sweeps have the equipment and safety gear to work safely. A cap and installation typically costs $100–$250 total from a sweep.
How Long Does a Chimney Cap Last?
Expected lifespans by material:
| Material | Expected Life |
|---|---|
| Galvanized steel | 5–10 years |
| Painted galvanized | 7–15 years |
| 304 Stainless steel | 20–30+ years |
| Copper | Indefinite |
| Aluminum (gas only) | 10–20 years |
Inspect your cap annually — ideally at the start of the heating season. A five-minute visual inspection from the ground with binoculars can catch rust, bent mesh, or a cap that has blown off before water damage occurs.
Related Reading
- How to Clean Gutters Safely — gutter cleaning techniques for working at height
- How to Repair a Chimney Crown — fixing cracks and crumbles in the concrete crown
- Home Maintenance Checklist by Season — annual inspection tasks including chimney checks
- Inspect the existing cap and crown
From the roof (use a ladder rated for the pitch, rubber-soled shoes), check the cap for rust-through (hold to light to see pinholes), bent or broken mesh, and cracked mortar at the base. Inspect the chimney crown for cracks. Take photos before touching anything — you'll reference them when positioning the new cap.
- Measure and choose the right cap
Single-flue cap: measure the outside dimensions of the flue tile at the top (width and length) and add 1/2 inch per side for overlap. Crown-mount cap: measure the full chimney crown from edge to edge and verify the cap will clear the tallest flue tile by at least 5 inches on the sides and 4 inches on top. Choose 304 stainless steel for longest life; standard mesh is 3/4-inch spark arrestor size.
- Remove the old cap
Clamp-style: loosen the four set screws with a nut driver and lift the cap straight off — do not lever against the flue tile. Mortar-set: use a cold chisel and hammer to break the mortar joint around the perimeter, working in stages around the full circumference. Self-flashing: drill out masonry anchors in reverse, then score the flange perimeter with a utility knife before lifting.
- Install the new cap
Clamp-style: slide cap over flue tile, center it, hand-tighten all set screws evenly then snug with a nut driver. Crown-mount: set cap, mark anchor hole locations through flange, remove cap, drill with hammer drill and masonry bit, reinstall cap, drive masonry anchors through flange, then run a continuous bead of elastomeric chimney crown sealant around the full flange perimeter.
- Treat rust on an existing cap (if repairing rather than replacing)
Wire brush or angle grinder all loose rust down to bright metal. Apply phosphoric acid rust converter — brush on, let react 15-30 minutes until it turns dark, then let cure 24 hours. Apply one coat of self-etching rust-inhibiting primer. Finish with 2-3 thin coats of 1200°F high-temperature flat black spray paint, allowing each coat to flash off before applying the next.
Free: 10-Point Home Maintenance Checklist
Prevent costly repairs with this seasonal checklist. Save hundreds every year by catching problems early.
Your checklist is ready!
Open Checklist →Something went wrong. View the checklist here.