How to Fix a Broken Water Pressure Regulator
Learn how to diagnose, adjust, and replace a faulty water pressure regulator to restore safe water pressure throughout your home.
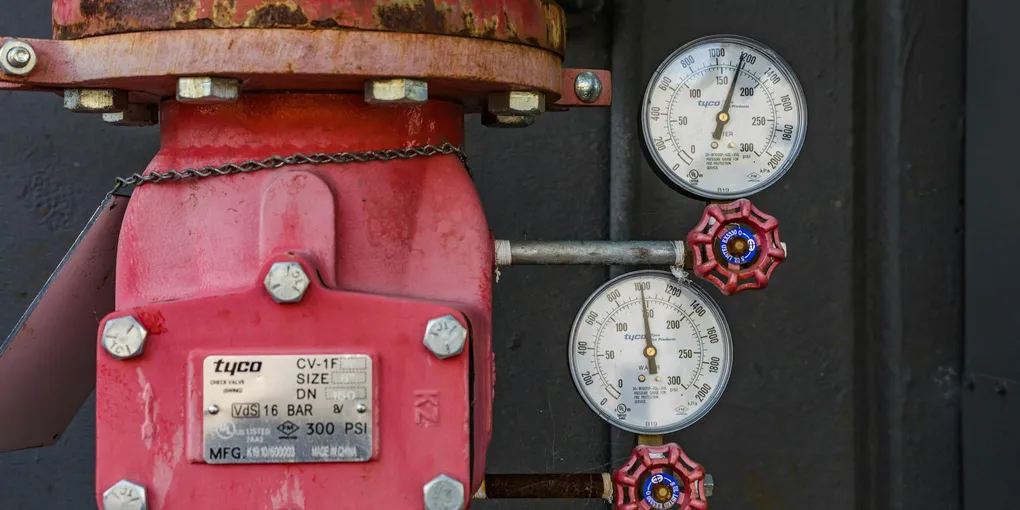
A water pressure regulator (also called a pressure reducing valve or PRV) protects your pipes, appliances, and fixtures from the high pressure that often comes from the municipal supply. When it fails, you may experience damaging high pressure, frustrating low pressure, or erratic fluctuations throughout your home.
A water pressure regulator (also called a pressure reducing valve or PRV) protects your pipes, appliances, and fixtures from the high pressure that often comes from the municipal supply. When it fails, you may experience damaging high pressure, frustrating low pressure, or erratic fluctuations throughout your home. The good news is that adjusting or replacing a pressure regulator is a manageable DIY plumbing job that takes about one to two hours.
What You Will Need
- Water pressure gauge with hose thread fitting
- Adjustable wrench (two — one for each side of a union connection)
- Pipe wrench
- Teflon tape (PTFE thread seal tape)
- Pipe thread sealant (optional, for belt-and-suspenders sealing)
- Towels and a bucket
- Replacement water pressure regulator (if replacing)
- Replacement unions or fittings (if needed)
Step 1: Measure Your Current Water Pressure
Before touching anything, get an objective reading of your water pressure. Thread a pressure gauge onto a hose bib (outdoor spigot) or laundry tub faucet — anywhere you have a threaded connection downstream of the regulator. Turn on the faucet fully and read the static pressure. Make note of the pressure with fixtures running throughout the house as well.
- Above 80 psi: The regulator may be set too high, have a failed spring, or a stuck-open valve seat.
- Below 40 psi: The regulator may be set too low, have a clogged strainer, or a failed diaphragm.
- Fluctuating wildly: The diaphragm has likely ruptured and the regulator needs replacement.
Step 2: Locate the Regulator and Inspect It
Find the regulator on your main supply line (typically near the main shutoff valve). Inspect the body for:
- Corrosion or verdigris on brass fittings
- Visible cracks in the body
- Water dripping from the adjustment cap or body
- A soft or mushy texture to the outer cap (indicates internal diaphragm failure)
If the body is leaking externally or the cap feels degraded, plan on full replacement. If the regulator looks intact, try adjustment first.
Step 3: Adjust the Regulator Set Point
The regulator has a lock nut and an adjustment screw on top. Use a wrench to loosen the lock nut (counter-clockwise). Turn the adjustment screw:
- Clockwise to increase pressure
- Counter-clockwise to decrease pressure
Make one full turn, then re-check pressure at your test gauge. Repeat in quarter-turn increments until you reach your target (55 to 65 psi is a good starting point). Once set, tighten the lock nut to hold the adjustment.
If adjustment does not produce a meaningful pressure change, or if the pressure swings back after you release the tool, the regulator is mechanically failed and needs replacement.
Step 4: Shut Off the Main Water Supply
Turn off the main shutoff valve for the house — typically a gate valve or ball valve just before the regulator. Turn on a faucet at the lowest point of the house (a laundry tub or bathtub on the ground floor) to drain residual pressure from the supply lines. Have towels and a bucket positioned under the regulator before you disconnect anything.
Step 5: Remove the Old Regulator
Most regulators are installed with union fittings on either side to allow removal without cutting pipe. Locate the union nuts on both the inlet and outlet side of the regulator. Using two wrenches — one to hold the union body and one to turn the nut — loosen each union nut counter-clockwise. Once both are loose, slide the regulator assembly free.
If there are no unions and the regulator is sweated (soldered) in place, you will need to cut the pipe on each side with a tubing cutter and install a new regulator using push-fit fittings (like SharkBite fittings) or sweat the new connections.
Note the flow direction arrow on the old regulator body before removing it — the new one must be installed in the same orientation.
Step 6: Choose the Right Replacement Regulator
Buy a replacement regulator that matches:
- Pipe size (typically 3/4 inch for most residential mains, 1 inch for larger homes)
- Inlet/outlet connection type (threaded NPT, sweat, or push-fit)
- Pressure range (most residential models are adjustable from 25 to 75 psi)
Watts or Zurn lead-free brass regulators are widely trusted brands carried at most plumbing supply houses and online.
Step 7: Install the New Regulator
Wrap all male threads on the new regulator and union fittings with two to three layers of Teflon tape, wrapping clockwise as you look at the thread end. Thread the union nuts onto each side of the regulator body finger-tight, then snug with a wrench — do not over-tighten brass fittings.
Confirm the flow direction arrow on the new regulator points in the direction of water flow (toward the house, away from the main supply). The strainer screen end is the inlet side.
Step 8: Restore Water and Test for Leaks
Slowly open the main shutoff valve partway, allowing pressure to build gradually. Check all union connections for drips. If you see a slow drip, tighten the union nut slightly more. Once no leaks are detected, open the main valve fully.
Check the pressure at your test gauge. Most replacement regulators come pre-set at 50 psi from the factory. Adjust as described in Step 3 to reach your target pressure (55 to 65 psi for most homes).
Step 9: Flush the Strainer Screen
New regulators have a stainless mesh strainer at the inlet to catch debris that could damage the diaphragm. After the first week of use, shut off the water and remove the strainer screen per the manufacturer’s instructions, rinse it clean, and reinstall. After that initial flush, inspect it annually.
Bonus: Install a Pressure Gauge Permanently
Consider installing a permanent inline water pressure gauge just downstream of the regulator so you can check pressure at any time without tools. Threaded into a tee fitting, these gauges cost under $20 and make it easy to notice if your regulator starts to drift.
When to Call a Plumber
- If the main shutoff valve itself is corroded and will not turn
- If the supply pipe near the regulator is corroded, flaking, or undersized
- If your home has polybutylene or galvanized steel supply pipes that need upgrading along with the regulator replacement
A water pressure regulator replacement is one of the higher-value DIY plumbing projects a homeowner can tackle — you protect your appliances from damaging overpressure and restore comfortable water flow throughout the house in a single afternoon.
- Measure Your Current Water Pressure
Before touching anything, get an objective reading of your water pressure. Thread a pressure gauge onto a hose bib (outdoor spigot) or laundry tub faucet — anywhere you have a threaded connection downstream of the regulator.
- Locate the Regulator and Inspect It
Find the regulator on your main supply line (typically near the main shutoff valve). Inspect the body for:
- Adjust the Regulator Set Point
The regulator has a lock nut and an adjustment screw on top. Use a wrench to loosen the lock nut (counter-clockwise). Turn the adjustment screw:
- Shut Off the Main Water Supply
Turn off the main shutoff valve for the house — typically a gate valve or ball valve just before the regulator.
- Remove the Old Regulator
Most regulators are installed with union fittings on either side to allow removal without cutting pipe. Locate the union nuts on both the inlet and outlet side of the regulator.
- Choose the Right Replacement Regulator
Buy a replacement regulator that matches:
Free: 10-Point Home Maintenance Checklist
Prevent costly repairs with this seasonal checklist. Save hundreds every year by catching problems early.
Your checklist is ready!
Open Checklist →Something went wrong. View the checklist here.