How to Fix a Broken Shower Door Hinge in 20 Minutes ($10–$30 Replacement)
Replace a broken frameless shower door hinge in 20 minutes with the right hardware and basic tools. Replacement hinges cost $10–$30 and require no professional.
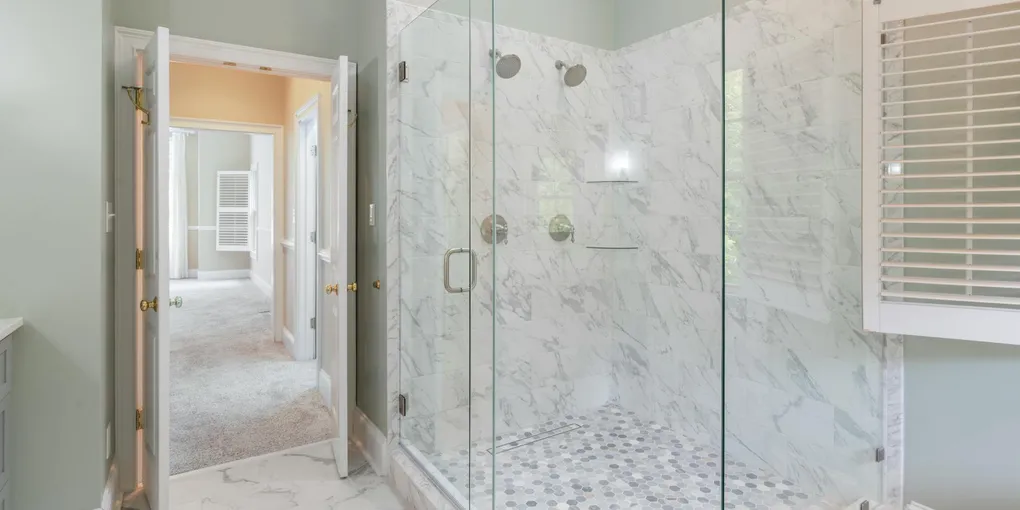
A sagging or grinding frameless shower door is more than annoying — a failing hinge can eventually let a heavy glass panel drop, causing injury or a costly replacement.
A sagging or grinding frameless shower door is more than annoying — a failing hinge can eventually let a heavy glass panel drop, causing injury or a costly replacement. The good news is that hinge replacement is a manageable DIY project if you work carefully and source the right parts first.
Why Shower Door Hinges Fail
Frameless glass shower doors hang on heavy-duty pivot or barrel hinges bolted directly through the glass or clamped around its edge. Daily exposure to steam, soap scum, and hard water corrodes set screws and hinge bodies over time. The pivot pin wears down, the hinge body cracks, or the mounting screws strip out of the wall jamb. Any of these failures causes the door to sag, bind, or swing freely instead of latching.
Tools and Materials
Before you start, gather everything so you are not running to the hardware store mid-job:
- Replacement hinges matched to your door’s glass thickness (typically 3/8 in. or 1/2 in.)
- Hex key (Allen wrench) set
- Phillips and flathead screwdrivers
- Cordless drill with standard and masonry bits
- Level
- Painter’s tape
- Clear 100% silicone sealant
- Plastic putty knife
- Soft towels or a moving blanket
A reliable replacement set is the WINSOON Frameless Shower Door Hinges, available in multiple finishes and glass thickness ratings.
Step 1 — Support the Door
Before loosening any fastener, have a helper hold the glass panel firmly. Frameless glass doors weigh 50 to 100 pounds or more. Lay folded towels on the floor at the base of the door as a cushion if it shifts.
Step 2 — Remove the Old Hinges
Using the correct hex key, loosen the set screws on the hinge clamp faces. Do not strip them — if they are seized with mineral scale, apply penetrating oil and wait 10 minutes. Once the clamps are loose, slide the hinge body off the glass edge. Next, unscrew the wall-side hinge plate from the door jamb or tile backer.
Step 3 — Clean the Mounting Area
Scrape away old silicone with a plastic putty knife and wipe the glass edge and wall surface with rubbing alcohol. Residual silicone prevents the new hinge from seating flat and will cause wobble.
Step 4 — Install the New Wall Plate
Hold the new wall-side hinge plate in position, using a level to match the original mounting height. If the existing screw holes are still solid, drive the new screws in. If the holes have stripped, use wall anchors rated for tile or use a masonry bit to open them slightly and fill with two-part epoxy before driving screws. For wall plates going into a wood jamb, pre-drill to prevent splitting.
Step 5 — Mount the Glass Clamp
Slide the hinge clamp around the glass edge at the correct position. Most hinges require the clamp center to sit at a specific distance from the glass corner — check the manufacturer sheet. Tighten the set screws alternately, like lug nuts on a wheel, so the clamp seats evenly. Do not over-torque; you can crack the glass edge.
A torque-limiting hex key set like the Bondhus Metric Hex Key Set helps prevent over-tightening on glass hardware.
Step 6 — Align and Test
With both hinges installed, check that the door swings smoothly and that the gap along the strike jamb is even top to bottom. Most frameless hinges have small set-screw adjustments for door angle and closing tension — consult your hinge instructions and dial them in now.
Step 7 — Seal and Cure
Apply a thin bead of clear silicone around each wall-plate perimeter where it meets tile or drywall. Smooth with a wet finger and allow 24 hours before using the shower.
Maintenance Tips
- Every six months, clean hinge set screws and pivot pins with a soft brush and wipe with a light machine oil.
- Check for mineral buildup at the hinge pivot — a spray of white vinegar dissolves calcium before it binds the mechanism.
- Inspect mounting screws annually and retighten if any feel loose.
With the right replacement hinges and careful installation, your frameless shower door will swing true and stay sealed for years. If you find that the existing glass has a chip at the hinge hole or a stress crack anywhere near the hardware, stop and call a glazier — no hinge repair is worth the risk of a shattering panel.
- Step 1 — Support the Door
Before loosening any fastener, have a helper hold the glass panel firmly. Frameless glass doors weigh 50 to 100 pounds or more. Lay folded towels on the floor at the base of the door as a cushion if it shifts.
- Step 2 — Remove the Old Hinges
Using the correct hex key, loosen the set screws on the hinge clamp faces. Do not strip them — if they are seized with mineral scale, apply penetrating oil and wait 10 minutes. Once the clamps are loose, slide the hinge body off the glass edge.
- Step 3 — Clean the Mounting Area
Scrape away old silicone with a plastic putty knife and wipe the glass edge and wall surface with rubbing alcohol. Residual silicone prevents the new hinge from seating flat and will cause wobble.
- Step 4 — Install the New Wall Plate
Hold the new wall-side hinge plate in position, using a level to match the original mounting height. If the existing screw holes are still solid, drive the new screws in.
- Step 5 — Mount the Glass Clamp
Slide the hinge clamp around the glass edge at the correct position. Most hinges require the clamp center to sit at a specific distance from the glass corner — check the manufacturer sheet.
- Step 6 — Align and Test
With both hinges installed, check that the door swings smoothly and that the gap along the strike jamb is even top to bottom.
Free: 10-Point Home Maintenance Checklist
Prevent costly repairs with this seasonal checklist. Save hundreds every year by catching problems early.
Your checklist is ready!
Open Checklist →Something went wrong. View the checklist here.