How to Fix a Broken Concrete Stoop
Repair cracked, spalled, or crumbling front stoop concrete yourself with the right patching materials and a few hours of work.
Fixing a broken concrete stoop: (1) Cracked slab: fill cracks under 1/4 inch wide with polyurethane concrete caulk ($8). For wider cracks, use vinyl concrete patch — chisel out the crack to undercut the edges, clean, dampen, apply patch, compact, tool flush. (2) Spalling (flaking surface): grind or chisel off loose material, apply a concrete bonding adhesive, then a concrete resurfacer in thin layers. (3) Missing corner or edge piece: form a temporary wood mold, apply hydraulic cement or anchored concrete patch compound. (4) Stoop that has sunk (separated from house): this is a foundation settlement or erosion issue — slab jacking (foam lifting) or partial rebuild may be needed. (5) Repair cracks promptly — water enters, freezes, and expands the crack every winter. Apply penetrating concrete sealer after repairs to prevent future moisture intrusion.
Frequently Asked Questions
What is the difference between a concrete crack and spalling?
A crack is a linear break in the concrete surface, often caused by settling, freeze-thaw cycles, or shrinkage. Spalling is surface flaking or pitting where the top layer breaks away in chunks or flakes, typically caused by freeze-thaw damage, deicing salt, or poor original finishing. Cracks are repaired with a flexible concrete caulk or crack filler; spalling is repaired with a surface bonding compound or concrete resurfacer applied over the entire affected area.
Can I patch concrete in cold weather?
Concrete and patching compounds require temperatures above 40 degrees F during application and for at least 24 hours after. Working in cold weather risks weak curing, crumbling, and bond failure. If you must work in cooler weather, use a fast-setting concrete patch product rated for low temperatures and cover the repair with burlap and plastic sheeting to retain heat during the cure. Avoid any patch work if frost is expected overnight.
How long does a concrete patch last?
A well-executed concrete patch with proper surface prep and a polymer-modified patching compound typically lasts 5 to 15 years before needing attention again. Longevity depends on how thoroughly the old loose material was removed, how well the bonding agent was applied, and whether a concrete sealer was applied after the patch cured. Skipping the bonding agent is the most common reason patches fail within one or two seasons.
Should I use hydraulic cement or concrete patch compound for a stoop repair?
Hydraulic cement is best for actively leaking cracks where water pressure is pushing through. For typical stoop cracks and spalling, a polymer-modified concrete patch compound is the better choice — it bonds more reliably to existing concrete, accepts foot traffic faster, and produces a smoother, more consistent finish. Hydraulic cement sets too fast for surface repairs and is difficult to finish smoothly on horizontal surfaces.
Do I need to seal the stoop after patching?
Yes. A penetrating concrete sealer applied after the patch cures fully (typically 7 to 28 days depending on the product) protects both the new patch and the surrounding concrete from moisture infiltration, freeze-thaw damage, and deicing salt. This is the single most effective step to prevent future spalling. Reapply the sealer every 2 to 3 years as part of routine exterior maintenance.
My entire stoop surface is crumbling. Should I patch it or resurface it?
If more than 30 to 40 percent of the surface is spalled or damaged, patching individual areas becomes impractical and the results look inconsistent. In that case, a full concrete resurfacer product applied to the entire stoop gives a uniform finish and seals the whole surface at once. Products like Quikrete Concrete Resurfacer or Sakrete Flo-Coat can be applied in a thin layer (1/8 to 1/4 inch) over sound existing concrete, giving you a fresh surface without full demolition.
How much does it cost to repair a concrete stoop — DIY vs. contractor?
DIY repair costs: crack filler (polyurethane caulk): $8–$15. Concrete patch compound for larger areas: $15–$35 per bag. Concrete resurfacer for full surface: $30–$60 per bag (covers approximately 50 sq ft at 1/8 inch thick). Bonding agent: $10–$20. Total DIY: $30–$100 for most stoop repairs. Professional concrete repair costs: $200–$500 for crack filling and patch work on a typical front stoop. Full stoop replacement (demolish and pour new): $1,500–$4,000 depending on size and access. The DIY savings are significant for straightforward surface repairs. Hire a professional when the stoop has settled (raised or sunken sections creating a trip hazard), when the structure is crumbling to the base course, or when the repair involves significant safety concerns.
Can I pour new concrete over an old concrete stoop?
Yes, but with important limitations. New concrete does not bond reliably to old concrete without a bonding agent — the old surface is too dense and smooth for chemical adhesion alone. Minimum thickness for new concrete poured over existing: at least 2 inches (thinner pours crack quickly under foot traffic). Process: clean and roughen the old surface (acid etch or pressure wash), apply a concrete bonding adhesive (SikaFix or Quikrete Bonding Adhesive), then pour the new concrete while the bonding agent is still tacky. For surface repairs under 1 inch thick, use a polymer-modified concrete resurfacer rather than standard concrete — standard concrete at thin depths lacks the bonding agents and flexibility to survive freeze-thaw cycles. If the stoop is badly settled, adding concrete on top perpetuates the structural problem — address settling before adding material.
Fixing a broken concrete stoop: (1) Cracked slab: fill cracks under 1/4 inch wide with polyurethane concrete caulk ($8). For wider cracks, use vinyl concrete patch — chisel out the crack to undercut the edges, clean, dampen, apply patch, compact, tool flush.
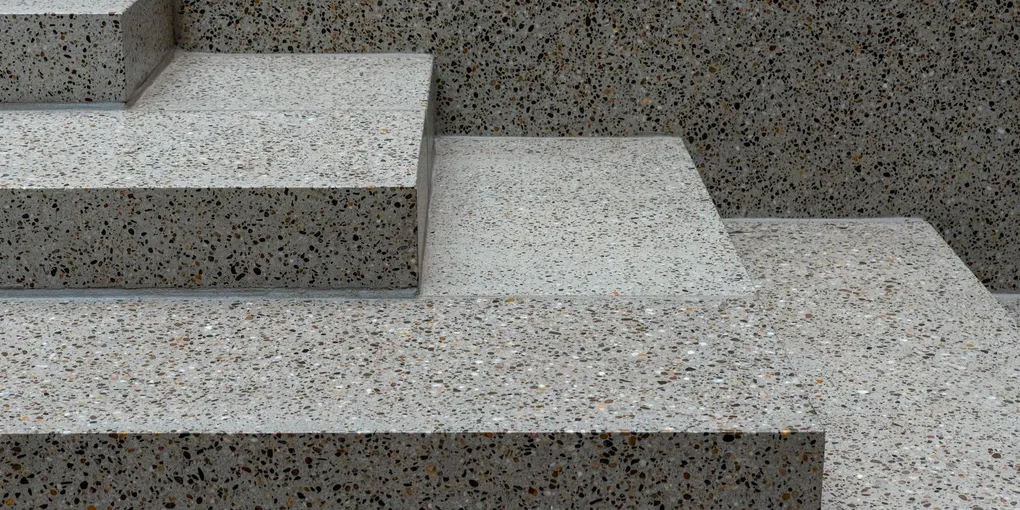
A cracked or spalling front stoop is one of the most visible signs of deferred home maintenance, and it only gets worse with each freeze-thaw cycle. The good news: most stoop repairs are straightforward DIY work requiring a few hours, basic tools, and the right patching materials.
What You Need
Gather your supplies before starting — concrete work moves fast once you mix the patching material.
- Polymer-modified concrete patch compound ($15–$30 for a 10 lb container, enough for most stoop repairs)
- Concrete bonding adhesive/primer ($10–$18 for a quart — critical for patch adhesion)
- Penetrating concrete sealer ($20–$35 for a gallon, covers the full stoop after repair)
- Cold chisel and hammer (for chipping loose concrete)
- Wire brush and stiff-bristle scrub brush
- Shop vacuum
- Margin trowel and finishing trowel
- Garden hose or pressure washer
- Painter’s tape and plastic sheeting (for protecting adjacent surfaces)
Step 1: Assess the Damage
Walk the entire stoop surface carefully. Press on areas that look questionable — hollow-sounding concrete or material that flexes under pressure must be removed before patching. Patching over hollow or unsound concrete guarantees early patch failure.
Mark the full extent of cracks with chalk. For spalled areas, note how deep the damage goes — surface flaking less than 1/4 inch deep is easy to address with resurfacer; deeper damage needs a thicker patch compound.
Step 2: Remove All Loose and Unsound Concrete
This is the most important step in the entire process. Use a cold chisel and hammer (or an angle grinder with a diamond cup wheel for larger areas) to chip away every bit of loose, crumbling, or delaminated concrete. Work from the edge of the damaged area inward, chipping until you reach solid material.
For cracks, widen and deepen the crack slightly using the chisel — a crack that has been “opened up” to at least 1/4 inch wide holds patch material far better than a hairline crack filled with compound.
After chipping, sweep out all dust and debris. Vacuum the crack and any recesses with a shop vac to remove fine dust that would prevent the bonding agent from adhering.
Step 3: Clean and Pressure Wash the Surface
Thoroughly clean the entire repair area and the surrounding concrete. A pressure washer (2,000 to 3,000 PSI) is ideal for removing dirt, algae, efflorescence, and old sealer residue. Allow the surface to dry for at least 24 hours after washing before proceeding.
If any oil stains are present, treat them with a concrete degreaser before washing — oil contamination prevents patch adhesion. After cleaning, the concrete should look uniformly gray with no shiny, oily, or dusty patches.
Step 4: Apply the Bonding Agent
This step is skipped by many DIYers and is the primary reason concrete patches fail. Apply a concrete bonding adhesive to all surfaces that will contact the new patch material — the crack walls, the base of any chipped-out areas, and the surrounding concrete edge.
Brush or roll the bonding adhesive onto the prepared surfaces according to the manufacturer’s directions. Most bonding agents are applied while wet (the patch goes on while the adhesive is still tacky) though some require the adhesive to dry to a tack-free state first. Read the label carefully.
Step 5: Mix and Apply the Patch Compound
Mix the concrete patch compound to a stiff, mortar-like consistency — it should hold its shape when pushed into a crack and not slump. Overly wet mixes shrink more during curing and produce weaker patches.
For cracks: press the compound firmly into the crack using a margin trowel, working it in layers if the crack is deep. Overfill slightly, then smooth flush with the surrounding surface.
For spalled areas: press the compound firmly into the repair area using a margin trowel or finishing trowel, working from the edges toward the center to avoid trapping air pockets. Build up to match the surrounding surface level exactly — high spots will be trip hazards, and low spots will collect water.
Smooth the final surface with a damp finishing trowel. If the surrounding concrete has a broom texture, drag a stiff brush lightly across the wet patch to match the texture.
Step 6: Cure and Protect
Cover the freshly patched areas with plastic sheeting or damp burlap to slow the cure and prevent cracking from rapid moisture loss. Keep the patch moist for at least 24 to 48 hours. Avoid foot traffic for 24 hours; full cure takes 7 to 28 days depending on the product.
After full cure, apply a penetrating concrete sealer to the entire stoop surface — not just the patches. This protects against future freeze-thaw damage and deicing salt, which are the primary causes of stoop spalling in cold climates.
When to Call a Pro
If the stoop shows significant structural settling, large sections have lifted or tilted, or the damage extends to the foundation connection, a concrete contractor should assess the situation before any patching is done.
Related Reading
- How to Power Wash a Driveway and Walkway
- Best Concrete Sealers for Driveways and Stoops
- How to Fix a Cracked Driveway
- Assess the Damage
Walk the entire stoop surface carefully. Press on areas that look questionable — hollow-sounding concrete or material that flexes under pressure must be removed before patching. Patching over hollow or unsound concrete guarantees early patch failure.
- Remove All Loose and Unsound Concrete
This is the most important step in the entire process. Use a cold chisel and hammer (or an angle grinder with a diamond cup wheel for larger areas) to chip away every bit of loose, crumbling, or delaminated concrete.
- Clean and Pressure Wash the Surface
Thoroughly clean the entire repair area and the surrounding concrete. A pressure washer (2,000 to 3,000 PSI) is ideal for removing dirt, algae, efflorescence, and old sealer residue.
- Apply the Bonding Agent
This step is skipped by many DIYers and is the primary reason concrete patches fail. Apply a concrete bonding adhesive to all surfaces that will contact the new patch material — the crack walls, the base of any chipped-out areas, and the surrounding...
- Mix and Apply the Patch Compound
Mix the concrete patch compound to a stiff, mortar-like consistency — it should hold its shape when pushed into a crack and not slump. Overly wet mixes shrink more during curing and produce weaker patches.
- Cure and Protect
Cover the freshly patched areas with plastic sheeting or damp burlap to slow the cure and prevent cracking from rapid moisture loss. Keep the patch moist for at least 24 to 48 hours.
Free: 10-Point Home Maintenance Checklist
Prevent costly repairs with this seasonal checklist. Save hundreds every year by catching problems early.
Your checklist is ready!
Open Checklist →Something went wrong. View the checklist here.