How to Fix a Broken Attic Vent
A damaged or blocked attic vent leads to moisture buildup, mold, and higher energy bills. Learn how to clear soffit vents, repair gable vent screens, and replace ridge vents yourself.
Fixing a broken attic vent: (1) Blocked soffit vent — clear debris from exterior holes with a stiff brush; inside the attic, pull back insulation from each rafter bay and install foam ventilation baffles to hold a clear air channel. (2) Torn gable vent screen — from inside the attic, cut out old screen and staple new 1/4-inch hardware cloth over the opening; for a rotted frame, replace the whole panel. (3) Failed ridge vent — lift cap shingles, remove the damaged section, nail in a replacement ridge vent section with 3-inch overlap, recaulk the joints, and replace cap shingles. Fix underlying causes (blocked airflow, missing baffles) or the same vent will fail again.
Frequently Asked Questions
How do I know if my attic ventilation is inadequate?
Signs of poor attic ventilation include: high attic humidity in winter (above 60%), ice dams forming along the eaves, shingles aging faster than expected, excessive heat in upper rooms during summer, and visible mold or moisture staining on attic framing. The code minimum is 1 square foot of net free vent area per 150 square feet of attic floor, split equally between low (soffit) and high (ridge or gable) vents.
Can I fix blocked soffit vents without going on the roof?
Yes. Clearing blocked soffit vents is done entirely from ground level or from inside the attic — no roof access required. From outside, use a stiff brush or hose to clear clogged vent holes. From inside the attic, install ventilation baffles between rafters at the eaves to keep insulation from blocking the air channel. This is one of the most impactful ventilation repairs and requires no specialized skills.
How much does it cost to fix or replace attic vents?
DIY soffit vent clearing or baffle installation: $5-$30 in materials. Gable vent screen replacement: $10-$40 in hardware cloth and fasteners. Ridge vent section replacement: $30-$80 in materials for a 10-foot section. Hiring a contractor: $150-$400 for soffit vent work, $300-$800 for ridge vent replacement. Full ridge vent installation on an existing roof without one: $500-$2,000 depending on roof length.
What is the difference between a soffit vent, gable vent, and ridge vent?
Soffit vents are located under the eave overhangs and allow cool outside air to enter at the bottom of the roof. Ridge vents run along the peak and exhaust hot air at the top — they work best paired with soffit vents in a continuous intake-to-exhaust system. Gable vents are louvered openings in the triangular end walls and provide cross-ventilation in homes without ridge vents. Most modern homes use soffit plus ridge vent systems for more uniform airflow.
Can I have both gable vents and a ridge vent on the same roof?
It is not recommended. Gable vents and ridge vents compete rather than cooperate — the ridge vent is designed to exhaust air drawn in from soffit vents below, but open gable vents create a shorter path for air movement at the same height as the ridge. This short-circuits the system and leaves much of the attic without proper airflow. If you add a ridge vent to a home that has gable vents, seal or remove the gable vents, or leave them open only if they are the sole exhaust path and ridge vents are not present.
How do I add soffit vents to a house that has none?
Adding soffit vents to a closed soffit is a DIY-feasible half-day project. Mark vent locations along the soffit, spacing them 4 to 6 feet apart (for round vents) or cutting a continuous slot for strip vents. Use a jigsaw or hole saw to cut through the soffit panel material. Insert standard soffit vent covers (round, rectangular, or continuous strip) and secure with short screws. From inside the attic, install foam ventilation baffles in each rafter bay above the new vents to maintain the air channel. This upgrade meaningfully improves attic ventilation on older homes that were built before soffit venting was standard practice.
Fixing a broken attic vent: (1) Blocked soffit vent — clear debris from exterior holes with a stiff brush; inside the attic, pull back insulation from each rafter bay and install foam ventilation baffles to hold a clear air channel.
Attic ventilation is one of those systems that works silently when it is right and causes expensive damage when it is not. A blocked soffit vent, a torn gable vent screen, or a failed ridge vent can cause summer heat to bake your shingles from the inside, allow winter moisture to condense in your insulation, and create the warm damp conditions that mold needs to grow.
The good news is that most attic vent problems are visible, diagnosable, and fixable without specialized skills or expensive contractors. This guide walks through the three most common attic vent failures and exactly how to repair each one.
What You Need
Gather these tools and materials before you begin. Having the right supplies ready prevents you from discovering mid-repair that you need another trip to the store.
- Utility knife and stiff brush for clearing blocked soffit channels — essential for removing insulation and debris from soffit baffles
- Replacement aluminum or fiberglass gable vent screen — for torn or corroded gable vent mesh
- Ridge vent replacement sections — for cracked or crushed ridge caps
- Roofing nails and roofing caulk — for securing new ridge vent and sealing edges
- Foam attic ventilation baffles — to maintain clear airflow channels between rafters when insulation is added
- Hardware cloth or galvanized mesh — for sealing wildlife entry points around damaged vents
How Attic Ventilation Works
Before diagnosing a specific failure, it helps to understand the system as a whole. A properly ventilated attic uses passive airflow: cool outside air enters through low vents (soffit or eave vents) at the bottom of the roof, rises as it warms, and exits through high vents (ridge vents or gable vents) near the peak.
This continuous airflow accomplishes three things. In summer, it flushes out superheated air that would otherwise cook shingles and transfer heat into living spaces. In winter, it keeps the attic cold, which prevents warm air escaping from the living space from melting snow unevenly and causing ice dams. Year-round, it controls humidity and prevents condensation from soaking insulation and framing.
The standard guideline from building codes is one square foot of net free vent area for every 150 square feet of attic floor, split roughly equally between low and high vents. Failure at any point in this chain — a plugged soffit, a torn gable screen, a collapsed ridge vent — breaks the airflow and stress builds up elsewhere in the system.
Diagnosing the Problem
Signs your soffit vents are blocked: The soffits feel warm to the touch in winter. Attic humidity is high. Ice dams form along the eaves. When you look up from inside the attic toward the eave edges, you cannot see daylight through the vent holes, or you see insulation pushed up against the rafters with no air channel above it.
Signs your gable vent screen is damaged: You can see daylight through the louvers but the screen behind them is torn, missing, or corroded. You have found bird nests, wasp nests, or squirrel entry points at the gable vent. Water stains appear on the gable wall inside the attic after driving rain.
Signs your ridge vent is failing: Walking the ridge line, you can see sections that are cracked, crushed by foot traffic during past roofing work, or have lost their cap shingles. Inside the attic, wet staining appears near the ridge framing. Shingles around the ridge cap look lifted or cracked.
Fix 1 — Clearing Blocked Soffit Vents
Soffit vents are the small rectangular or continuous slot vents running along the underside of the eave overhang. They fail in two ways: either the vent holes in the soffit material become clogged with paint, dirt, or insect nesting, or insulation inside the attic has been pushed or blown into the rafter bays at the eaves, blocking the air channel above the vent.
Clearing the exterior soffit holes: From outside using a ladder, inspect each soffit vent panel. If the small holes are clogged with paint or debris, scrub them out with a stiff brush. For vents that are severely clogged or painted completely over, remove the vent panel by backing out its screws, clean or replace it, and reinstall.
Clearing the interior channel: This is the more common and more impactful problem. From inside the attic, look at each rafter bay near the eaves. There should be a clear channel running from the soffit vent up to the open attic space. If insulation has fallen into or been blown into this channel, use your hands or a shop vacuum to pull it back, then install a foam ventilation baffle.
Ventilation baffles (also called rafter baffles or insulation stops) are shaped pieces of foam or cardboard that staple between rafters and hold insulation back while maintaining the air channel from soffit to ridge. They run from the soffit vent area up toward the peak. Slide them under the roof decking and staple them in place, then reinstall insulation behind them. Cover every rafter bay along the eaves.
If there are no soffit vents at all — common in homes built before the 1970s — adding them is a larger project involving cutting the soffit material and installing new vent panels, but it is worth doing if the attic shows signs of moisture damage.
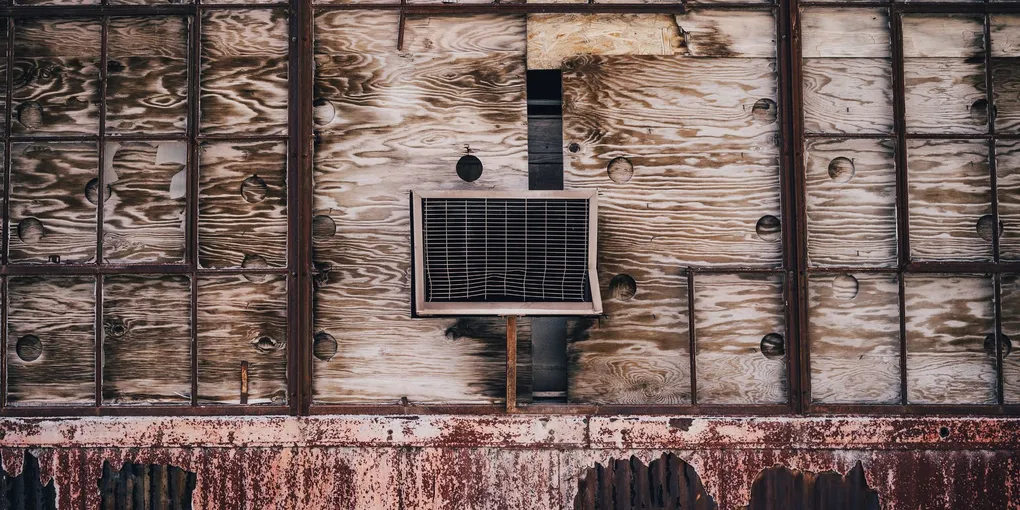
Fix 2 — Repairing or Replacing a Gable Vent Screen
Gable vents sit in the triangular end walls of the attic (the gable walls) and are typically a louvered panel with a mesh screen behind the louvers to keep out pests. The louvers themselves are usually aluminum or wood and rarely fail. The screen, however, is vulnerable to corrosion, physical damage, and pest entry.
Inspect the vent from inside the attic first. Look at the screen from the attic side. If you can see light through torn sections or find evidence of animal entry (droppings, nesting material, gnawed wood), you have confirmed screen failure.
Accessing the vent: Gable vents are typically reachable from inside the attic without going on the roof. Approach carefully — you are walking on ceiling joists and must not step between them. Use a piece of plywood as a walking board.
Screen-only repair: If the louver frame is intact, you can replace just the screen material. Pry or cut out the old screen using a utility knife or tin snips. Cut a piece of hardware cloth or aluminum insect screen to fit the opening with about an inch of overlap on each side. Staple it in place using a staple gun. For gable vents that face prevailing weather, use 1/4-inch hardware cloth rather than standard window screen — it is much more resistant to wind and driven rain.
Full panel replacement: If the louver frame is rotted (wood) or heavily corroded (old aluminum), the easiest fix is a complete replacement panel. Measure the rough opening width and height. Gable vent panels are available in standard sizes at home centers and lumber yards. Remove the old panel by backing out its fasteners and pulling it free. Set the new panel into the opening, check that it is plumb and level, and fasten it with galvanized screws or nails. Caulk the perimeter joint with exterior paintable caulk.
Sealing wildlife entry: If animals have been using the gable vent as an entry point, seal the attic side of the repaired vent with heavy hardware cloth stapled generously and then fold the edges over the frame. One-way exclusion doors are available if you suspect animals may still be inside — install the door for several days to let remaining animals exit, then remove it and seal permanently.
Fix 3 — Replacing Damaged Ridge Vent Sections
Ridge vents run the length of the roof peak and allow hot, humid attic air to escape continuously. They are installed over a slot cut in the roof decking along the ridge and are covered by cap shingles. Because they sit at the highest, most exposed point of the roof, they take abuse from wind, foot traffic, and UV degradation.
When to repair versus replace: A single cracked or crushed section can be repaired in isolation. If large sections of ridge vent are missing or the cap shingles over most of the ridge are in poor condition, it is worth replacing the entire ridge vent while you are up there.
Materials needed: Replacement ridge vent material (sold in rolls or rigid sections), roofing nails, and matching cap shingles. Always match the ridge vent style and net free area rating to what was originally installed if you can, or upgrade to a higher-flow product if the attic has been running hot.
Working on the ridge safely: Ridge work requires going on the roof. Use a safety harness and anchor point if the pitch is steep. Work in the morning before the roof surface gets hot. Have a helper on the ground.
Removing the damaged section: Carefully lift the cap shingles over the damaged area. They are typically nailed and may have sealant on the tabs. Slide a flat bar under them gently to avoid cracking adjacent shingles. Once cap shingles are up, pull the nails from the old ridge vent section and remove it.
Installing the replacement: Slide the new ridge vent section into position, aligning it with the existing slot in the decking. Nail it per manufacturer specs — typically roofing nails every 12 inches along each side. Overlap the new section with adjacent existing vent sections by the amount specified in the instructions (usually 3 to 4 inches). Apply a dab of roofing caulk at each overlap joint. Replace cap shingles over the new vent, staggering nail placement to avoid driving through the vent body.
If the slot in the decking is blocked — sometimes installers fail to cut it properly or it gets blocked by debris — use a circular saw set to 1-inch depth to open or widen it before installing the new vent. This slot is essential; without it, the ridge vent is decorative only.
Maintaining Attic Ventilation Long-Term
Attic ventilation is not a set-it-and-forget-it system. A few simple annual steps keep it working:
Inspect soffit vents from the ground every spring. Use binoculars if needed. Look for vents that appear painted over, blocked with debris, or covered by wasp nests. Knock down any nests in early spring before wasps become active.
Check gable vent screens from inside the attic every two to three years. You are looking for torn screen, nesting activity, and light intrusion around the frame edges that might indicate the panel is pulling away.
After any roof work, confirm the ridge vent is intact. Roofers walking the ridge during shingle replacement sometimes crush sections of ridge vent or knock cap shingles out of alignment. A visual inspection from the ground after any roofing project catches these problems before they cause damage.
Monitor attic humidity in winter. A simple wireless humidity sensor placed in the attic and paired with an indoor display lets you track whether attic humidity climbs above 60 percent — the threshold where condensation risk rises significantly. If humidity stays high despite what appear to be clear vents, you may need additional vent area or a vapor retarder below the insulation.
FAQ
-
question: “How do I know if my attic has enough ventilation?” answer: “The basic rule is 1 square foot of net free vent area per 150 square feet of attic floor, split between low (soffit) and high (ridge or gable) vents. Check your attic’s square footage against the rated free area of your installed vents. Persistent high humidity, summer heat above 130 degrees Fahrenheit, or ice dams in winter all suggest inadequate ventilation.”
-
question: “Can I add insulation to my attic without blocking the soffit vents?” answer: “Yes, but you must install ventilation baffles first. Baffles hold the insulation back from the eaves and maintain a clear channel from each soffit vent up to the attic space. Without baffles, even the best-ventilated attic becomes poorly ventilated once deep insulation is added.”
-
question: “Are ridge vents better than gable vents?” answer: “For most homes, ridge vents paired with soffit vents provide more consistent and uniform airflow than gable vents because they exhaust air along the entire roof length. Gable vents work well in some configurations but can create uneven pressure and leave sections of the attic with poor airflow. Many building professionals recommend converting gable-only systems to soffit plus ridge.”
-
question: “I found a squirrel nest inside my gable vent. What should I do?” answer: “First confirm no animals are currently inside by installing a one-way exclusion door over the vent opening for 3 to 5 days. Once you are confident the attic is clear, remove the nest, clean the area with an enzyme-based odor eliminator to discourage return visits, and then repair the vent with heavy hardware cloth as described in this guide.”
-
question: “My ridge vent leaks during heavy rain or wind-driven storms. Is it defective?” answer: “Occasional water intrusion during extreme wind-driven rain is normal for ridge vents — they are designed to manage typical rain, not horizontal rain driven at high wind speeds. However, regular leaking points to improper installation, a missing or damaged baffle inside the vent that should deflect driven rain, or cap shingles that are not properly sealing the vent edges. Inspect and recaulk the cap shingle edges and verify the vent has its internal weather filter in place.”
-
question: “How long do ridge vents and soffit vents last?” answer: “Quality aluminum or plastic ridge vents typically last 20 or more years under normal conditions. Aluminum soffit vent panels can last the life of the house if the paint is maintained. What degrades faster is the screen material in gable vents and the rubber or foam baffles used to block insects inside ridge vents — inspect and replace these every 10 to 15 years.”
Related Reading
- How to Insulate Your Attic the Right Way
- How to Clean Your Gutters and Downspouts
- How to Identify and Fix an Ice Dam
- Attic Insulation Cost Guide — insulation upgrades work best when ventilation is also corrected
- Fix 1 — Clearing Blocked Soffit Vents
Soffit vents are the small rectangular or continuous slot vents running along the underside of the eave overhang.
- Fix 2 — Repairing or Replacing a Gable Vent Screen
Gable vents sit in the triangular end walls of the attic (the gable walls) and are typically a louvered panel with a mesh screen behind the louvers to keep out pests. The louvers themselves are usually aluminum or wood and rarely fail.
- Fix 3 — Replacing Damaged Ridge Vent Sections
Ridge vents run the length of the roof peak and allow hot, humid attic air to escape continuously. They are installed over a slot cut in the roof decking along the ridge and are covered by cap shingles.
Free: 10-Point Home Maintenance Checklist
Prevent costly repairs with this seasonal checklist. Save hundreds every year by catching problems early.
Your checklist is ready!
Open Checklist →Something went wrong. View the checklist here.