How to Fix a Blown-Off Roof Shingle Before It Leaks ($15–$30 DIY, No Roofer Needed)
Missing shingle? Replace it yourself in 30 minutes with a matching shingle ($5–$15) and roofing nails. Slide the new shingle under the one above, nail it through both layers, then seal the nail heads with roofing cement to prevent leaks.
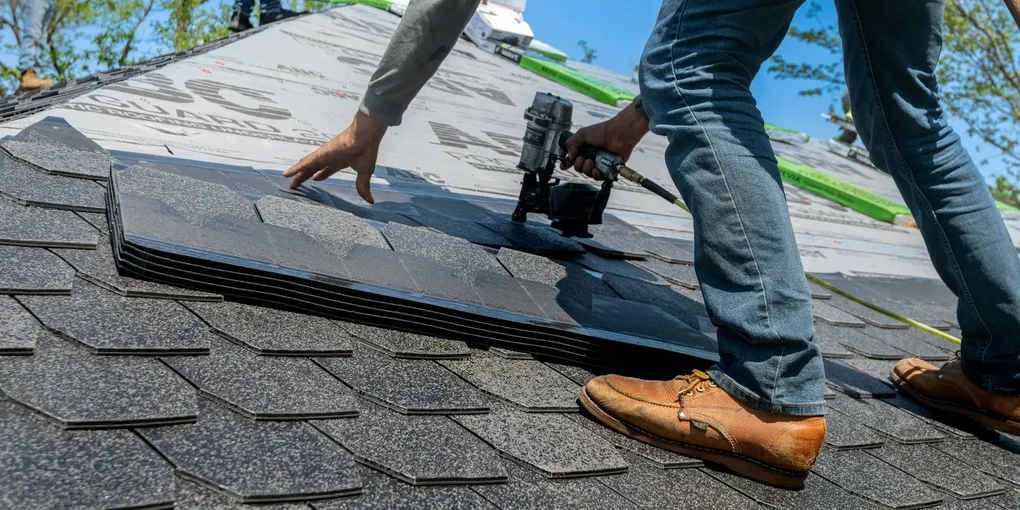
Replacing a blown-off roof shingle: (1) Safety first — use a roof bracket and harness on slopes steeper than 4:12. Work on a dry day. (2) Slide the new shingle under the overlapping shingles above, aligning with the course. (3) Lift the tabs of the shingles above just enough to nail through — four roofing nails across the top of the new shingle, 1 inch from each edge and above the adhesive strip. (4) Press the lifted tabs back down; if the adhesive strip doesn't bond on its own in warm weather, apply a small dab of roofing sealant under each tab. (5) Check surrounding shingles for lifted edges or cracked tabs — one blown shingle often means others are loose. Buy a 3-tab shingle bundle ($30–$50) that matches your roof color.
Frequently Asked Questions
How do I know if a shingle is just lifted versus completely gone?
From the ground, use binoculars to inspect the roof after a windstorm. A completely missing shingle leaves a visible darker patch of exposed felt underlayment or bare decking. A lifted shingle still occupies its position but has one or more tab corners curling up or the entire shingle is angled away from the surface. Both need repair, but a lifted shingle that is not yet cracked can often be re-adhered without replacement.
Can I replace a single shingle or do I need to redo the whole section?
A single shingle replacement is perfectly valid and standard practice. Asphalt shingles are designed so individual pieces can be removed and replaced without disturbing the surrounding field. The only time a larger repair is warranted is when multiple adjacent shingles are damaged, when the underlayment beneath the missing shingle is also torn, or when the decking beneath has been wet long enough to soften.
What happens if I leave a missing shingle unrepaired for a week or two?
One storm can push enough water under adjacent shingles to saturate the underlayment and begin soaking the decking. The underlayment slows but does not stop water indefinitely. Within one or two wet weather events, moisture can reach the attic framing and insulation. Mold can begin forming in 24 to 48 hours in a wet, warm attic cavity. Repairing a missing shingle the same week it blows off is the best way to avoid a much more expensive repair.
Do I need to match the exact shingle brand and color?
An exact match is ideal but rarely achievable on an older roof because shingles weather and fade over time. Bring a sample of the existing shingle to a roofing supply house or home center and match the weight class (3-tab versus architectural) and color family as closely as possible. A close match from a few feet away is the practical goal. For a prominent front-facing roof slope, some homeowners choose to replace a larger section so the new shingles are concentrated in a less visible area.
Is it safe to walk on my roof to make this repair?
Walking on asphalt shingles in good condition on a low-slope roof is manageable for most homeowners with the right precautions. Wear rubber-soled shoes for grip. Never walk on a wet or frost-covered roof. Avoid walking in hot weather when shingles are soft and easily scuffed. On steep roofs (over 6:12 pitch), use a safety harness and roof anchor. If you are not comfortable with the height or pitch, hire a roofer. The repair itself is simple but fall risk is real.
How long does a shingle replacement repair last?
A properly installed replacement shingle will last as long as the surrounding shingles. If the existing roof is mid-life and you use a matching quality shingle, you can expect the repair to perform for 15 to 20 or more years. Using roofing cement at the tabs and properly sealing the nail heads are the keys to a repair that does not blow off again in the next storm.
How do I do an emergency temporary fix for a missing shingle until I can make the permanent repair?
If you can't get on the roof or buy replacement shingles immediately, the fastest temporary fix is roofing cement and a piece of sheet metal (a scrap of aluminum flashing cut to fit). Slide the metal under the course above, covering the exposed decking and the top edge of the shingles below. Apply roofing cement around all edges. This won't be pretty but will keep water out through several rain events. Alternatively, a tarp anchored with cap nails over the affected area (weighted at the edges, not nailed through the roof) buys more time. Temporary fixes should be replaced within 2–4 weeks — they are not durable solutions. Interior water staining in the attic after a storm means water is already getting in and repair is urgent.
How much does it cost to replace a few shingles versus hiring a roofer?
DIY single shingle replacement: $30–$60 total (one bundle of 3-tab shingles covers 33 sq ft, costs $30–$50; a tube of roofing cement is $5–$10). Hiring a roofer for 1–5 shingles: $150–$400 minimum for a service call, regardless of how small the repair. Most roofers charge a flat minimum — small repairs often cost more in labor than materials. DIY saves $100–$350 per repair on straightforward single-shingle replacements on accessible, low-slope roofs. For any repair involving more than a row or two of shingles, multiple locations, or steep slopes: the safety risk and materials cost of DIY approach the contractor price and a professional becomes worth it.
Replacing a blown-off roof shingle: (1) Safety first — use a roof bracket and harness on slopes steeper than 4:12. Work on a dry day.
A single blown-off shingle may look like a minor issue from the ground, but it is a direct path for water into your roof deck, attic insulation, and ceiling framing. The good news is that replacing one or a few missing shingles is one of the more approachable DIY roofing repairs — no special skills required, just the right materials, a careful approach to working at height, and about two hours of focused work.
This guide walks you through finding the damaged area, removing the remnants of the old shingle, and installing a new replacement that will perform as well as the surrounding field.
What You Need
Gather these materials before you climb. Having everything ready in a bucket or tool belt means fewer trips up and down the ladder.
- Replacement asphalt shingles matched to your existing roof — buy a small bundle; most come in packs of three shingles
- Roofing nails 1-1/4 inch galvanized — four per shingle plus extras
- Roofing cement or roofing sealant tube — for sealing under tabs and over nail heads
- Flat pry bar or shingle ripper — for lifting adjacent shingles and removing nails
- Hammer or roofing hatchet
- Caulk gun — for applying roofing cement from a cartridge
- Safety harness and roof anchor kit — essential for any pitch above 6:12
Estimated cost: $30 to $80 depending on shingle type and whether you already own a pry bar and hammer.
Step 1: Locate and Assess the Damage
Work from the attic first if possible. On a sunny day, go into the dark attic and look for pinpoints of daylight — a missing shingle will often let light through the underlayment at nail holes or torn spots. After any rain, look for wet insulation or staining on the sheathing boards that marks where water entered.
From outside, identify the missing shingle’s exact position on the roof. Note which course (horizontal row) it is in counting up from the eave, and how far from the rake (edge) it sits. This helps you navigate to the right spot once you are on the roof.
Also assess the underlayment beneath the missing shingle. The black felt or synthetic underlayment should be visible and intact. If it is torn, punctured, or completely absent, you will need to patch the underlayment before installing the replacement shingle.
Step 2: Set Up Safely
Place your ladder on firm level ground, extending it at least three rungs above the eave so you have something to hold when stepping onto the roof. Secure the ladder’s feet with ladder levelers if the ground is uneven.
On any roof where you feel uncertain about your footing, attach a roof anchor to the decking through the shingles near the ridge (choose a spot that will be covered by ridge cap) and connect a safety harness. This setup costs $60 to $100 and is reusable for future repairs. It is worth it.
Carry materials up in a bucket hung from a roofing hook that hangs over the ridge, or in a tool belt. Keep both hands free for moving on the roof.
Step 3: Remove the Remnants of the Damaged Shingle
Even when a shingle blows completely off, the nails that held it usually remain, and pieces of the shingle or adhesive strip may still be stuck under the courses above. You need to clear all of this before installing the replacement.
Lift the shingles above the damaged area. Using the flat pry bar, gently slide it under the lower edge of the shingles in the course directly above the missing shingle. Pry up slowly — you want to lift enough to access the nails without cracking the shingle in the course above.
Remove the remaining nails. Four nails are typically used per shingle, positioned along the nail line about one inch above the top of the cutouts (for 3-tab shingles) or across the middle of the shingle (for architectural shingles). Hook the pry bar under each nail head and lever it out. If a nail head has broken off, use nippers or pliers to pull the shank.
Clear adhesive residue. The self-sealing adhesive strip on the bottom of the overlapping shingle may have bonded to the old shingle’s top surface. Use your pry bar or a putty knife to carefully separate any adhesive that has bonded to the adjacent shingles. Avoid tearing the shingle above.
Step 4: Inspect and Repair the Underlayment
With the shingle removed and the area exposed, examine the underlayment. Run your hand across the felt or synthetic material and look for tears, punctures, or saturated spots.
Minor tears (under 6 inches): Apply a patch of roofing cement over the tear with a putty knife, spreading it 2 inches beyond the tear in all directions. Let it tack up before installing the replacement shingle.
Larger tears or missing underlayment: Cut a patch of matching underlayment material (or a similar weight felt) large enough to overlap the damaged area by at least 6 inches in all directions. Apply roofing cement to the decking surface, press the patch down, and nail the edges with roofing nails spaced 6 inches apart. Apply another coat of roofing cement over the patch edges.
If the decking itself — the OSB or plywood beneath the underlayment — is soft, spongy, or visibly deteriorated, stop. Decking replacement is beyond the scope of a shingle swap and typically requires a roofing contractor.
Step 5: Cut and Fit the Replacement Shingle
Bring the replacement shingle to the repair location and fit it into the open slot.
For 3-tab shingles: The replacement shingle should slip directly into the slot, with its tabs aligning with the tabs of the shingles on either side. Trim the upper corners of the replacement shingle at a 45-degree angle if the manufacturer specifies this for the course position — this helps water shed at the overlap.
For architectural (dimensional) shingles: Architectural shingles have no standard tab pattern, so alignment is more flexible. Match the exposure (the amount of shingle visible below the overlapping course) to the surrounding shingles.
Slide the new shingle into position, tucking its upper edge under the course of shingles above. The bottom edge of the replacement shingle should align perfectly with the bottom edges of the shingles on either side. If it does not, check that you have the shingle oriented correctly — shingles have a top and a bottom edge.
Step 6: Nail the Replacement Shingle
Drive four roofing nails through the replacement shingle at the manufacturer’s specified nail line. For most 3-tab shingles, this is 5/8 inch above the top of the cutouts and 1 inch in from each side, with two additional nails spaced evenly between. For architectural shingles, the nail line is printed or marked on the shingle back.
Drive each nail flush with the shingle surface — heads slightly below the surface are acceptable, but overdriven nails that break through the shingle surface create leak points.
Seal each exposed nail head with a dab of roofing cement. Use a putty knife or the tip of a caulk tube to apply a coin-sized amount over each nail head.
Step 7: Seal the Tabs and Overlapping Shingles
Apply a stripe of roofing cement about 1 inch wide under the bottom edge of the shingles in the course above, where they overlap the replacement shingle. Press these shingles firmly down onto the cement. This re-adheres the overlapping shingles that were lifted during the repair and seals the repair against wind uplift.
Also apply a thin bead of roofing cement under the exposed tabs of the replacement shingle itself, pressing each tab down firmly. On a warm day, the existing self-seal adhesive strip will eventually bond on its own, but fresh roofing cement ensures an immediate seal regardless of temperature.
Step 8: Check Your Work
Step back and look at the repair from several angles. The replacement shingle should lie flat with no lifted corners or humped edges. The tabs should align with the adjacent shingles on each side. No nail heads should be visible above the shingle surface.
Check from the attic after the next rain. If no daylight is visible and no moisture is evident on the sheathing near the repair area, the repair is holding.
Maintaining Your Roof Long-Term
After any shingle repair, add a roof inspection to your annual home maintenance checklist. The best time is spring, when you can check for winter damage, and fall, to confirm the roof is ready for the wet season.
Use binoculars from the ground to scan for lifted corners, cracked shingles, and displaced granules (dark areas where shingle granules have worn away) without going on the roof every year. Reserve the on-roof inspection for every three to five years or after any severe windstorm.
Related Reading
- How to Clean Your Gutters and Downspouts
- How to Inspect Your Roof for Damage
- How to Fix a Leaking Roof Flashing
- Locate and Assess the Damage
Work from the attic first if possible. On a sunny day, go into the dark attic and look for pinpoints of daylight — a missing shingle will often let light through the underlayment at nail holes or torn spots.
- Set Up Safely
Place your ladder on firm level ground, extending it at least three rungs above the eave so you have something to hold when stepping onto the roof. Secure the ladder's feet with ladder levelers if the ground is uneven.
- Remove the Remnants of the Damaged Shingle
Even when a shingle blows completely off, the nails that held it usually remain, and pieces of the shingle or adhesive strip may still be stuck under the courses above. You need to clear all of this before installing the replacement.
- Inspect and Repair the Underlayment
With the shingle removed and the area exposed, examine the underlayment. Run your hand across the felt or synthetic material and look for tears, punctures, or saturated spots.
- Cut and Fit the Replacement Shingle
Bring the replacement shingle to the repair location and fit it into the open slot.
- Nail the Replacement Shingle
Drive four roofing nails through the replacement shingle at the manufacturer's specified nail line. For most 3-tab shingles, this is 5/8 inch above the top of the cutouts and 1 inch in from each side, with two additional nails spaced evenly between.
Free: 10-Point Home Maintenance Checklist
Prevent costly repairs with this seasonal checklist. Save hundreds every year by catching problems early.
Your checklist is ready!
Open Checklist →Something went wrong. View the checklist here.