How to Bleed a Hot Water Radiator (Remove Air, Restore Heat)
A radiator with cold spots or that gurgles has trapped air — bleeding it takes five minutes per radiator and immediately improves heat output.
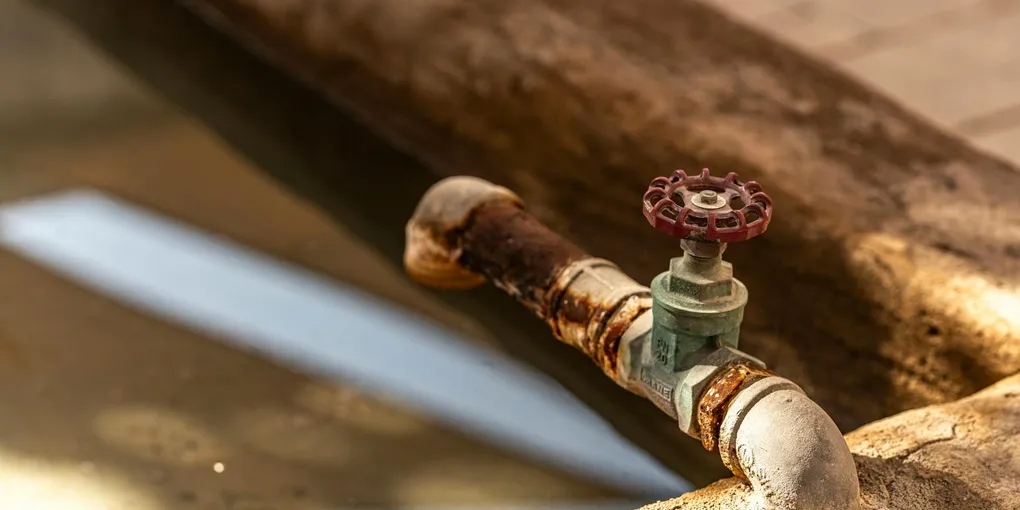
Bleeding a hot water radiator: (1) Turn the heating on and wait until the system reaches full operating temperature — cold-at-the-top radiators confirm air is trapped. (2) Turn the heating OFF and wait 30–60 minutes to let pressure drop slightly. (3) Place a cloth under the bleed valve (small valve on the side of the radiator, usually near the top). (4) Insert a radiator key and turn counterclockwise slowly — you'll hear hissing as air escapes. (5) As soon as water starts dripping steadily, close the valve immediately. (6) Repeat for all radiators, working from the lowest floor up. (7) After bleeding all radiators, check the boiler pressure gauge — refill to 1–1.5 bar if pressure dropped. Takes 5 minutes per radiator; do this at the start of every heating season.
Frequently Asked Questions
How do I know if my radiator needs bleeding?
A radiator that needs bleeding shows clear signs: it's cool at the top but warm at the bottom (air accumulates at the top, blocking hot water from filling that section), it makes gurgling or trickling noises when the heating runs (air bubbles moving through the water), or the room heats less effectively than it used to even though the boiler and thermostat are working. You can also confirm by touching the radiator when the system is at full operating temperature — a radiator without air should be hot across its entire surface. Cold spots anywhere on the radiator body indicate air pockets.
What is a radiator key and do I need a special one?
A radiator bleed key (also called a radiator key or air vent key) is a small square-tipped tool that fits the bleed valve on the side of the radiator. The valve has a square recess — the key turns it. Most residential radiators use a standard-size bleed valve that takes a universal radiator key, available at hardware stores for $2–$5. Some older or European radiators have a slotted bleed valve that can be operated with a flat-head screwdriver. If you're not sure what type you have: look at the bleed valve closely — a square recess needs a key, a slot takes a screwdriver.
How often should I bleed my radiators?
Bleed radiators at least once a year, at the start of the heating season — before you need them. This removes any air that accumulated during the off-season. Additionally, bleed any time you notice cold spots or gurgling during the heating season. Some systems accumulate air faster than others, especially older systems without automatic air vents or systems with small leaks that allow air to enter. After any repair that opened the system (valve replacement, pipe work), always bleed all radiators before resuming normal operation.
What pressure should I restore after bleeding?
Most residential hot water heating systems should be maintained at 12–15 PSI when cold (system not running, boiler off). After bleeding, check the pressure gauge on the boiler — it's typically a small dial gauge on the supply pipe near the boiler. If the pressure has dropped below 12 PSI after bleeding: use the fill valve (also called the feed valve or makeup valve, usually a small valve on the cold water supply line into the boiler) to add water until the gauge reads 12–15 PSI. Open the fill valve slowly, watch the gauge, and close it when the target pressure is reached.
Can I bleed radiators without turning off the circulator pump?
You can, but it's harder. With the pump running, the water is circulating and the air bubbles may be moving rather than sitting at the top of the radiator — you may bleed a lot of water before catching the air pocket. Turning off the pump (or lowering the thermostat until the pump stops) allows air to rise to the highest point (the bleed valve location at the top of the radiator) and be captured more efficiently. Turning off the pump also prevents water pressure surges while bleeding. If you can't easily turn off the pump, you can still bleed effectively — just work more slowly and be prepared to catch more water.
After bleeding, my boiler pressure light came on. What do I do?
When you bleed radiators, water exits along with the air, dropping the system pressure. The low-pressure warning light on the boiler indicates the system has dropped below its minimum operating pressure (usually below 10 PSI). Locate the fill valve — typically a small valve or lever on a pipe near the boiler that connects to the cold water supply. Open it slowly and watch the pressure gauge rise. Stop at 12–15 PSI. Close the fill valve completely. Reset the boiler if it has locked out. The boiler will now fire normally. If the pressure drops again quickly without any bleeding: there is a leak in the system that needs to be found and repaired.
Why does a hot water radiator system keep getting air in it?
Some air accumulation is normal — all hot water heating systems dissolve a small amount of air over time and need occasional bleeding. But if you're bleeding the same radiators repeatedly (more than once a year), there is an underlying cause: (1) A pinhole leak in a pipe, radiator, or fitting — the system is pulling in air as makeup water is drawn in. (2) A failing expansion tank — if the expansion tank loses its air charge, pressure cycling draws air into the system. (3) The system is missing an automatic air vent at the high point — air naturally migrates up and gets trapped unless there's a vent to release it. (4) The pump is creating a vacuum at its inlet, drawing air in at loose joints. Persistent air problems warrant a plumber inspection — the fix is usually inexpensive but needs to be diagnosed properly.
What should I do if the radiator bleed valve is stuck or won't turn?
A stuck bleed valve is common on older radiators, especially if it hasn't been opened in years. First, try a penetrating lubricant (WD-40 or PB Blaster) — apply to the valve body and let soak for 15–20 minutes, then try again with the bleed key using steady, firm pressure. Do not force it — an overtightened key can round off the square recess or snap the valve. If the valve won't budge after soaking, the valve likely needs to be replaced. A plumber can replace a stuck bleed valve for $50–$100 in most cases. Do not try to open a stuck valve by heating it — hot water systems carry pressure and temperature, and damaging a valve while the system is pressurized can cause water to spray. Drain the system or isolate the radiator before any valve work.
Bleeding a hot water radiator: (1) Turn the heating on and wait until the system reaches full operating temperature — cold-at-the-top radiators confirm air is trapped. (2) Turn the heating OFF and wait 30–60 minutes to let pressure drop slightly.
A radiator with cold spots isn’t producing the heat it should, and it’s costing you money in wasted fuel. The fix — bleeding the radiator to release trapped air — is one of the simplest home maintenance tasks there is. With a radiator key and a small container, the whole process takes about five minutes per radiator.
This guide covers everything: identifying which radiators need bleeding, the bleeding procedure, restoring boiler pressure afterward, and what to do when bleeding reveals a bigger problem.
What You Need
- Radiator bleed key set — the essential tool; buy a two-pack so you have a spare
- Small container or cup — to catch the water that comes out when bleeding; even a small amount of brown or rusty water is normal
- Old towels or rags — protect floors from drips, especially with older radiators
- Pressure gauge — if your boiler’s existing gauge is damaged or hard to read; useful reference
- Boiler pressure fill valve key — some modern boilers have a keyed fill valve; check if yours requires a key to add water
- Rust inhibitor / inhibitor fluid for heating systems — add to the system annually to prevent corrosion in the radiators and pipes
How Hot Water Radiator Systems Work
Before bleeding, a quick orientation helps you understand what you’re doing and why.
A hot water (hydronic) heating system circulates water heated by a boiler through pipes to radiators throughout the house. The water gives up heat to the room through the radiator surface and returns to the boiler to be reheated. The system is a closed loop — the same water circulates indefinitely, with only small amounts added to replace bleed water or compensate for minor evaporation.
Air has no business being in a closed water loop, but it gets in anyway. Dissolved oxygen in the water comes out of solution as the water heats. Micro-leaks draw air in when the system pressure drops. Any time the system is opened for repair, air enters. A correctly designed system has automatic air vents or a magnetic filter to capture this air, but many older systems rely on annual manual bleeding.
Air rises to the highest points in the system — the tops of radiators and high spots in pipe runs. In a radiator, trapped air sits at the top, blocking the space where hot water should be. The result is a radiator that’s warm at the bottom (where hot water fills) and cool at the top (where air is trapped).
Which Radiators to Bleed
In theory, any radiator can accumulate air. In practice, upper-floor radiators accumulate air faster because they’re at the highest points in the system. Start with the highest radiators in the house and work down.
Signs a specific radiator needs bleeding:
- Cold at the top, warm at the bottom
- Audible gurgling or trickling when the heating runs
- Room fails to reach temperature even with the thermostat raised
- Radiator takes much longer to warm up than others
Bleed every radiator at the annual start-of-season check, even if none show obvious symptoms. Small air pockets that haven’t yet caused noticeable cold spots get removed before they grow.
The Bleeding Procedure
Complete this with the heating system running at full operating temperature. The boiler should be on and the circulator pump running — you want the system pressurized and the water hot, which helps move air bubbles to the bleed point.
Step 1: Locate the bleed valve. It’s a small valve at the top of the radiator, typically at one end. It looks like a small nut with a square socket in the center, or a nut with a flat slot. The valve is usually on the side opposite the lockshield valve (the valve covered by a cap that you’d need a wrench to operate).
Step 2: Prepare. Place a small container under the bleed valve to catch water. Have a rag ready. The water that comes out may be discolored (brown or rust-tinged) — this is normal and not a concern unless it’s very rusty, which would indicate corrosion in the system requiring treatment.
Step 3: Open the bleed valve. Insert the radiator key into the square socket. Turn counterclockwise — just a quarter to half turn. Do not remove the valve entirely. You’ll hear hissing immediately as air escapes. Hold the key in place (don’t let it turn further open) and hold your container under the valve.
Step 4: Wait for water. Continue holding the valve open. The hissing will continue until all the air in that section of the radiator has escaped. Then water will begin to flow. When a steady, uninterrupted stream of water flows from the valve (no more sputtering or hissing), the radiator is fully bled.
Step 5: Close the valve. Turn the key clockwise to close the bleed valve. Close it firmly — snug but not overtightened. Overtightening can damage the valve seat and cause future dripping.
Step 6: Move to the next radiator. Work from the highest floor to the lowest, bleeding each radiator in turn.
Step 7: Check boiler pressure. After bleeding all radiators, check the boiler’s pressure gauge. Bleeding releases water from the system, dropping the pressure. The system needs to be at 12–15 PSI when cold to operate correctly. If pressure has dropped: refill the system through the fill valve.
Restoring System Pressure
After bleeding, boiler pressure often drops. If the pressure gauge on the boiler reads below 12 PSI, the system needs to be refilled.
Find the fill valve. It’s typically located on a pipe near the boiler — a small valve that connects the heating system to the cold domestic water supply. It may be a standard gate or ball valve, a lever valve, or on modern boilers, an automatic filling loop. Some boilers have a keyway fill valve (requires a small key to open — usually provided with the boiler or stored nearby).
Open the fill valve slowly. Watch the pressure gauge as you open it. The pressure will rise. Stop when the gauge reads 12–15 PSI. Close the fill valve completely.
Check the boiler. If the boiler’s pressure dropped low enough to trigger a low-pressure lockout, it may need to be reset. Check the boiler’s indicator lights or display — a low-pressure fault usually clears once pressure is restored and you press the reset button on the boiler.
Run the system. Allow the system to heat to operating temperature. The pressure will rise somewhat as the water expands (normal operation). Operating pressure at full temperature is typically 18–22 PSI. If pressure rises above 25 PSI, the expansion tank may be failing — have it inspected by a heating professional.
What to Do If Bleeding Doesn’t Help
Sometimes a radiator still has cold spots after a thorough bleeding session. When bleeding isn’t the answer:
Check the supply and return valves. At the floor or wall connection points, each radiator has a supply valve (the one you control for room temperature) and a lockshield valve (covered by a cap, for balancing). Confirm both are open. A partially closed lockshield valve restricts flow and causes cold spots that look like air problems.
Check the thermostatic radiator valve (TRV). If the radiator has a TRV (a thermostatic knob on the valve, usually with numbers 1–5), confirm it’s turned up sufficiently. A TRV set to 1 or 2 may be barely allowing flow. If the TRV is stuck closed (a common failure after summer when the pin inside the valve corrodes in place), the radiator won’t heat regardless of system pressure.
To test a stuck TRV: remove the thermostatic head (usually unscrews or unclips) and look for a small pin on the valve body. The pin should move when you push it with a fingertip. If it’s seized: work it back and forth gently with pliers to free it. Apply a small amount of penetrating oil if needed. Once the pin moves freely, reattach the head.
Check the system’s balance. In some systems, one or more radiators receive so much flow that others are starved. A plumber or heating engineer can balance the system by adjusting the lockshield valves to equalize flow.
Annual Radiator Maintenance
Beyond bleeding, a few annual habits keep a hydronic heating system performing efficiently.
Add inhibitor fluid. Hydronic systems develop internal corrosion as the water and iron or steel components interact. A corrosion inhibitor (available in liquid form from heating suppliers) added to the system through the fill valve slows this process significantly. Most manufacturers recommend replenishing the inhibitor annually. Check the concentration by testing with a test strip — levels that are too low mean the system is unprotected.
Check the expansion tank. The expansion tank absorbs the increased volume of water as it heats. A failed expansion tank (waterlogged or with failed internal bladder) causes the pressure relief valve to drip each time the system heats up. Test the tank by pressing the Schrader valve (like a tire valve) on the tank — if water comes out rather than air, the tank bladder has failed and the tank needs replacement.
Flush if water is very brown. If the water from bleeding is very dark or heavily laden with rust, the system’s corrosion inhibitor has been depleted and the radiators and pipes are corroding internally. A system flush — draining the system completely and refilling with fresh water and inhibitor — is warranted.
Related Reading
- The Bleeding Procedure
Complete this with the heating system running at full operating temperature. The boiler should be on and the circulator pump running — you want the system pressurized and the water hot, which helps move air bubbles to the bleed point.
- Restoring System Pressure
After bleeding, boiler pressure often drops. If the pressure gauge on the boiler reads below 12 PSI, the system needs to be refilled.
- What to Do If Bleeding Doesn't Help
Sometimes a radiator still has cold spots after a thorough bleeding session. When bleeding isn't the answer:
Free: 10-Point Home Maintenance Checklist
Prevent costly repairs with this seasonal checklist. Save hundreds every year by catching problems early.
Your checklist is ready!
Open Checklist →Something went wrong. View the checklist here.