How to Add an Outdoor Water Spigot: Running Pipe and Installing a Frost-Proof Hose Bib
Guide to adding a new outdoor water spigot — tapping into a supply line inside, running pipe through the wall, and installing a frost-proof hose bib.
Adding an outdoor hose bib gives you a water source exactly where you need it — for a garden, side yard, or area that the existing spigot cannot reach. The job is a half-day project for someone comfortable with basic plumbing.
Adding an outdoor hose bib gives you a water source exactly where you need it — for a garden, side yard, or area that the existing spigot cannot reach. The job is a half-day project for someone comfortable with basic plumbing. The most important decision you make is the spigot itself: in any climate that freezes, a frost-proof hose bib is not optional. A standard hose bib will split the first winter.
What Is a Frost-Proof Hose Bib and Why Does It Matter
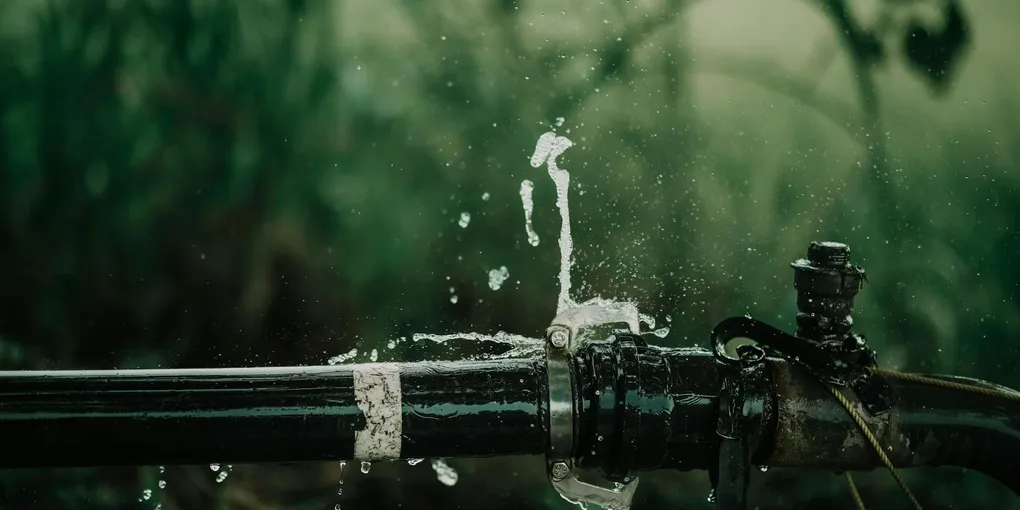
A standard hose bib has its valve seat — the part that stops water flow — right at the wall. When freezing temperatures arrive, any water sitting in the short section of pipe between the valve and the exterior freezes and cracks the faucet body.
A frost-proof hose bib (also called a freezeless hose bib or sillcock) has a long stem — typically 8, 10, or 12 inches — that pushes the valve seat back inside the wall into the heated space. When you turn it off, the water drains from the exterior stem so there is nothing to freeze. Install a 12-inch frost-proof hose bib regardless of how mild your winters seem.
Step 1: Planning
Choose a location close to an interior supply pipe to minimize pipe run length. The best spots are near a utility room, basement perimeter, or crawlspace where supply lines are accessible.
Identify the nearest supply line. Cold water supply is what you want — usually 1/2-inch or 3/4-inch pipe. In a basement or crawlspace, these are often visible. In a finished space, you may need to work through a wall or utility access panel.
Plan the wall penetration. The hose bib pipe passes through the rim joist (in a basement or crawlspace installation) or through an exterior wall stud bay. The frost-proof stem needs to pitch slightly downward toward the outside so the stem drains completely when you close the valve — about 1/4 inch per foot.
Check permit requirements. Contact your local building department before starting. Many areas require a permit for new plumbing fixtures.
Step 2: Turn Off the Water
Shut off the main water supply to the house at the main shutoff valve. Open a faucet at the lowest point in the house to drain pressure from the lines. You will be cutting into a live supply pipe — complete drainage prevents a flood.
Step 3: Tap the Supply Line
The SharkBite push-to-connect tee fitting is the easiest way to tap an existing supply line without soldering. It works on copper, CPVC, and PEX.
- Use a copper pipe cutter to cut a clean section out of the supply pipe. The tee fitting requires you to remove a short section — check the fitting instructions for the exact gap required (usually about 1 inch total).
- Deburr the cut ends with the reamer on the pipe cutter or with sandpaper. SharkBite fittings require smooth, square cuts.
- Push the SharkBite tee onto both pipe ends. You will feel it click into place. Pull the pipe to confirm it is locked — it takes firm force to release a properly seated SharkBite fitting.
- The third port of the tee faces the direction you need to run your new pipe.
Step 4: Run Pipe Through the Wall
Drill the wall penetration. Use a long exterior wall drill bit — typically 18 inches for rim joist installation, longer for going through a full stud wall. The bit diameter should match your pipe outside diameter plus a little clearance.
For a rim joist installation (basement or crawlspace):
- Drill through the rim joist from inside, angling slightly downward toward the outside.
- The hose bib stem slides through this hole.
For a wall installation:
- Locate a stud bay that gives you a straight run from the supply tee to the exterior.
- Drill through the interior wall, the insulation cavity, and the exterior sheathing and siding.
Run the pipe. 1/2-inch flexible PEX tubing is ideal for this run — it bends around obstacles, requires no joints in the wall cavity, and is freeze-resistant. Use SharkBite PEX fittings or crimp-style fittings and rings at both ends. Alternatively, run copper pipe with soldered fittings if you prefer.
Step 5: Install the Hose Bib
- Apply thread sealant tape to the male threads of the hose bib inlet.
- Slide the hose bib through the exterior hole until the mounting flange is flush with the siding.
- Connect the pipe from inside. Use a SharkBite fitting or soldered connection at the hose bib inlet.
- The hose bib stem must tilt slightly downward toward the exterior — check the pitch with a level and shim the mounting flange if needed.
- Screw the mounting flange to the exterior siding. On masonry, use concrete anchors.
- Caulk around the flange with exterior-grade silicone caulk to seal against water intrusion.
Step 6: Insulate and Test
Turn the water back on slowly. Check the supply tee and all connections inside for leaks. Open the hose bib outside and let it run for a minute to flush debris. Close it and check again from inside.
If you ran pipe through an unheated space (rim joist cavity, unheated garage), insulate the pipe run with pipe foam insulation. Even with a frost-proof hose bib, the supply pipe leading to it needs to be in conditioned or insulated space.
Code Note: Backflow Preventer
Most plumbing codes require a vacuum breaker on outdoor faucets. Many frost-proof hose bibs include one built into the hose connection. If yours does not, screw a vacuum breaker backflow preventer onto the hose thread. It costs $5-10 and installs in seconds. This is required by code in most jurisdictions and protects the potable water supply from contamination.
Related Guides
- How to Fix a Leaking Hose Bib
- How to Fix a Leaky Outdoor Faucet
- How to Fix a Broken Outdoor Spigot Vacuum Breaker — install a vacuum breaker on your new spigot to prevent backflow
- How to Winterize Your Home
- Planning
Choose a location close to an interior supply pipe to minimize pipe run length. The best spots are near a utility room, basement perimeter, or crawlspace where supply lines are accessible.
- Turn Off the Water
Shut off the main water supply to the house at the main shutoff valve. Open a faucet at the lowest point in the house to drain pressure from the lines. You will be cutting into a live supply pipe — complete drainage prevents a flood.
- Tap the Supply Line
The SharkBite push-to-connect tee fitting is the easiest way to tap an existing supply line without soldering. It works on copper, CPVC, and PEX.
- Run Pipe Through the Wall
Drill the wall penetration. Use a long exterior wall drill bit — typically 18 inches for rim joist installation, longer for going through a full stud wall. The bit diameter should match your pipe outside diameter plus a little clearance.
- Install the Hose Bib
Apply thread sealant tape to the male threads of the hose bib inlet.
- Insulate and Test
Turn the water back on slowly. Check the supply tee and all connections inside for leaks. Open the hose bib outside and let it run for a minute to flush debris. Close it and check again from inside.
Free: 10-Point Home Maintenance Checklist
Prevent costly repairs with this seasonal checklist. Save hundreds every year by catching problems early.
Your checklist is ready!
Open Checklist →Something went wrong. View the checklist here.